During the summer of 2007 my wife and I decided to install a waterfall in our front flowerbed against our house. The flowerbed is about 8' by 20' and was filled with irises, monkey grass (
Liriope muscari), a rose bush, a holly bush (tree), and 2 large hardy (dinner-plate) hibiscus. I dug up the rose bush and gave it to my in-laws who said they could find a place for it. I relocated most of the iris to one location and gave some of them away. I also moved around quite a bit of the monkey grass so that it just formed an outline of the flowerbed. There also is a large patch of dense monkey grass under the holly tree at the other end of the flowerbed. I didn't have to disturb that end.
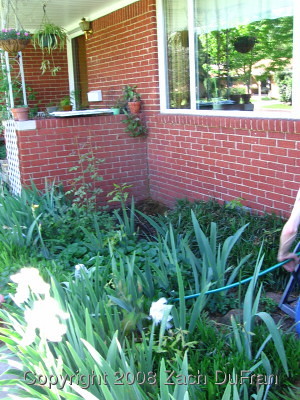 |
| Front flowerbed before waterfall project |
As far as the mechanical elements, we got a "pondless waterfall kit" at a local landscaping shop that specializes in ponds and waterfalls. It was on sale for a really good deal. However, the price of some necessary items
not included in the kit can be costly. The kit itself contains 2 different layers of underlayment - a very thick rubber tarp and a more thin fiber layer. The fiber layer goes first, and then the rubber tarp next. Also included in the kit is the water pump and housing, a long stretch of tubing (about 6-8 feet, I would guess), the top waterfall container, and all of the necessary fittings to piece it together. Really, the construction of the mechanical pieces took just 30 minutes or so. Attaching the tarp to the top container was a little tricky and very important to do well, since most "leaks" will occur there. I have had to mess with it a little since I have finished the waterfall, making tweaks whenever I noticed some water was straying from the intended path and slipping
underneath the tarp.
In order to "build" this waterfall, I needed to create the correct landscape. Since I just had a flat bed, this required a bunch of dirt. Thankfully a couple of neighbors happened to be making some changes of their own, resulting in large piles of dirt in their yards. One neighbor down the street was taking out a large raised bed that ran half the length of the front of the house. I'm not sure how I lucked in to this situation, but it happened. They were appreciative of my hauling off their dirt and I was thankful for the free dirt. I did have to haul it down the street in a wheel barrow, though. Load by load by load by load by load...
Anyway, I was able to build a nice hill in the corner of the bed that would serve as my miraculous hillock of bubbling clear water!
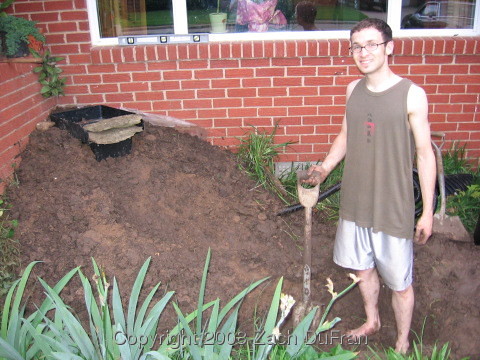 |
| Waterfall preparation |
A friend of ours has a lot of land that contains some rock that he said we were welcome to have. Rock is one of those extra ingredients not included in the kit and it is quite expensive to buy. I called some are landscape suppliers and priced rock - then quickly took our friend up on his offer. We had to drive about an hour to the land and spent most of a Saturday finding rocks of varying sizes that were somewhat consistent in coloring and looked like they would create a nice waterfall. We were very happy with our free rocks and free help that we received, as well.
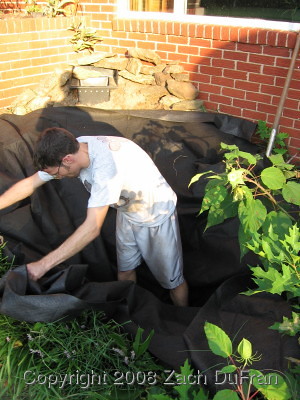 |
| Laying out the underlayment to form the basin |
You can see a large bud in the lower right corner of the picture and another in the center of the right side of the picture. This is one of my dinner plate hibiscus. The hibiscus were beautiful when they bloomed but up until that day it looked like a huge weed had grown to 3 or 4 feet tall right there in the middle of our front window on the house. So I removed the hibiscus shortly after installing the waterfall.
After putting all of the equipment together and positioning the tarp, I filled up the bottom basin with water and plugged in the pump. It worked!
Now it was time to start experimenting with rock layouts. I probably spent about an hour until I had all of the rocks in a layout that pleased my eye. Then I went and got my wife for an inspection. She made tweaks here and there. Then I took the bags of river pebbles that we had bought and filled in all of the areas between rocks where the underlaying tarp was exposed. There were lots of crooks and crannies and we ended up needing more bags of pebbles than we had initially purchased. Thankfully the bags of pebbles are pretty cheap ($3ish for a large bag). Once the pebbles were in place the waterfall really looked good.
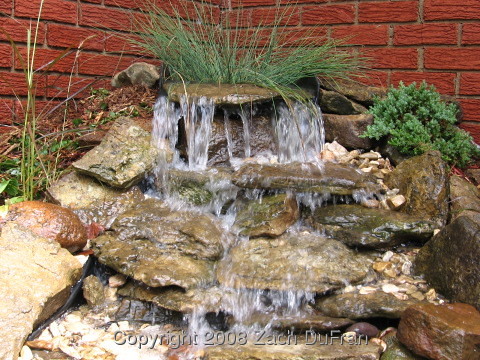
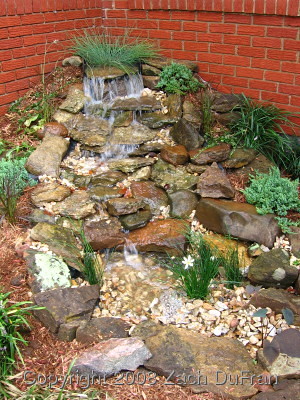 |
| Complete waterfall |
Of course, the finishing touches were to get some aquatic plants and to landscape around the waterfall.
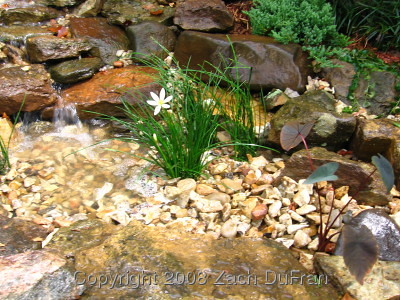 |
| Waterfall color |
 |
| Water cascading down from the source |
At the onset of spring this last year I looked out the window one morning to see a bunch of birds playing/showering in our waterfall.
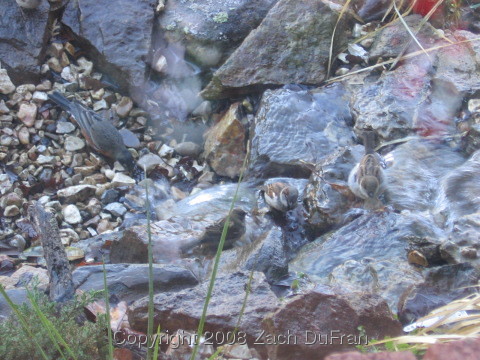 |
| Birds at play(?) in the waterfall - or maybe just bathing |
I'm not much of a bird watcher, so I don't know what type of birds these are, but I really liked their markings, so I took a couple of pictures of them.
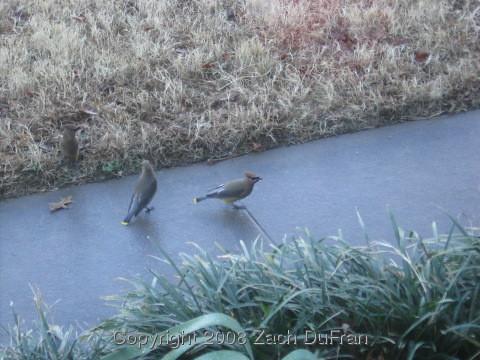 |
| I like the markings on these birds - anyone know what they are? [Update: They're Cedar Waxwings.] |
Though the word "natural" may not be the best word to use for the waterfall surging out of the little hillock perfectly mounded against our red brick house - the scene has an authentic look to it. The rocks are native to our region and we landscaped around the waterfall with evergreen plants that should keep our front flowerbed beautiful year in and year out with minimal maintenance. In fact, the front flowerbed is really pretty all through the winter, even when everything else seems brown and dead.
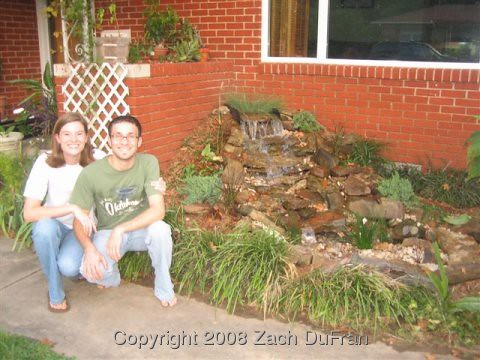 |
| My wife and I posing after our hard work |
That looks awesome! I am so jealous.
ReplyDeleteIf those birds were in Europe I'd say they were definitely waxwings. But my US ornithology sucks, so I don't know if waxwings are common in your part of America.
Your water fall is so pretty. A lot of work put into it but well worth the work. Especially when you start seeing different birds, insects and critters come to visit it. The bird may be a cedar waxwing or another kind of waxwing.
ReplyDeleteCedar waxwing it is! Thanks for the id, Lona.
ReplyDeleteWOW!!! Amazing results Zach. I'm sure that your water fountain added value to your home too.
ReplyDeleteThanks for stopping by my blog.Glad you liked the Japanese painted ferns. One would look lovely along the back or side of your waterfall.
ReplyDeleteGreat little blog you've got here - keep up the good work. Patch.
ReplyDeleteLooks like you did a fantastic job. This will be a nice addition to your garden not just for the visual but also the auditory.
ReplyDeleteJan
Always Growing
WOW Sach how amazing and beautiful, very well done/ Tyra
ReplyDeleteDo come and visit my garden! You are so welcome Sach/ Tyra
ReplyDeleteI wonder if I can tempt you with an apple
What an amazing project Zach - water is such a great addition to the garden.
ReplyDeleteK
Nice work, Job well done. Ive been searching the internet for waterfall ideas/streams for a flat garden, and using your corner idea would solve all my problems! Thanks
ReplyDelete