At the top of the mountain in the Cloud Forest dome at Gardens by the Bay is a pond surrounded by orchids and carnivorous plants. I admire carnivores, but I can't identify many of them. My tour companion, Shawn, grows a lot of
Nepenthes and I'm pretty sure he could identify everything we saw. I had to check with my carnivorous friends to get identifications on most of these plants.
 |
| Dense grouping of carnivorous plants |
Many people know the Venus Flytrap, but there are many other interesting carnivorous plants. Most terrestrial carnivorous plants grow in bog conditions in poor soil, which is the reason they supplement their "diet" by catching insects through various methods. There are deep pitchers with slippery edges, sticky leaves, and even triggered traps with teeth.
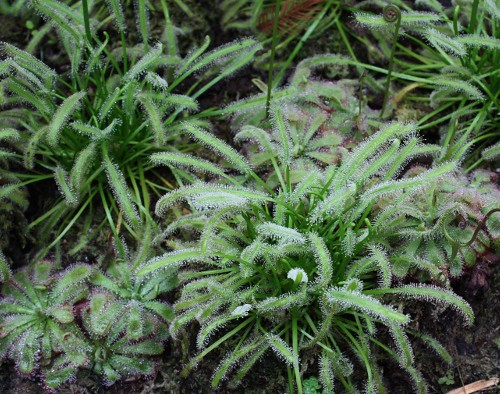 |
| Sundews (Drosera) |
Drosera (Sundews) is the largest genus of carnivorous plants with nearly 200 species. They catch their prey on the sticky glands on their leaves. In the photo above you can see at least two different species.
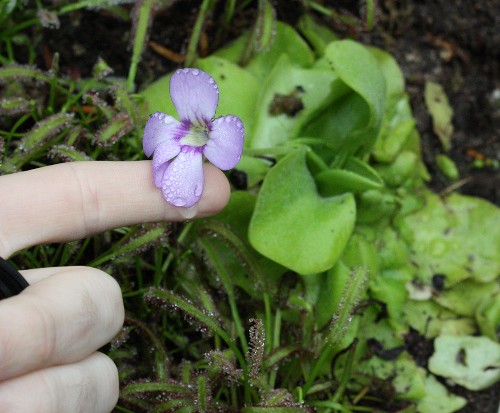 |
| Butterwort (Pinguicula) flower |
You wouldn't necessarily know by looking, but
Pinguicula (Butterwort) has sticky leaves that act like flypaper. Insects are eventually digested right there on the leaf surface. The flowers resemble those of some Gesneriads.
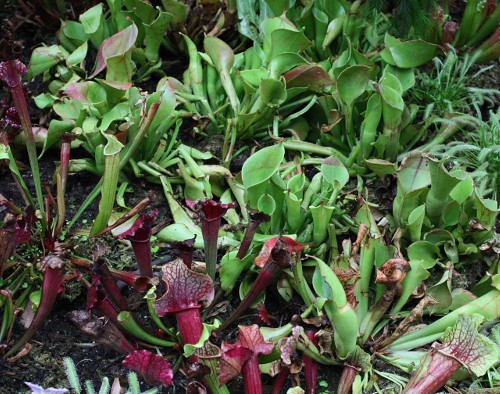 |
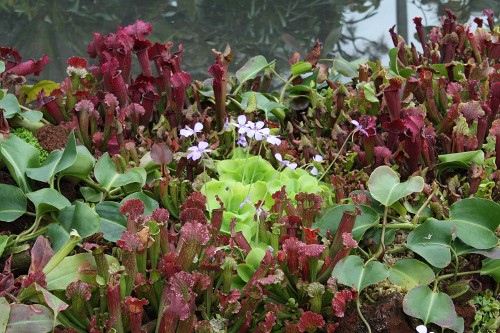
| Sarracenia and Heliamphora |
Sarracenia are the upright pitcher plants from North America, not to be confused with
Nepenthes, the trailing pitcher plants from the Old World tropics (mostly southeast Asia). The primitive South American counterparts to
Sarracenia are
Heliamphora, the Marsh Pitcher Plants.
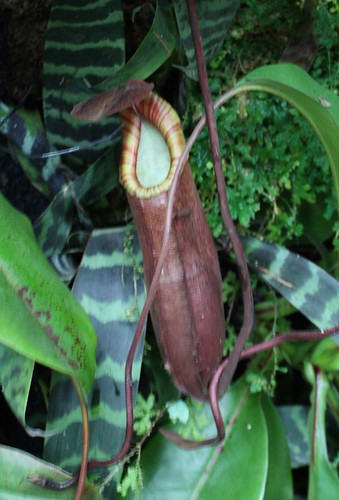 |
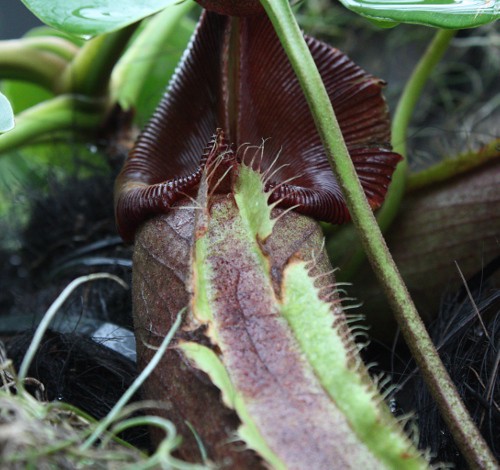
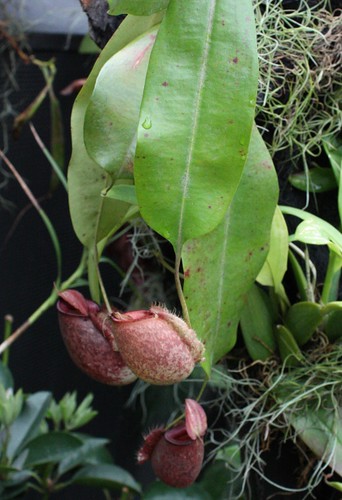
| Nepenthes pitcher |
While
Nepenthes usually have symbiotic bacteria living in the pool within their pitchers, there is at one species of
Heliamphora that produces its own enzymes to break down its food.
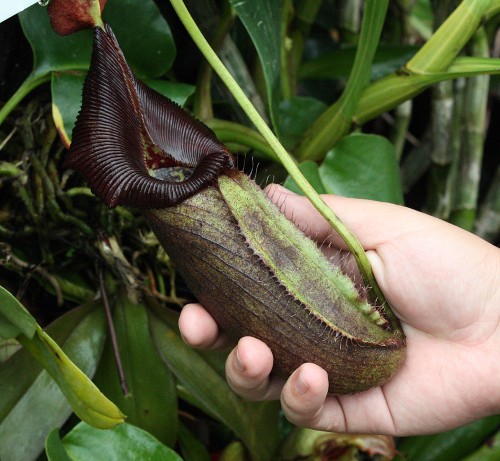 |
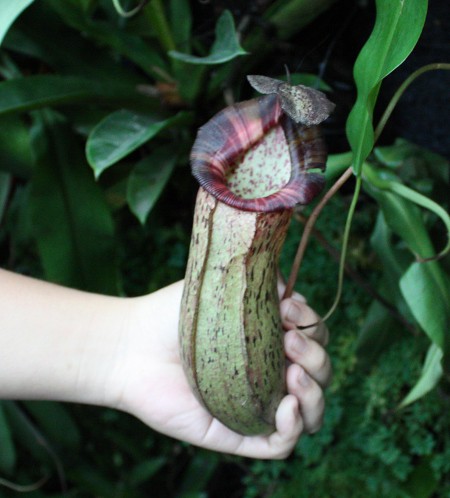
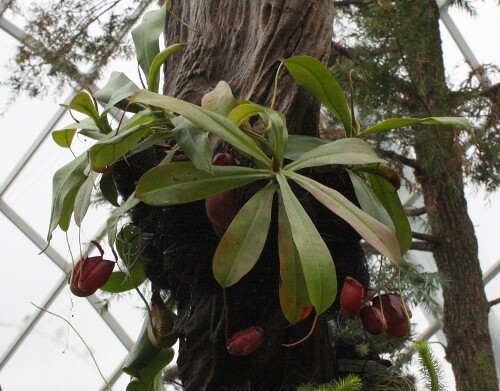
| Nepenthes robcantleyi |
The top of the Cloud Forest mountain had a lot of different carnivorous plants, but
Nepenthes plants were scattered throughout the dome, so I have a lot more photos of those to share.
 |
| Nepenthes robcantleyi |
 |
| Nepenthes robcantleyi |
 |
| Nepenthes robcantleyi |
I did not see any open flowers of
Nepenthes, but I did see a flower spike that would be opening soon.
 |
| Flower spike on a Nepenthes |
 |
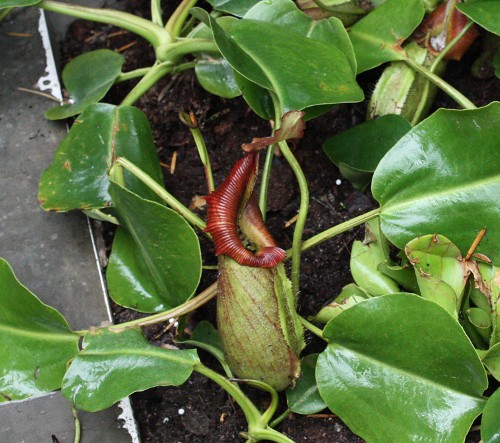
| Nepenthes ampullaria x sibuyanensis |
I love the little jugs of the
Nepenthes pictured above and below here. Aren't they cute? The big, long pitchers are very impressive and have really neat markings, but the little jugs of these two hybrids were my favorites.
 |
| Nepenthes xHookeriana |
In the middle of the pond on top of the mountain there was a little island planted entirely with carnivorous plants. I hope no bug crawls ashore there thinking of taking a vacation.
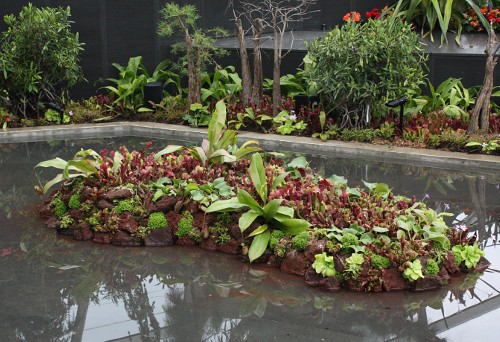 |
| Carnivore island: Enter at your own risk. |