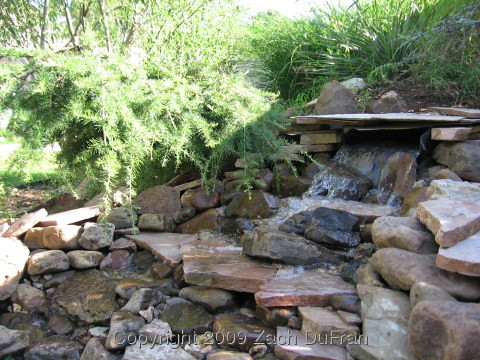
Showing posts with label landscape. Show all posts

Monday, April 2, 2012

New flowerbed project

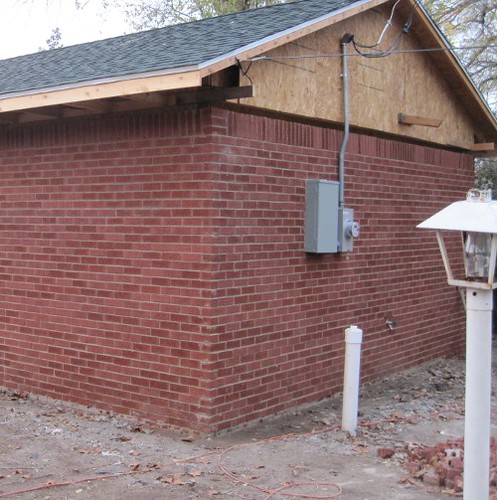
Our dream is to have a backyard that is functional, beautiful and relaxing. We want to have lots of areas where you can sit down and enjoy the outdoors while reading a book or just enjoy the weather. We have worked to create this feel in several parts of our yard. After building on to our house, our backyard had changed and we had a new area to perfect.

back_garden_before
Before: Our blank (and messy) canvas
We decided to add a flowerbed against the back our addition that would soften the big red brick wall and bring some more color into our yard. Once we decided to put in another flowerbed, we started thinking about how we could be a little smarter with our plant purchases this time around. In the past we have poured money into our corner garden year after year, with only a couple of our perennials sticking around to see another year. We didn’t want to do that with this garden.

peewee_supervising
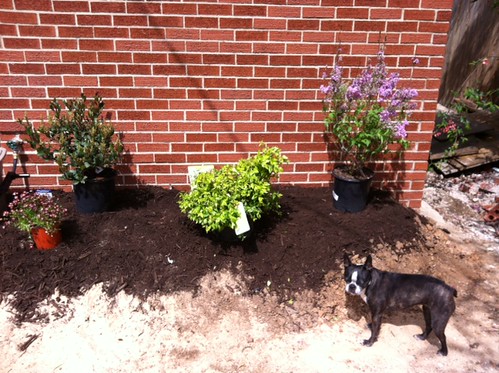
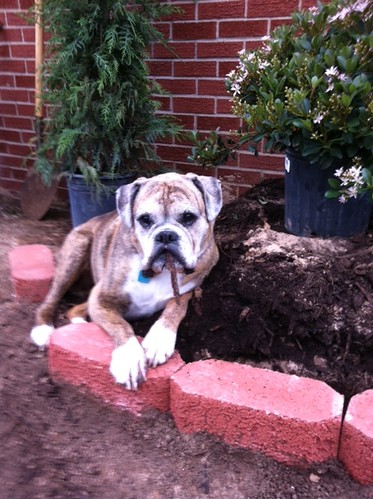
All decisions go through the tiny creature. Pee-Wee supervised each step of the landscaping process. At this point in the process we had laid out our plants, but not yet mixed the soil components, so you can see the rich black compost on top, clay and dirt on the right and sand on the left.

lilac
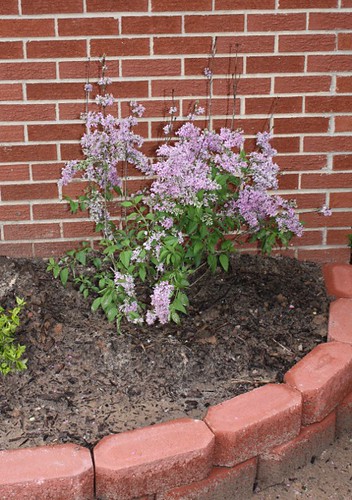
Lilac bush

back_garden_grouping
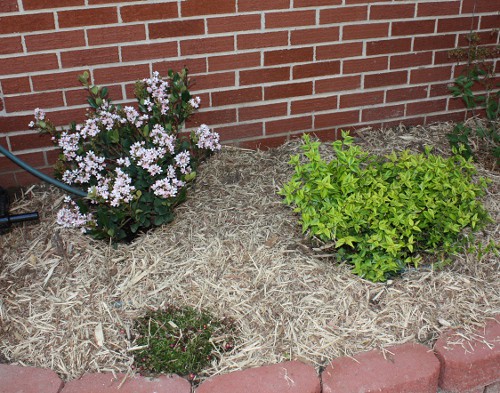
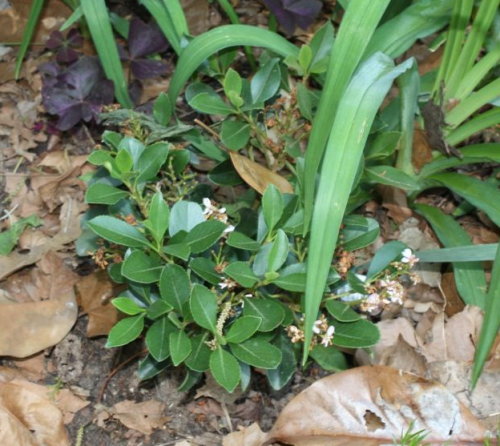
Grouping of Indian Hawthorn, Saxifraga and Abelia
Christie read several magazine articles about planting new flowerbeds and they all suggested starting with foundation evergreen plants before doing anything else. This makes sense for a number of reasons: You want your garden to have year-round interest, so putting these in first is like planning for even the most boring part of your annual cycle to be appealing. It also makes sense because these plants are generally the largest ones in the garden and you really want to place those before you put in the more superfluous splashes of color. So we came up with a list of several evergreens that we wanted to find for our new garden and we vowed to not change our mindset on the evergreens, even if we saw a bunch of super spectacularly awesome plants with more pizzazz.

euonymus
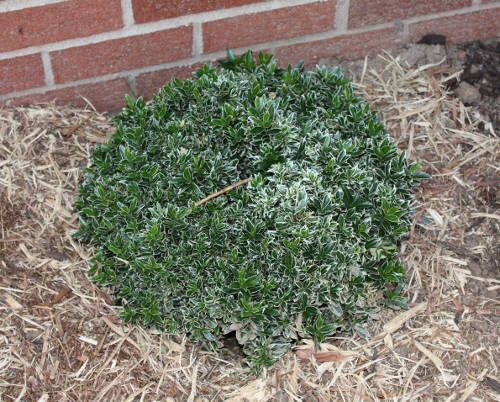
Variegated Euonymus Boxleaf
It turns out that when we were walking through the garden center looking for evergreens, we noticed some really nice features in them and really fell in love with several evergreens. We don’t have trouble “stopping to smell the roses,” but until now we had not “stopped to gaze at evergreens.” Granted these don’t have the most showy flowers or amazing colors or anything, but there are some really nice evergreens available for our zone and we took advantage of their variety.

abelia
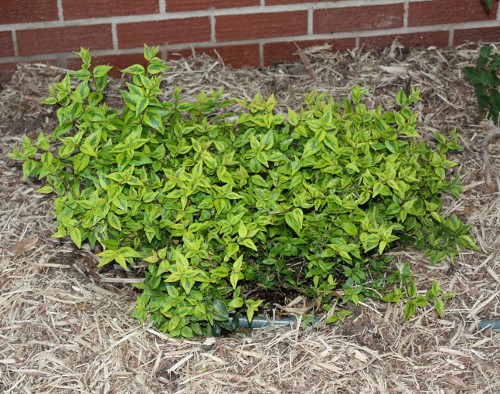
Kaleidoscope Abelia
One other change to our garden philosophy this time around was to buy plants that were more expensive but also more mature. We decided that a more mature plant is more likely to make it through our difficult growing season than a petite plant. Nearly every summer we have about a week of days above 100 F and periods of no rain. And about 1 out of every 5 winters will dip down to about 5 F. We figure the initial investment is definitely more, but the plants are more likely to make it through the critical first couple of years if they are mature plants when they go in the ground.

back_garden_curve
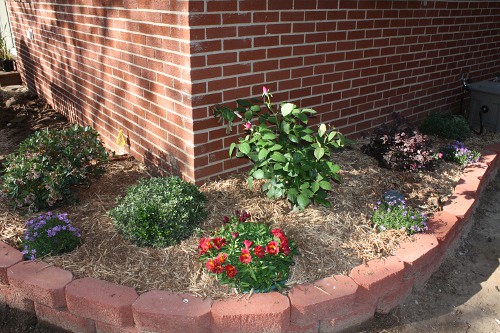
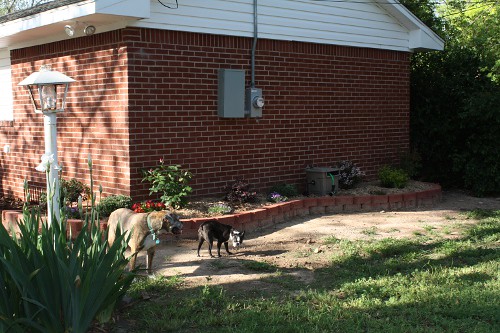
Back garden along the curve. Bright red flowers are Alstromeria. Rose bush behind and to the right.

pip_with_compost
Pippa finds landscaping very relaxing. She kept track of where the last block was to be placed and also helped us sift out the large sticks from the compost mix. (Notice the stick in her mouth.)
Once again*, we were incredibly fortunate in that we wanted to build a raised flowerbed and a neighbor down the street had a huge pile of dirt in their front yard that they needed hauled away. They put in an underground storm shelter; we put in a flowerbed. Win-win. (Of course, somewhere in there Christie and I had to shovel and haul about 20 wheelbarrow loads full of dirt about 1/4 mile down the street.) I mixed equal parts of sand, leftover from our addition, to offset the tough clay nature of the dirt. Then we got a bunch of free compost from the city and mixed that in as well. It was a lot of shovel work, but I think it resulted in an excellent soil for our plants.

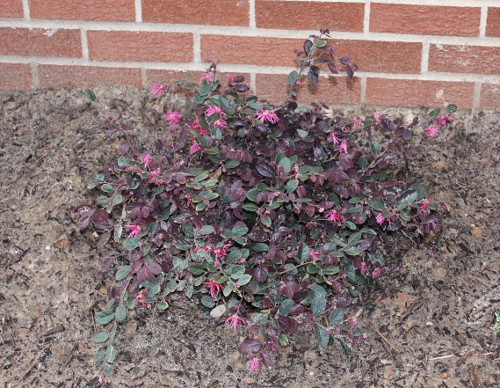
loropetalum
Loropetalum
Another first for us came when we purchased our first rosebush. We have always appreciated cut roses and have seen some very nice rose gardens, but we have never grown roses before. We both really like the light lavender roses, so we were looking particularly for one of those varieties. We found a nice bush of Neptune and we’re really excited to see how many roses we will get from our little bush. Right now there are two big buds on it that are about to open and they look very much like they will be red or at least a dark pink/magenta color. We’ll have to see if they change before they completely open or if the plant was mislabeled.

So, what did we end up planting?
  • Rose ‘Neptune’
  • Snow Pink and Pink Lady Indian Hawthorns: Rhaphiolepsis indica ‘Snow Pink’ and ‘Pink Lady’ (evergreen with light pink flowers in the spring, followed by blue berries)
  • Burgundy Blast Loropetalum Loropetalum chinesis rubrum ‘Burgundy Blast’ (evergreen, or “ever purple,” with interesting pink fringe blooms in the spring)
  • Oxana Princess Lily Alstroemeria x hybrida ‘Staprioxa’ (early riser with red blooms in spring)
  • 2 Dwarf Variegated Boxleaf Euonymus Euonymus japonica ‘Microphylla Variegata’
  • Kaleidoscope Abelia Abelia x grandiflora ‘Kaleidoscope’ (evergreen, changes color throughout the year, small white blooms in summer)
  • Persian Lilac Syringa x persica (deciduous, fragrant light purple blooms)
  • Touran Scarlet Saxifraga Saxifraga x ardensii ‘Touran Scarlet’
  • Phlox, phlox, phlox (Christie’s favorite creeping spring bloomer, an evergreen groundcover)
  • Peony Sarah Bernhardt Paeonia ‘Sarah Bernhardt’
back_garden_full
Full view of the new garden
* There is this strange phenomenon that occurs every time we need dirt. This is the third occurrence. The first occurrence was shortly after we were married and wanted to install our corner garden. We had some neighbors do landscaping and they regraded their front yard, resulting in a pile of dirt that ended up being just the right amount of dirt to build up our 3 tiers. Then, a couple of years later, we wanted to put in our waterfall in the front garden and a neighbor in the opposite direction took out a raised flowerbed in their yard. We hauled that dirt down the street in a matter of one afternoon and voila!

Thursday, May 26, 2011

2011 Edition of "corner garden additions"

Each year we plant new stuff in our corner garden.  It's always a bit of a test to see what can become established, what we will remember to water, etc.  We always start with good intentions, but somewhere along the way it gets really hot and dry in the middle of the summer and we forget to water for a week or two and before you know it, we've lost some of our new plants.

This year we have started off with really good habits.  During this time of year we are normally allowing nature to water our garden, but this spring has been particularly dry.  To top it off, we laid out some Fescue grass sod about a month ago, so we were forced to be vigilant with our watering efforts.  Since we have been watering our sod and our new garden around the greenhouse, we have also been dragging the hose out to the corner garden and watering those new and established plants - to give them the water they are expecting at this time of year.

indian_hawthorn
Indian Hawthorn (Rhaphiolepis indica)
A plant that I have admired in some flowerbeds around town is the Indian Hawthorn (Rhaphiolepis indica).  After first seeing it blooming and subsequently producing blue berries in the flowerbeds in front of my office building, I searched online to find out what it was.  I read that it was sometimes a challenging plant to grow, but I observed that no one was giving it special care in the flowerbeds at the office.  In fact, I saw it growing in several other flowerbeds that receive irregular attention through the year.  When I saw this plant being offered pretty cheap at Lowe's, I snatched one up to try in the corner garden - saving my receipt, in case it doesn't work out.  (I hope you know that Lowe's has a 1 year guarantee on their plants...)

gaura_new
One of the new Gauras, in bud but not yet opened.  Sorry for the fuzzy picture.
We have planted Gauras (Oenothera sp., sometimes called "Butterfly Weed") in the corner garden before and lost them.  They are mildly drought tolerant, but need to become established first.  In other words, if you toss them in the ground, squirt them with the hose and then let them sit in the baking sun for the rest of the summer, they probably won't make it.  But if you give them some TLC for a year and then leave them to nature, they should be much more successful.  We got two beautiful mature Gauras this year and planted them in our brick garden around the greenhouse.  They have been growing steadily and blooming up a storm, since we have been watering them regularly.  So then I saw some smaller Gauras for a really good price ($2.49) and I snatched up two of them for the corner garden.

kniphofia
New Kniphofia, which is still quite small. Again, sorry for the fuzzy picture.
One of the really cool plants native to Ethiopia that we can actually grow outdoors in zone 7 is the Kniphofia.  My granddad actually had one of these growing in his front flowerbed a couple of years ago.  I saw a large one up in Seattle last year and it is really a cool plant.  My plant is tiny for the time being, but I'm hoping it will grow enough to produce the really neat red, orange and yellow blooms this summer.

salvia_pink
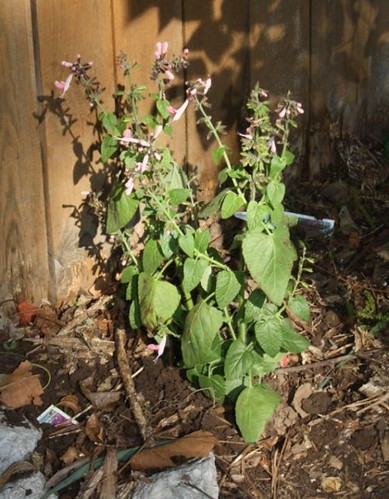
New light pink Salvia
We also added some of the purple/blue creeping Phlox, Christie's favorite spring bloomer.  We have had a couple of them in the corner garden, but a couple didn't come back this year.

salvia_last_year
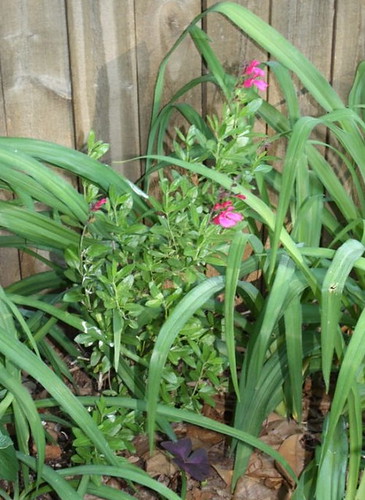
Salvia greggii which we planted last year.  It's getting bigger this year and has been blooming constantly.
I'm really happy to see that a couple of our additions from the last two years are thriving again this year - the Pink Preference Autumn Sage (Salvia greggii 'Pink Preference') and Elaeagnus.  The Blue False Indigo (Baptisia australis v. minor) from two years ago is still just a tiny plant.  I really home this is the year that it takes off and blooms!

Wednesday, May 18, 2011

New iris bed in bloom!

Last year I transplanted all of our Irises from various places in the yard to one central location around the light post in the middle of our backyard.

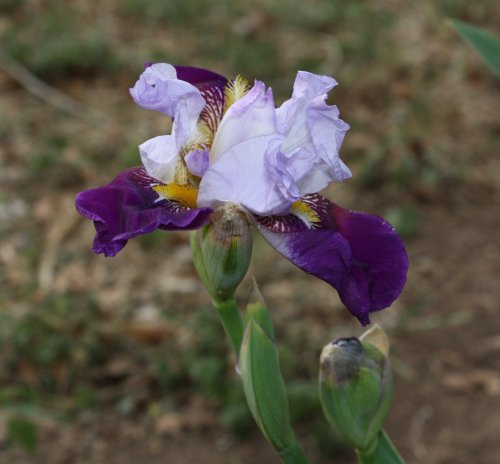
two_tone_iris_20110418
Two tone iris - Sorry I don't know the name.
At the time, it looked pathetic, but I knew all of those rhizomes would sprout new leaves and fill out the area. This year, the irises definitely filled the area with green. There weren't as many blooms as I would have expected, but we did get two Irises to bloom.

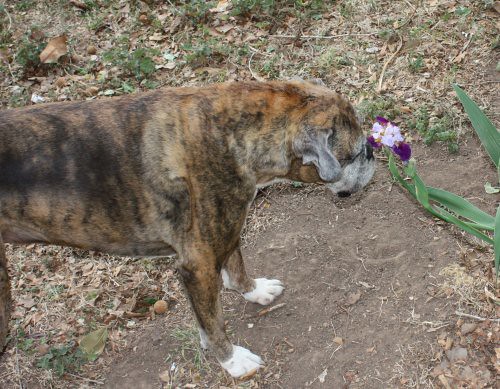
pippa_sniffing_iris
My pups sure know how to stop and smell the irises
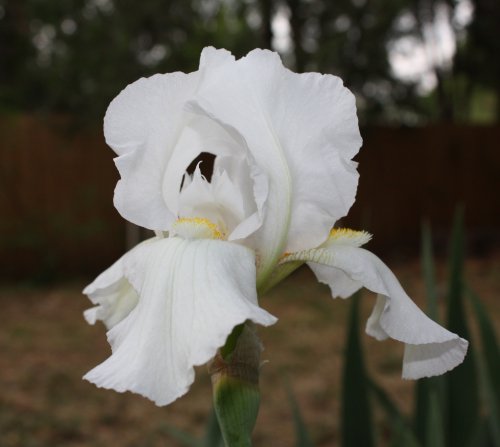
white_iris_20110418
Simple white iris
I'm hoping for considerably more to bloom next year!

Thursday, July 9, 2009

Another garden waterfall

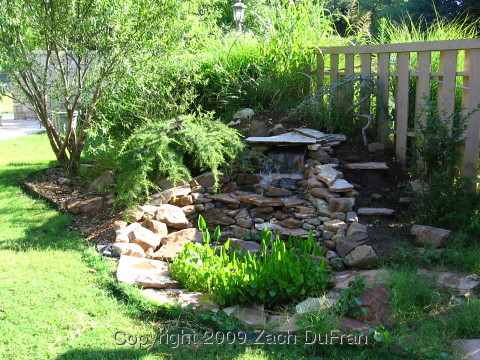
My parents-in-law own a very beautiful wedding chapel in the woods outside of town.  The chapel itself is a wood and rock structure with huge windows looking out to the dense trees and vegetation around it.  My wife and I help maintain the landscaping by weeding the flowerbeds about once a week.  We also recently installed a garden waterfall, like the one that we have in our front yard.  The waterfall area has been in construction for a while.  You can see that there is plenty of weeding for us to do just to the right of the falls.

chapel_full
The new garden waterfall at Thunderbird Chapel
The chapel has several sandstone walkways around it, so we incorporated some of the sandstone, along with the more commonly used river rocks.  The scale might be hard to deduce from these photos.  The height of the top is probably about 4 feet from the ground level and the length of the waterfall is about 8 feet from the water top to the edge of the basin.

chapel_top
Close-up of the waterfall
While weeding the flowerbeds we have seen a lot of frogs.  There is a pond nearby, but not really in hopping distance.  I think they will really appreciate the addition of this waterfall to their neighborhood.

Wednesday, December 31, 2008

Planty Resolutions

At this time of the year, everyone is making resolutions.  So I guess I will talk about what I plan to do for this next year.  More than resolutions, these are my goals.  The first four goals apply to this blog directly and the last five apply to me and my plants.

  1. Continue posting at the rate of 2-3 times per week.  I started this blog a year and a half ago, but only began posting at regular (frequent) intervals a couple of months ago.  So far I have not had trouble coming up with at least 2 posts a week.  I hope to keep that trend throughout the year.

  2. Review about 1 plant book a month.  Even if I don't read one new plant book each month, I have a backlog that should last me the full year - all I need to do is write the review.

  3. Write a "trip report" about once a month.  This will be a little trickier, as I don't know off the top of my head 12 different places to visit and write about.  But I will give it a shot.  More than likely this will become more of a quarterly post, or just as they occur.  I won't hold myself to the month interval, since my vacations tend to be distributed more heavily towards Spring and Summer.

  4. Write a "project" post once a month.  I have written three posts that I tagged and categorized as "projects."  I foresee more of these in the future, as I plan to write about my successes and failures of making hypertufa pots and terrariums.  We'll see what else I get my hands into.

  5. Start a collection of Asarums (Wild Ginger).  I have had just one species of Asarums in the past, but I've been saving up some money so that I can order 2 or 3 varieties from Asiatica Nursery and begin a real collection.  [I'm not sure if I want to start the collection in the Spring or wait until the Fall, since they will thrive in my cool, dark house overwinter.]  I received a collector's book on Asarums for Christmas that I will be posting about soon - stay tuned!

  6. Grow some of my own food.  During the summer of 2008, we grew about 5 tomatoes (maybe less) and 3 limes.  For the summer of 2009 I have some ambitious plans to grow: tomatoes, potatoes, kiwi (will not have fruit this year), and broccoli.  Last year I tried broccoli, but the plants kept getting eaten by some caterpillars.  I don't have a lot of room for gardening in the sun, but I am going to try growing the tomatoes and broccoli in pots this year, so that I can move them into the appropriate full sun locations and save my ground space for potatoes and kiwi.  The kiwi will take a couple of years before fruiting, but I want to get them in the ground this year.  The potatoes (my favorite vegetable) will also be a new venture for me.  Wish me luck!

  7. Vigorously plant front figure 8 bed.  We have a wonderful front flowerbed in the shape of a figure 8 that is filled with red and white tulips in the Spring.  The rest of the growing season it gets invaded by grass.  We have tried putting down tarp and covering with mulch after the tulips are finished, but that's just not very pretty.  Last year we planted potato vine, which was great.  The only problem is that we didn't plant enough.  This year I want to plant sooner (while the tulips are just finishing their blooming) and plant about twice as much.  If I stay on top of watering them at first, they should really fill out the bed nicely and keep the grass out.

  8. Fertilize. I have never fertilized any of my own plants before.  Some of my plants have not bloomed for me - ever.  Are these two items coincidental?  I think not.  I was very happy not fertilizing my plants, but I have committed to fertilizing regularly starting this spring.  Maybe I will get my Walking Iris, Shell Ginger and Bougainvillea to bloom this year!

  9. Recreate the corner garden.  Two years ago we started a beautiful little corner garden in our backyard.  At the time it was a shade garden.  After the ice storm in December 2007, it became a full/part sun garden, since the trees hanging over the garden were destroyed.  To make matters worse, the small cherry tree we had planted in front of the garden has since died, so we can't hope for it to one day shade the garden.  And I can't count on my tiny Japanese Maple to provide shade anytime soon.  This last summer the garden suffered because I had planted it with shade perennials (hostas and coral bells, mostly).  Now I need to either rethink the garden or plant a new shade tree so that this garden can return to form.  I've been thinking about planting a ginkgo tree ever since I saw one last fall that was a beautiful solid shade of yellow.  What do you think?

Well, that does it for now.  Those all seem like doable goals.  And each one of them will probably result in a couple of posts.  I'll keep you updated.

Friday, November 21, 2008

Garden waterfall project

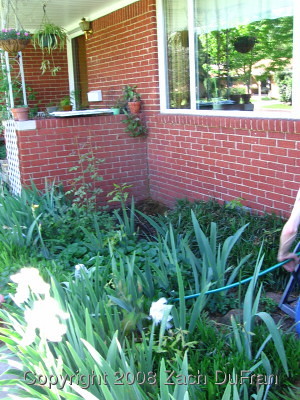
During the summer of 2007 my wife and I decided to install a waterfall in our front flowerbed against our house. The flowerbed is about 8' by 20' and was filled with irises, monkey grass (Liriope muscari), a rose bush, a holly bush (tree), and 2 large hardy (dinner-plate) hibiscus.  I dug up the rose bush and gave it to my in-laws who said they could find a place for it.  I relocated most of the iris to one location and gave some of them away.  I also moved around quite a bit of the monkey grass so that it just formed an outline of the flowerbed.  There also is a large patch of dense monkey grass under the holly tree at the other end of the flowerbed.  I didn't have to disturb that end.
before
Front flowerbed before waterfall project
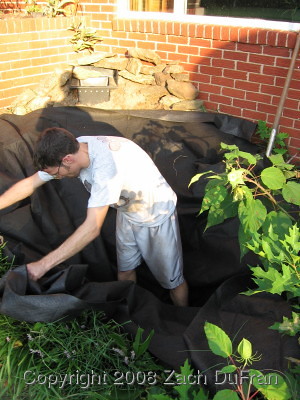
As far as the mechanical elements, we got a "pondless waterfall kit" at a local landscaping shop that specializes in ponds and waterfalls.  It was on sale for a really good deal.  However, the price of some necessary items not included in the kit can be costly.  The kit itself contains 2 different layers of underlayment - a very thick rubber tarp and a more thin fiber layer.  The fiber layer goes first, and then the rubber tarp next.  Also included in the kit is the water pump and housing, a long stretch of tubing (about 6-8 feet, I would guess), the top waterfall container, and all of the necessary fittings to piece it together.  Really, the construction of the mechanical pieces took just 30 minutes or so.  Attaching the tarp to the top container was a little tricky and very important to do well, since most "leaks" will occur there.  I have had to mess with it a little since I have finished the waterfall, making tweaks whenever I noticed some water was straying from the intended path and slipping underneath the tarp.

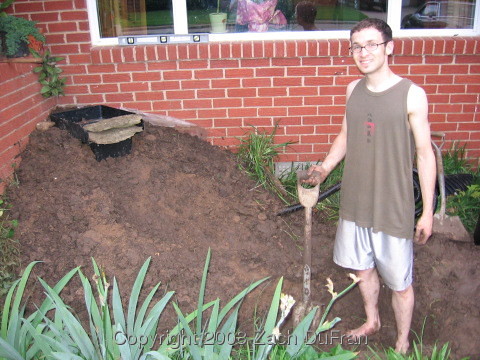
In order to "build" this waterfall, I needed to create the correct landscape.  Since I just had a flat bed, this required a bunch of dirt.  Thankfully a couple of neighbors happened to be making some changes of their own, resulting in large piles of dirt in their yards.  One neighbor down the street was taking out a large raised bed that ran half the length of the front of the house.  I'm not sure how I lucked in to this situation, but it happened.  They were appreciative of my hauling off their dirt and I was thankful for the free dirt.  I did have to haul it down the street in a wheel barrow, though.  Load by load by load by load by load...

Anyway, I was able to build a nice hill in the corner of the bed that would serve as my miraculous hillock of bubbling clear water!
waterfall_dirt
Waterfall preparation
A friend of ours has a lot of land that contains some rock that he said we were welcome to have.  Rock is one of those extra ingredients not included in the kit and it is quite expensive to buy.  I called some are landscape suppliers and priced rock - then quickly took our friend up on his offer.  We had to drive about an hour to the land and spent most of a Saturday finding rocks of varying sizes that were somewhat consistent in coloring and looked like they would create a nice waterfall.  We were very happy with our free rocks and free help that we received, as well.
tarp_layout
Laying out the underlayment to form the basin
You can see a large bud in the lower right corner of the picture and another in the center of the right side of the picture.  This is one of my dinner plate hibiscus.  The hibiscus were beautiful when they bloomed but up until that day it looked like a huge weed had grown to 3 or 4 feet tall right there in the middle of our front window on the house.  So I removed the hibiscus shortly after installing the waterfall.

After putting all of the equipment together and positioning the tarp, I filled up the bottom basin with water and plugged in the pump.  It worked!

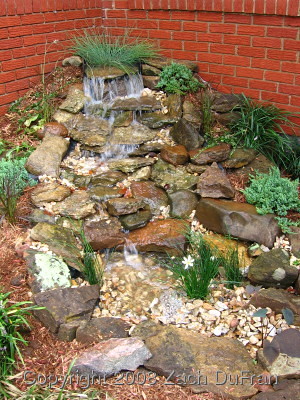
Now it was time to start experimenting with rock layouts.  I probably spent about an hour until I had all of the rocks in a layout that pleased my eye.  Then I went and got my wife for an inspection.  She made tweaks here and there.  Then I took the bags of river pebbles that we had bought and filled in all of the areas between rocks where the underlaying tarp was exposed.  There were lots of crooks and crannies and we ended up needing more bags of pebbles than we had initially purchased.  Thankfully the bags of pebbles are pretty cheap ($3ish for a large bag).  Once the pebbles were in place the waterfall really looked good.
finished_full
Complete waterfall
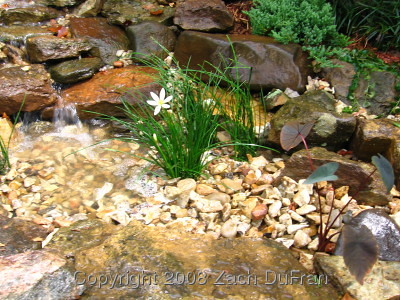
Of course, the finishing touches were to get some aquatic plants and to landscape around the waterfall.
finished_pool
Waterfall color
waterfall_top
Water cascading down from the source

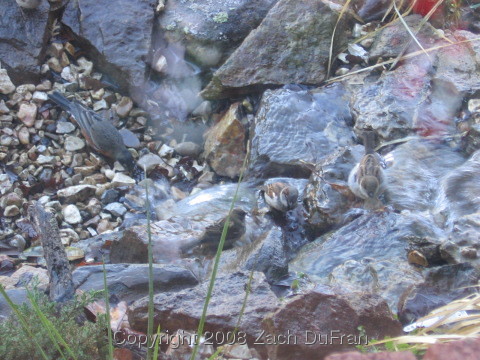
At the onset of spring this last year I looked out the window one morning to see a bunch of birds playing/showering in our waterfall.
waterfall_birds
Birds at play(?) in the waterfall - or maybe just bathing
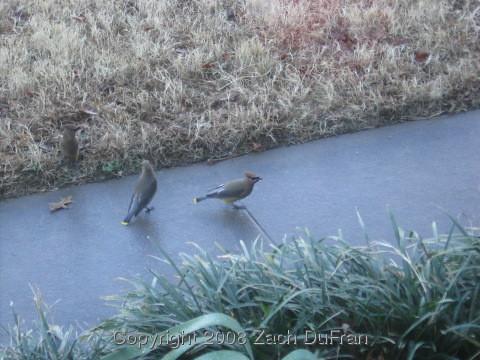
I'm not much of a bird watcher, so I don't know what type of birds these are, but I really liked their markings, so I took a couple of pictures of them.
more_birds
I like the markings on these birds - anyone know what they are?  [Update: They're Cedar Waxwings.]
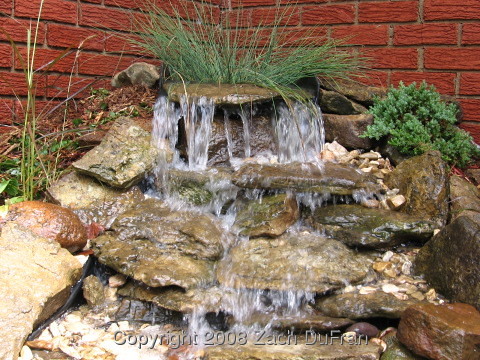
Though the word "natural" may not be the best word to use for the waterfall surging out of the little hillock perfectly mounded against our red brick house - the scene has an authentic look to it.  The rocks are native to our region and we landscaped around the waterfall with evergreen plants that should keep our front flowerbed beautiful year in and year out with minimal maintenance.  In fact, the front flowerbed is really pretty all through the winter, even when everything else seems brown and dead.
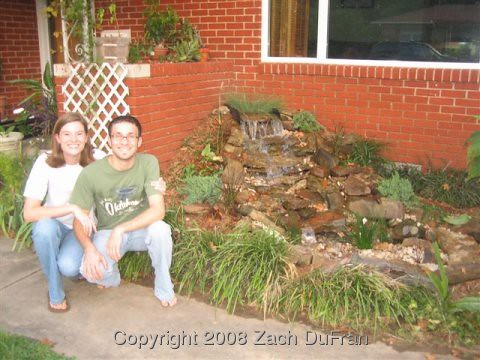
creators
My wife and I posing after our hard work