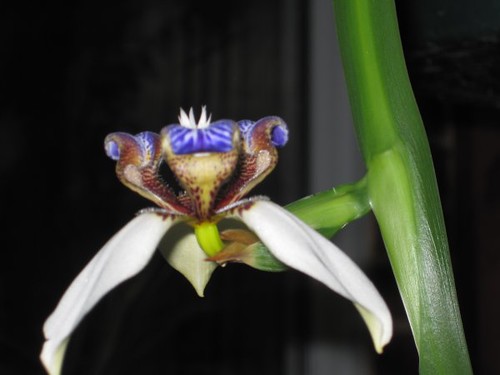
Showing posts with label iris. Show all posts

Thursday, May 16, 2013

Trip Report: Iris Gardens at Will Rogers Park

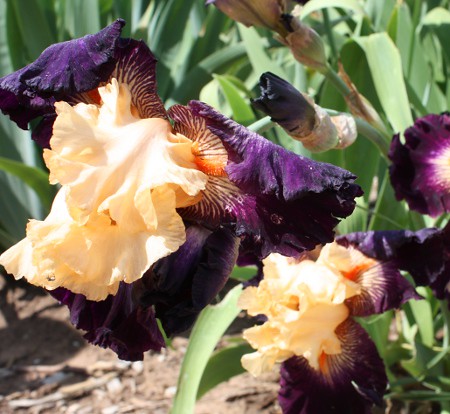
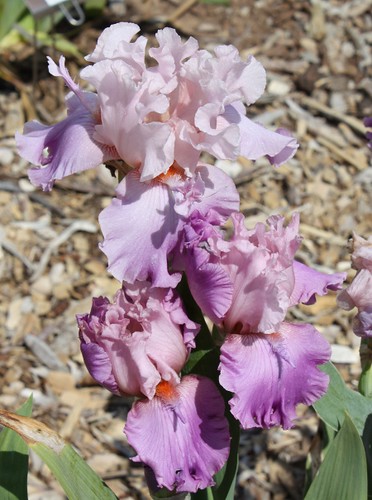
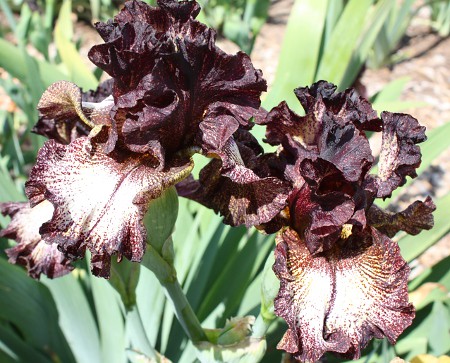
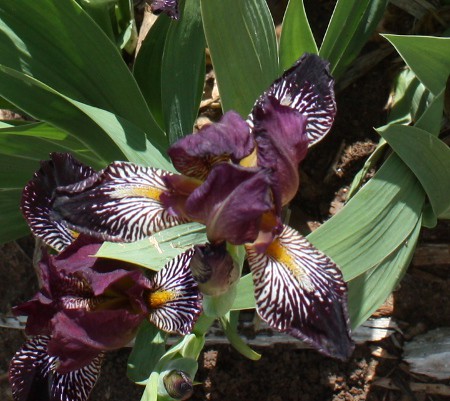
The Oklahoma Orchid Society show and sale takes place at the Will Rogers Park in Oklahoma City.  While we were there for the orchid show, we decided to wander around the park a little.  The Oklahoma Iris Society maintains a nice Iris Gardens that was in full bloom for our visit.  All of the plants were neatly labeled so we knew what we were viewing.

iris_greatest_show_on_earth
Greatest Show On Earth

iris_act_surprised
Act Surprised

iris_sorbonne
Sorbonne


iris_rayos_adentro
Rayos Adentro

There were probably about 35 varieties in bloom.  This last one was Christie's favorite.

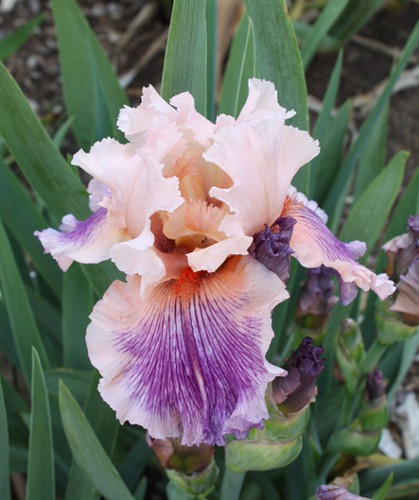
iris_splurge
Splurge

This has been a good year for our own little Iris garden at home.  We might have to add a variety or two for new colors next year.  This variety, Splurge, would be a good candidate.

Tuesday, August 2, 2011

Dietes seedlings

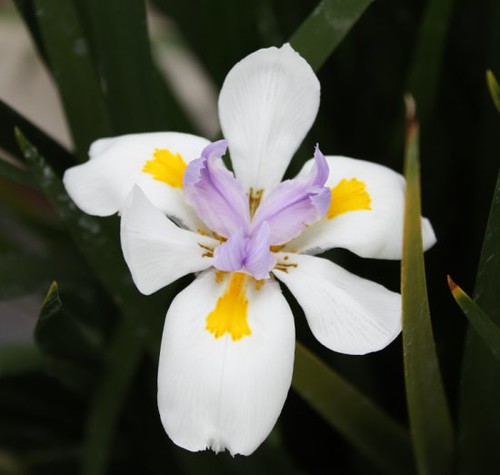
I decided I wanted to try some more tropical African irises, to accompany my Fortnight Lily (Dietes iridioides), but I couldn't find many plants for sale.  So I ordered some seeds of the Peacock Flower (Dietes biflora).  Starting plants from seed is a little new to me.  Or maybe I should say, successfully starting plants from seed is new to me.  I have tried quite a few seeds over the years and haven't had much luck.  Some recent success has encouraged me to try some more.

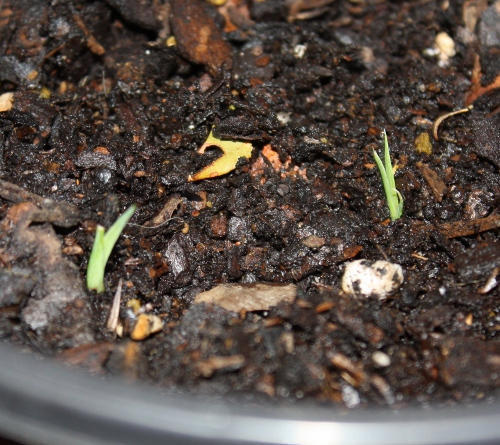
dietes_seedlings
Dietes bicolor seedlings after 1 month
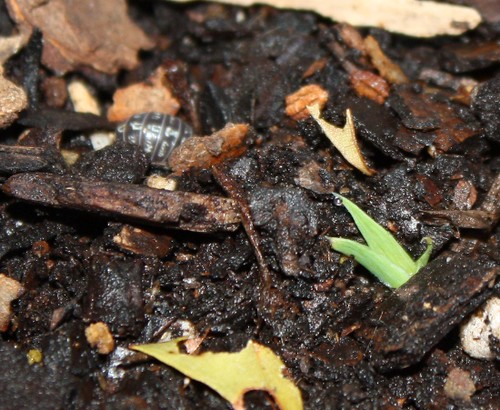
In just under a month my Dietes bicolor seedlings began to appear.  The amazing thing about these little guys is that they look just like the mature plants, but much smaller.  They already have a little fan of leaves.  For size comparison, check out the pill bug (Armadillidium vulgare) next to the seedling below.  Yes, they are that tiny.

dietes_pillbug
Dietes bicolor with pill bug for size comparison

These plants are not hardy in my zone, so they will have to spend the winters in the greenhouse.  But they can be grown outdoors just 1 zone south of me, and they are considered drought resistant and good for xeriscaping.  So I might have the opportunity to plant some of these soon in a garden in southern Texas.  More about that later.

I'm really glad I had luck with these iris plants.  It is an encouraging success that gives me the option of growing my plant collection without having to spend a lot of money.  Now, I wonder how long it takes these guys to become flowering size...?  If you would like to see the flowers, you can view pictures here.

Wednesday, May 18, 2011

New iris bed in bloom!

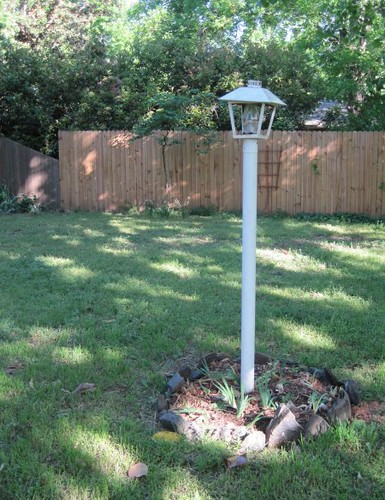
Last year I transplanted all of our Irises from various places in the yard to one central location around the light post in the middle of our backyard.

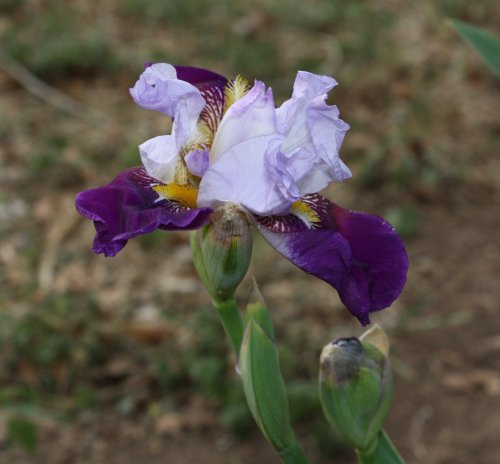
two_tone_iris_20110418
Two tone iris - Sorry I don't know the name.
At the time, it looked pathetic, but I knew all of those rhizomes would sprout new leaves and fill out the area. This year, the irises definitely filled the area with green. There weren't as many blooms as I would have expected, but we did get two Irises to bloom.

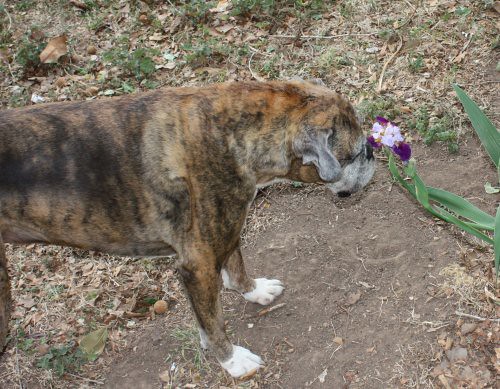
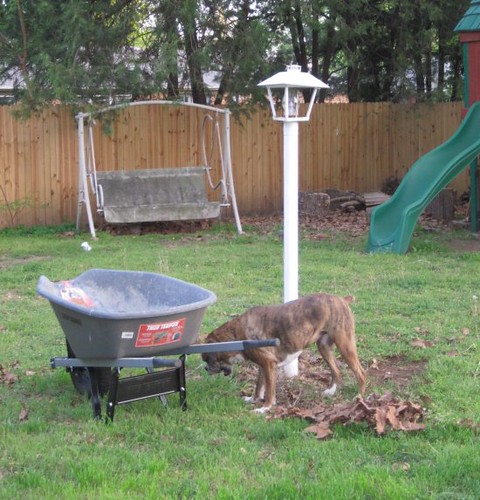
pippa_sniffing_iris
My pups sure know how to stop and smell the irises
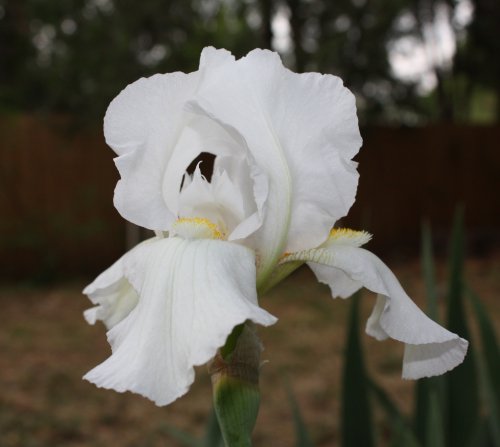
white_iris_20110418
Simple white iris
I'm hoping for considerably more to bloom next year!

Tuesday, July 6, 2010

My new favorite Iris: the Fornight Lily

While on our recent vacation to the Pacific Northwest, we visited the Volunteer Park Conservatory in Seattle, Washington. It was such a cool conservatory with so many interesting plants that it felt like I had been in charge of acquisitions! I plan to write 5+ posts on this little conservatory alone. You can look forward to posts talking about about the Marantaceae (Ctenanthe, Calathea, Maranta, Stromanthe), Carnivorous plants (Sarracenia and Nepenthes), Fuchsias, Bromeliads (including Tillandsias), Orchid Cacti (Epiphyllums), Euphorbias, and some oddballs (like Dischidia and Hydnophytum).

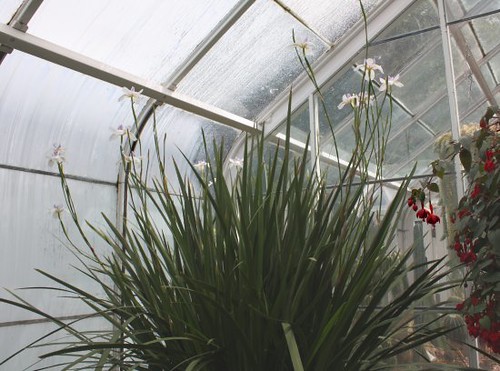
However, this post is about one single Iris plant - Dietes iridioides. This beautiful plant from the Iridaceae (Iris) family has very rigid leaves with the firmness of a Yucca. The plant stands tall at about 4 feet and forms a thick clump in any and all available space. It was apparent that the plant like its environment in the conservatory and since coming home I have learned that it is considered mildly invasive in the areas where it is hardy - zone 8a or greater.

dietes_bloom
Dietes iridioides bloom
I am tempted to talk my parents-in-law into buying some of these plants to use for landscaping their new property in Denton, TX, as I think it would be hardy there. Regardless, I've got to get some for myself and will keep it in a pot in my greenhouse. Seeds are very easy (and cheap) to come by on ebay, but I'm still not really confident in my seed-rearing abilities. Maybe this a plant worth the cheap experiment.

dietes_plant
Dietes iridioides
The plant is called "Fortnight Lily," "African Iris," "Cape Iris" or simply "Wild Iris" as a common name. But I imagine there are probably a good 20-30 different Iris that go by that name. The genus Dietes is native to southern and eastern Africa (including Ethiopia!), and consists of four to six species - one of which occurs outside of Africa, on an island off the coast of Australia.  This particular plant (Dietes iridioides), was formerly placed in the genus Moraea, but was moved to Dietes because it is rhizomatous (it has a rhizome).  I had to get help from a staff worker at the conservatory to finally find a label on one of the plants and it read "Dietes vegeta - Fortnight Lily."  The wikipedia article on Dietes tells me that this plant is really Dietes iridioides and I confirmed that information with Tropicos.

There are so many different types (genera) of Iris.  For a long time the only type of Iris with which I was familiar was a bearded Iris - a very common flowerbed plant in this part of the country.  I've always thought they were very nice flowers.  But then I discovered Dutch Iris (Iris x hollandica), which my grandmother was growing.  With more slender leaves and flowers, and a deep royal blue bloom, this quickly became my favorite Iris.  Just a couple of years ago I discovered Apostle Plants, or Walking Iris (Neomarica gracilis).  And again my favorite Iris was trumped!

I find that every new Iris I discover quickly becomes a favorite plant of mine.  Plants that are in the Iris genus are more familiar, but the "fringe" genera within the Iridaceae family are so much more interesting and beautiful to me.  The Iridaceae family consists of more than 2000 unique species from 66 genera, including some not as obviously related to the common bearded Iris, like the Crocus genus.  Many of these plants grow in sub-Saharan Africa (south of the Sahara desert) and quite a few in the Americas.

Monday, May 10, 2010

A place for Irises

Christie and I live in the house in which my mom grew up.  My grandparents were the first owners of the house and my grandmother lived here until she passed away, about 6 and a half years ago.

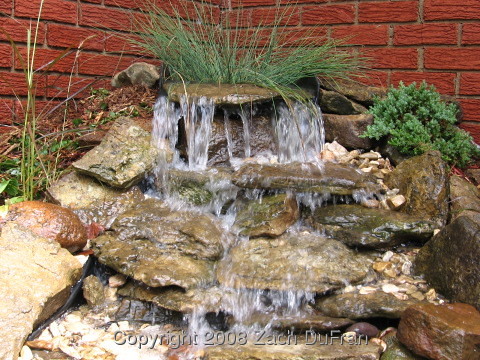
My grandmother planted a number of lavender, mixed white and purple & solid white Iris in the front flowerbed.  They have multiplied over the years and there are quite a few of them now.  Christie's grandmother also really likes Irises and had given us some a couple of years ago that we planted in the same front flowerbed.  Whenever my wife and I decided to rework the front flowerbed - removing several bushes and installing the garden waterfall - we chose to relocate most of the Iris.  They were too tall for the flowerbed and did not have the right feel.

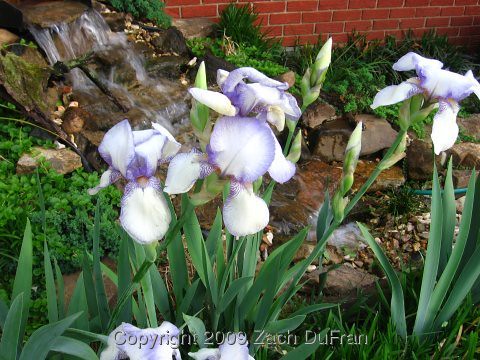
pw_iris_waterfall
Purple and white Iris in front of our garden waterfall.

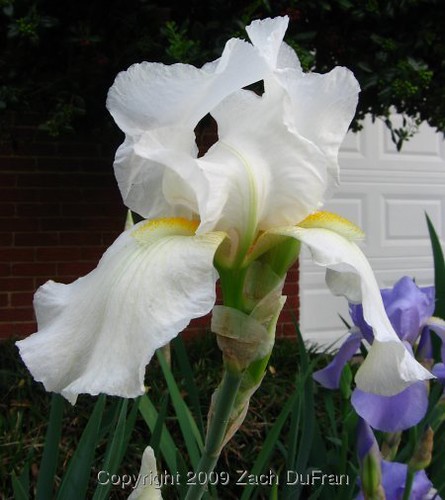
white_purple_irises
White Iris and Lavender Iris (background) in our front flowerbed.

Of course, we couldn't just throw them away.  But at the time, we couldn't really find a good place for them.  We dug them up, tossed them in buckets and they sat in the shade under a tree for over a year.  Without soil and sun they were almost dormant.  Thankfully almost all of them survived and a couple of them even bloomed in that state.

pink_iris
Rusty pink Iris given to us by Christie's grandmother.

royal_purple_iris
Royal blue/purple Iris given to us by Christie's grandmother.

On one of our road trips last Spring we visited the log cabin home of Sequoyah, who invented the Cherokee syllabary (cousin to the alphabet).  The grounds of this National Historic Landmark are very well kempt.  My wife was in awe of the rings of Irises around their trees.


sequoyah_iris_ring
Iris planted at Sequoyah's cabin

Finally, we had found inspiration for all of our beautiful Irises!  Christie thought that the Irises would look neat around the base of our Sycamore, but I wasn't sure if they would bloom very well there since they would be in such dense shade all day long.


iris_bed_before
Lonely light post ready for work.  Pip is scoping out our new Iris garden.

In the middle of our backyard is an old lamp post that was once fueled with natural gas.  The gas has been disconnected, but we would like to have it wired with electricity some day.  We decided that this lamp post would look really nice with Iris planted around it.  In addition to being pleasing to the eye, it will help prevent kids blindly running into the lamp post while playing in the backyard (something I've done before), if there is a bit of a flower bed around it.


iris_bed_after
Completed Iris bed

What do you think of our dedicated Iris bed?  A couple more Iris pop up in our front flowerbed around the waterfall every year.  As soon as they are finished blooming, I will relocate them to this location in the backyard with the others.

Thursday, April 29, 2010

Walking Iris in bloom

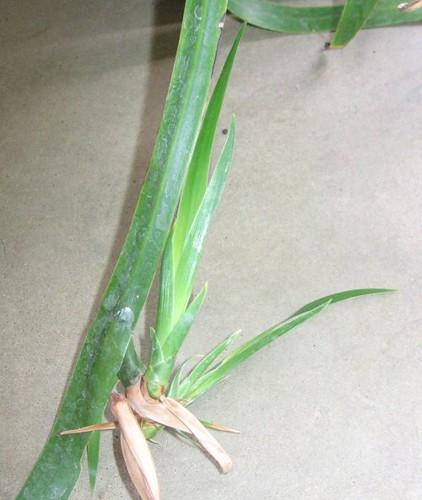
It was almost four years ago when I stumbled along an unusual looking plant at "The Greenhouse" - a local greenhouse that charges too much for their very nice plants.  It reminded me of an Iris, but the leaves were more glossy and thin.  Those features, along with the fact that it was potted in a hanging basket, had me guessing this was probably not a winter hardy plant.  The coolest feature of all was that towards the ends of many of the leaf blades there were new plants forming!

walking_iris_baby_aug2006
Baby plant forming on my Walking Iris (Neomarica gracilis) back in August 2006, when I purchased the plant.
I handed over the big bucks for this plant and quickly posted pictures of it to different forums online, looking for an ID.  I got one pretty quickly: Neomarica gracilis, commonly called Apostle Plant or Walking Iris.

I learned that the plant flowers from the ends of the leaves and then produces new plants there.  The leaves sag with the weight of the new plant and the new plants take root, hence the name Walking Iris.  Therefore, the plant that I had just bought had finished blooming.

I found an empty hanging basket and placed it next to my plant and buried each of the new plants, leaving them still attached to the mother plant.  A couple of months later I courageously cut the mother leaf free, leaving myself with two pots full of Walking Iris.  It was actually almost indistinguishable which was the "mother plant."  I was proud.

I kept my plants pretty healthy over the last couple of years, but there were a couple of rough times where my plants dried out and I would lose some of them.  Last summer I lost a whole hanging basket and a half - but some hung on!

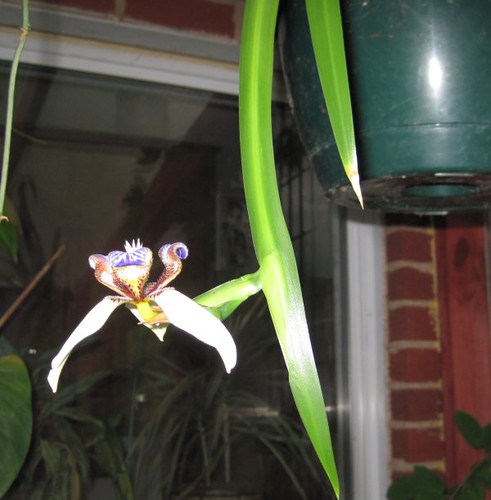
And for the first time last week, my plants bloomed!


walking_iris_first_bloom
First bloom
I'm so glad to have these blooms, as much for their appearance as for the promise of new plants.  I can start to fill in my hanging basket again.  And hopefully I can keep them all happy until next Spring.

walking_iris_first_bloom_close
Closer look at the first bloom
The blooms are very attractive, but only lasted one day.  My plant produced three blooms, each a couple of days after the previous.  So conceivably, a fuller plant than mine might have a couple of blooms at a time over a period of a couple of weeks.  I have something to look forward to.  (Please forgive the ending of this post with a trailing preposition.)

Friday, November 21, 2008

Garden waterfall project

During the summer of 2007 my wife and I decided to install a waterfall in our front flowerbed against our house. The flowerbed is about 8' by 20' and was filled with irises, monkey grass (Liriope muscari), a rose bush, a holly bush (tree), and 2 large hardy (dinner-plate) hibiscus.  I dug up the rose bush and gave it to my in-laws who said they could find a place for it.  I relocated most of the iris to one location and gave some of them away.  I also moved around quite a bit of the monkey grass so that it just formed an outline of the flowerbed.  There also is a large patch of dense monkey grass under the holly tree at the other end of the flowerbed.  I didn't have to disturb that end.
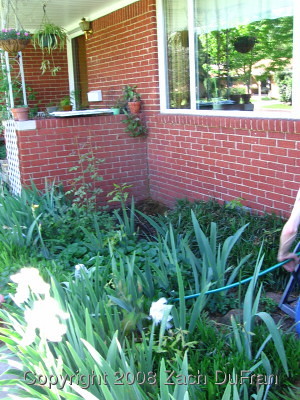
before
Front flowerbed before waterfall project
As far as the mechanical elements, we got a "pondless waterfall kit" at a local landscaping shop that specializes in ponds and waterfalls.  It was on sale for a really good deal.  However, the price of some necessary items not included in the kit can be costly.  The kit itself contains 2 different layers of underlayment - a very thick rubber tarp and a more thin fiber layer.  The fiber layer goes first, and then the rubber tarp next.  Also included in the kit is the water pump and housing, a long stretch of tubing (about 6-8 feet, I would guess), the top waterfall container, and all of the necessary fittings to piece it together.  Really, the construction of the mechanical pieces took just 30 minutes or so.  Attaching the tarp to the top container was a little tricky and very important to do well, since most "leaks" will occur there.  I have had to mess with it a little since I have finished the waterfall, making tweaks whenever I noticed some water was straying from the intended path and slipping underneath the tarp.

In order to "build" this waterfall, I needed to create the correct landscape.  Since I just had a flat bed, this required a bunch of dirt.  Thankfully a couple of neighbors happened to be making some changes of their own, resulting in large piles of dirt in their yards.  One neighbor down the street was taking out a large raised bed that ran half the length of the front of the house.  I'm not sure how I lucked in to this situation, but it happened.  They were appreciative of my hauling off their dirt and I was thankful for the free dirt.  I did have to haul it down the street in a wheel barrow, though.  Load by load by load by load by load...

Anyway, I was able to build a nice hill in the corner of the bed that would serve as my miraculous hillock of bubbling clear water!
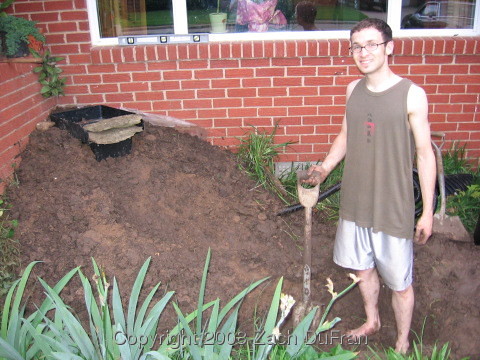
waterfall_dirt
Waterfall preparation
A friend of ours has a lot of land that contains some rock that he said we were welcome to have.  Rock is one of those extra ingredients not included in the kit and it is quite expensive to buy.  I called some are landscape suppliers and priced rock - then quickly took our friend up on his offer.  We had to drive about an hour to the land and spent most of a Saturday finding rocks of varying sizes that were somewhat consistent in coloring and looked like they would create a nice waterfall.  We were very happy with our free rocks and free help that we received, as well.
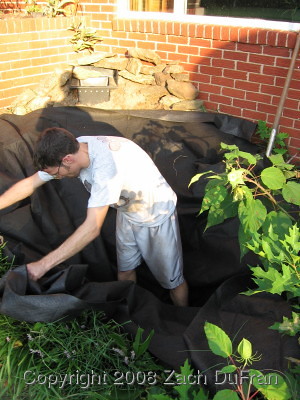
tarp_layout
Laying out the underlayment to form the basin
You can see a large bud in the lower right corner of the picture and another in the center of the right side of the picture.  This is one of my dinner plate hibiscus.  The hibiscus were beautiful when they bloomed but up until that day it looked like a huge weed had grown to 3 or 4 feet tall right there in the middle of our front window on the house.  So I removed the hibiscus shortly after installing the waterfall.

After putting all of the equipment together and positioning the tarp, I filled up the bottom basin with water and plugged in the pump.  It worked!

Now it was time to start experimenting with rock layouts.  I probably spent about an hour until I had all of the rocks in a layout that pleased my eye.  Then I went and got my wife for an inspection.  She made tweaks here and there.  Then I took the bags of river pebbles that we had bought and filled in all of the areas between rocks where the underlaying tarp was exposed.  There were lots of crooks and crannies and we ended up needing more bags of pebbles than we had initially purchased.  Thankfully the bags of pebbles are pretty cheap ($3ish for a large bag).  Once the pebbles were in place the waterfall really looked good.
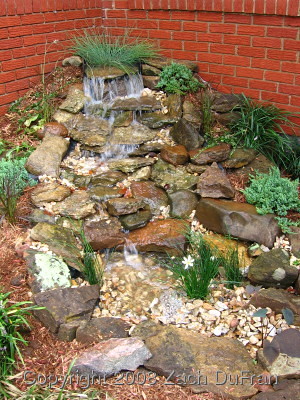
finished_full
Complete waterfall
Of course, the finishing touches were to get some aquatic plants and to landscape around the waterfall.
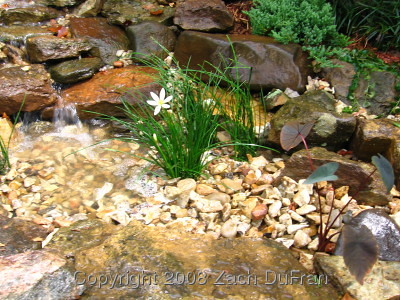
finished_pool
Waterfall color
waterfall_top
Water cascading down from the source

At the onset of spring this last year I looked out the window one morning to see a bunch of birds playing/showering in our waterfall.
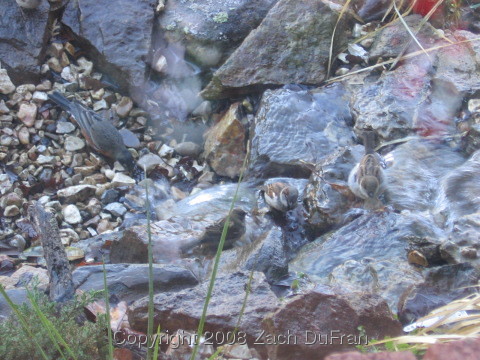
waterfall_birds
Birds at play(?) in the waterfall - or maybe just bathing
I'm not much of a bird watcher, so I don't know what type of birds these are, but I really liked their markings, so I took a couple of pictures of them.
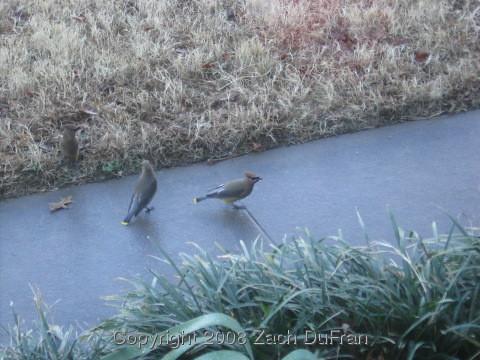
more_birds
I like the markings on these birds - anyone know what they are?  [Update: They're Cedar Waxwings.]
Though the word "natural" may not be the best word to use for the waterfall surging out of the little hillock perfectly mounded against our red brick house - the scene has an authentic look to it.  The rocks are native to our region and we landscaped around the waterfall with evergreen plants that should keep our front flowerbed beautiful year in and year out with minimal maintenance.  In fact, the front flowerbed is really pretty all through the winter, even when everything else seems brown and dead.
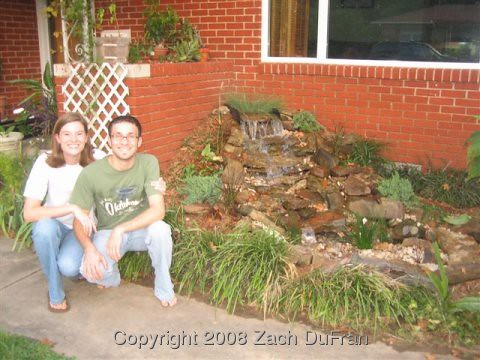
creators
My wife and I posing after our hard work

Wednesday, October 10, 2007

What is propagation?

I’ll start from the basics. The word propagation can mean several different things.  In the context of meteorology, we use the word "propagate" to describe the movement of certain weather properties of interest. In the context of plants, the word “propagation” refers to producing new plants from one of a number of different sources (i.e., seed or clipping).


I think my interest in propagation is three-fold:
1. I would like to have more plants without buying them,

2. it’s a fun challenge and


3. the science is intriguing to me.
There are a number of methods for propagating plants.  The most simple is probably division. Many plants will reproduce underneath the soil, sending off runners and developing new plants. In this case, you can divide these plants by pulling the roots apart and separating the individual plants. Many times a plant can even be successfully divided by cutting a large root ball apart. This works well for: mature asparagus ferns, aglaonemas, wandering jew, moneywort, etc.


Another simple method of propagation is to root soft cuttings in a vase of water. Some plants that this works well for are: again wandering jew, pothos ivy, many philodendrons, lipstick plant, and pineapples.

The technique of layering deals with forcing roots to form along the stem of a plant and then removing that section of plant when the roots are mature enough to support the section without the mother plant. Did that make sense? One way of doing a layer propagation is called air-layering. It’s a neat concept that I have tried many times, with no success. First, a set of leaves is removed from a softwood stem of a plant, bush or tree. [By the way, softwood is often defined as an area of new growth that would make a “snapping” sound if you were to break it]. Next, an incision is made in the stem at this location. It is best to apply rooting hormone to the wound. (Of course, I have never had a successful rooting, so what do I know about what’s best!?!) A toothpick (or a piece of one) can be inserted in the cut to hold it open, and other toothpicks may be used as a splint, to hold the stem together (as if it were a broken bone). Lastly, the area should be wrapped in plastic with moist peat moss inside. This dressing allows the entire plant to support the section of plant which has been wounded, while encouraging roots to form in the peat moss. Here is a good website with instructions and visualizations.

There are other forms of layering, as well. Regular layering (sometimes called mound layering) is accomplished by building up the dirt around the base of a plant or bush and running several branches of the bush through the mound. Some plants will freely begin to produce roots at nodes along the buried branch or stem. Other plants require the extra encouragement of a wound and some rooting hormone.


Some of the more simple forms of propagation include starting plants from seed or corm/rhizome/bulb separation. This separation technique is much like division except that rhizome separation often requires cutting a rhizome into pieces, which is a scary step for someone who has a plant they want to multiply, not kill. Irises can be propagated by simply cutting the creeping rhizome into pieces. Conversely, tulip bulbs can simply be separated when new bulbs are formed each year.

There are some more advanced techniques that I may try eventually, but first I need to master (or at least have some limited success) with the more primitive forms of propagation. Some advanced techniques are tissue culture (micro propagation) and grafting. Tissue culture is used extensively in the nursery business, so I am told. It sounds a little complicated, but it turns out that it is not much of a mystery at all. Grafting is a common technique used for rose gardening and for fruit trees. It can be accomplished by removing a single bud from the desired rose/fruit parent plant. Then a special inverted-T shape incision is made in the host plant to hold the bud. The bud is secured in place and the plant is watered as normal. A successful grafted bud will begin to grow in about a week. An unsuccessfully grafted bud will turn black pretty quickly.

I’ll be posting again soon, chronicling “My Attempts at Propagation.”  Stay tuned!