Friday, November 22, 2013

Ceratostylis rubra in bloom

I have admired Ceratostylis rubra for several years.  It is not a flashy orchid with big, colorful flowers or even fragrant flowers.  It's just simple and interesting.  One of the features I really like is the woody look, caused by the papery, brown cataphylls that surround the base of each leaf.

Ceratostylis rubra

The flowers are also beautiful, if you take the time to look at them.  They are small and orange, but have the opalescent shimmer commonly found in orchids.  The center is pure white.  When I look at these flowers I think of creamsicle.

Ceratostylis rubra

I bought my plant in April and this is the first time it has bloomed for me.  Because the flowers are held so close to the plant, it is easy to miss when in bloom.  I was lucky to notice it and will have to watch closely for it each year.  I assume it will probably flower around the same time again next year.

Ceratostylis rubra

Friday, October 11, 2013

Greenhouse repair, stage 2

Before leaving for my annual trip to Florida, I was able to get the greenhouse put together again.  I spent about 10 hours (total) cleaning out the broken panel and patching it with clear tape.  If I told you there were 576 holes I would probably be lying.

Untitled
patched panel

Because there were actually more.

Untitled
patched panel
Once it was finally patched I sealed the ends with tape again and put the end caps on.  I put the panel back on top, flipping it over so the patched side is now down and the suspected stronger side is now facing up.  Some caulk and screws were all that was needed to make it official.

Greenhouse roof re-installed
It doesn't look great on the inside, but from the outside it looks okay and at least it is closed in once again.  I am hoping it will last a while before I have to actually replace any of the panels.

Friday, August 9, 2013

Greenhouse repair, stage 1

It has been four years since I built my greenhouse.  All in all, I am very happy with it.  This Spring we had some severe thunderstorms roll through (quite typical for central Oklahoma).  One of them dumped a lot of hail about the diameter of a quarter.  Many people in town got new roofs after the hail storm, but our new roof withstood the hail without any damage.  The greenhouse didn't fair so well.

Greenhouse hail damage and repair
Roof of greenhouse riddled with holes from hail damage
The roof and walls of the greenhouse are made of triple wall polycarbonate.  There is one seam in the roof.  Based on my damage assessment I'm guessing that one of the sides of the polycarbonate must be tougher and more resistant to damage than the other side.  I had no idea when I installed the sheets.  Nor did I realize I was putting different sides up on the two pieces.  The repeated pounding of the hailstones punctured through the upper surface on one of the polycarbonate sheets and left the other sheet unharmed.  I wish I had known this when I was building the greenhouse.

Greenhouse hail damage and repair
The panel on the left is completely without blemish while the panel on the right has hundreds of holes.
You can also see where the panel has filled with water (top of the image).

At the time of damage I couldn't just remove the sheet and replace it.  For one, replacement material is expensive and difficult to procure.  I had to buy a huge sheet (8' x 36') and cut it down to manageable sheets to get it home the first time around.  It was also still getting down near freezing some nights at the time, so I couldn't leave the greenhouse unprotected.  Because I used triple wall polycarbonate the holes weren't actually exposing the interior of the greenhouse to cold air from outside.  There was still a layer of protection.

Greenhouse hail damage and repair
Seeds from our Sycamore tree and other junk has washed off the roof,
right into the channels of the polycarbonate panel.

I stalled and life was busy and in the meantime, the holes of the roof allowed all sorts of water and junk to get inside.  Because the ends of the panel were sealed shut, the roof actually filled up with water, to the level of the lowest hole in each channel.

Greenhouse hail damage and repair
Water draining from one of the channels after I removed a screw attaching the panel to the frame.

What to do now?  Well, I have removed the damaged sheet, which was very heavy with the added weight of the water.  I drained the water and I am in the process of cleaning it out.  This is a time consuming process and I'm afraid the final outcome will not be a clear panel.  The walls and other roof panel of my greenhouse still look about as clear and clean as the day I installed them, but this roof panel will likely not be as pristine.

Greenhouse hail damage and repair
Typical hole punched by hail

Once the cleaning process is complete I will be patching the (hundreds of) holes with clear packing tape.  I have patched some areas and then tried to shoot water through those channels to flush out the junk.  That didn't work as well as I had hoped, so I am going to try to use the holes to wash out the junk, and maybe also use a shop vac.

Greenhouse hail damage and repair
My patch job.  Not the prettiest thing around, but hopefully it will do the job.

After the junk is out, I will do all of the patching, re-seal the ends of the panel, flip the panel so the repaired side is down, and then reattach it to the roof.  With the repaired side facing down any "leaks" would just be allowing the warm air from the greenhouse into the cell, rather than cold outside air into the cell.  Also, if it is true that the sides of the polycarbonate differ in strength then this puts the stronger side facing up to weather the next inevitable hail storm.

Stay tuned to see how the repair progresses.

Wednesday, July 31, 2013

Anthurium inflorescences

My aroids don't bloom all that often.  So when they do, it is worthy of celebration.

This growing season I have had three of my Anthuriums produce inflorescences.  This summer has been relatively cool and moist, which I am sure is a driving factor.  I have shown pictures of my favorite species, Anthurium scandens before.  It continues to send out tiny inflorescences for me year-round.  This summer has been no exception.

Anthurium scandens inflorescence


Anthurium scandens inflorescence
Anthurium scandens inflorescence with quarter for size comparison


Anthurium paraguayense inflorescence
Anthurium paraguayense inflorescence

Anthurium paraguayense is a bird's nest style Anthurium with large leaves that have wavy margins.  The inflorescence is quite boring, but on the plus side, there were two of them - the second about 3 weeks after the first.  Had I been more proactive I could have saved pollen from the first inflorescence and tried to pollinate the second.  Next year!

Anthurium verapazense

Anthurium verapazense is becoming one of my favorite Anthurium in my collection.  The leaf shape is really nice and it puts out leaves at a pretty fast rate, compared to several of my other plants.  I was expecting another boring green inflorescence and was really happy to find this vibrant magenta spadix!

Anthurium verapazense inflorescence

I guess I should be watching for pollen on the off chance that I get another inflorescence to follow in the next couple of weeks.

Friday, July 26, 2013

An update on my batch of lemonade

In my last post I talked about trying to make lemonade out of my broken Amorphophallus atroviridis leaf.  Last night I impatiently opened the container, checked the leaves, and then gently brushed aside the vermiculite to see if there was anything at the end of the leaf cutting.

Amorphophallus atroviridis
Rooted Amorphophallus atroviridis leaf cutting
I was ecstatic to find several roots growing there.  I snapped a quick picture and returned the cutting to the container, gently pushing the media back in place.  I didn't want to disturb the two other cuttings.  I have a feeling all three of them have rooted because none of the leaves have wilted.  At this pace I imagine I will have some tubers forming in the next month and then maybe a new leaf will emerge from each of those tubers in a couple of months after that.

Friday, June 28, 2013

Making Amorphophallus lemonade

Last week my Amorphophallus atroviridis arose from its winter-long slumber and burst from the ground with the prettiest leaves you've ever seen in your life.  I was taking photos of both surfaces of the leaves when the unthinkable happened.  One moment the plant was fine; the next moment the petiole was broken off at the surface.  That second moment was not a good moment.

Amorphophallus atroviridis
Amorphophallus atroviridis - adaxial leaf surface
Amorphophallus atroviridis
Amorphophallus atroviridis - abaxial leaf surface

So what did I do?

I cried.  (I bet you thought I was going to say I made lemonade.)

What did I do next?

I cried some more.

But after that?

Are you kidding?  I was still crying.

Eventually I got my life back together and decided to do something with the beautiful leaf that used to be a plant.  I stuck it in a vase of water and sent an email to my friends, asking if they had tried rooting Amorphophallus from leaf cuttings before.  I was pretty sure I had heard this was possible, and I had already successfully done this with Zamioculcuas, another tuberous aroid.  Yes, some of them had!  Their suggestions were along the lines of how I normally treat plant cuttings.  Prepare a container with a good rooting media, thoroughly moisten the media, use a little rooting hormone (or crushed Advil) on the cut end of your stem, make a divot in your media, insert the cutting, pack media around the stem so it is stationary, seal the environment to maintain high humidity.

Untitled
Amorphophallus atroviridis leaf cuttings

The media can be perlite, vermiculite, soil or other things.  I used vermiculite because that is what I had on hand and because it has worked well for me for other types of cuttings.

Untitled
Cuttings inserted in the media

Many people will put their cuttings in pots and then put the pot in a Ziplock bag.  I like to use take-out containers.

Untitled
Sealed in their rooting environment

With time and patience, the tip of the cutting will eventually form roots and a new tuber.  The leaf will probably die back and new growth will emerge.  That's if all goes well.  If all doesn't go well, the leaves will perish, leaving no tuber or roots behind.  Today I read an article on success rates of rooting different species of Amorphophallus from leaf cuttings.  The success rate is very low for this particular species.  I hope that I am lucky and get at least one tuber out of this experiment.  If so, I will have made lemonade.

Monday, June 17, 2013

The effects of herbicides

About a month ago I noticed something odd about our Redbud (Cercis) trees.  The newest leaves were opening up all shriveled, deformed and partially yellow.  I had not closely watched leaves unfurling in the past, but I was pretty sure they opened as little hearts folded in half and just grew larger with time.  They didn't start out as these strange, malformed stingrays.

deformed Redbud leaves
Deformed Redbud leaf
deformed Redbud leaves
Deformed leaves
I asked some of my expert plant friends about this, especially those that live near me and are familiar with Redbuds.  One of them said that it looked like damage from herbicides.  I was pretty sure it couldn't be from herbicides since I don't use them myself and because these trees are in my backyard, which is pretty well surrounded by bushes and trees.  Also, the nearest house to these trees has been vacant for 7 years now.  None of our immediate neighbors have the immaculate monoculture lawns of those who spray their lawns with weed killers and fertilizers.  I did notice that the tree in the front yard across the street from our house also had the same pattern with their newest leaves, although to a lesser extent.

healthy Redbud leaves
Regular, healthy leaves
More recently the trees have been putting out regular leaves again, leaving a very clear set of affected leaves along each branch.  I took more photos and sent these to my friends.  The same friend who had guessed herbicide damage found an excellent article on Redbuds that explains they are very sensitive to pre-emergent herbicides, the kind people spray on their lawns just before the grass comes out in the spring.  The photos were eerily similar (see page 6).

deformed Redbud leaves
Deformed leaves surrounded by healthy growth
It seems as though our trees are suffering from someone that sprayed their lawn down the street, most likely on a windy day.  It's not surprising that a chemical whose purpose is to kill weeds would also negatively impact other plant life.  I like my yard to look nice - grass not too high and not too many weeds - but I have never given in and hired one of those companies to spray my lawn.  This is mostly because of the cost, but also because I don't like chemicals being used when they aren't necessary.  Now I have an additional reason to dislike these unnecessary chemicals.  The good news is that the damage is limited to some ugly leaves - at least as far as I can tell.  Hopefully there isn't enough of this being used that it is getting into our water supply at high concentrations.  We stopped drink tap water a couple of years ago.

Tuesday, June 11, 2013

2013 OKC Cacti and Succulent Show

Christie, Myla and I attended the Central Oklahoma Cacti and Succulent show and sale in Oklahoma City a couple of weeks ago.  This is a really good annual show with tons of plants for sale and a small show area for nice specimens.  Even though I am not mired in the cacti/succulent hobby, there are plenty of plants that are tempting and others that are neat to just view from outside looking in.

Investigating a Euphorbia
Checking out a neat Euphorbia

Adenium_and_pretty_girls
My pretty girls with a blooming Adenium

It was also a lot of fun to surround the little one with plants again.  She is going to be quite used to spending time in gardens and plant shows.

Euphorbia
A neat Euphorbia

Euphorbia
Another neat Euphorbia

As always, there were hundreds of different Euphorbia.  I was tempted to buy a couple, but I restrained myself.  In the end, I only bought a single plant, Stapelia flavopurpurea, which fit my qualifications of being a good value, already rooted (I'm not good at rooting cacti/succulents from cuttings), and already fits in one of my collection niches.  The plant has a couple of small buds, so I hope to share some bloom pictures in the next month.

cacti_tray
Tray of starter plants.

There were many trays of very reasonably priced starter plants. You could start a collection on a limited budget and get a nice variety of plants.

Adenia_spinosa
Adenia spinosa

Haworthia_truncata
Haworthia truncata

Haworthia_truncata_flowers
Haworthia truncata flowers

Sometimes it is confusing to me why certain plants are included in the cacti/succulent hobby.  For instance, how does the beautiful prize-winning Operculicarya (below) qualify as a cacti or succulent?  I think this hobby grouping is loosely defined, unlike many other plant societies (Orchids, Begonias, Aroids, for instance), which are specific taxonomic families.

Operculicarya_decaryi
Operculicarya decaryi

Trichocereus_bridgesii_monstrose
Trichocereus bridgesii monstrose

In the assorted monsters category I found the Trichocereus (above), reminiscent of the graboids from Tremors or the asteroid worm creature (exogorth) that tries to eat the Millennium Falcon. Also there was the strange show plant, the hybrid Euphorbia GH211 (below), which could have been in any number of Sci-Fi movies.  Just imagine a crowd of screaming people running away as it trudges down the street, maybe devouring a dog that couldn't get away fast enough.  Yes, it has definitely been in a movie or two.

Euphorbia_GH211_hybrid
Euphorbia GH211 hybrid

It seems this annual show is going to be a fixture for me.  I was told that next year's show is going to be even bigger and held at a larger venue.  My name is on the mailing list, so I should be notified as it approaches.  I look forward to it!

Thursday, May 23, 2013

Trip Report: Miscellany in Delhi

I got to spend a week in New Delhi, India in April.  I didn't have a lot of free time outside of my work obligations, but I spotted some interesting plants here and there.  The part of town I was in was very green, with trees everywhere.  Even still, with India being highly vegetarian, I probably ate more plants than I saw.

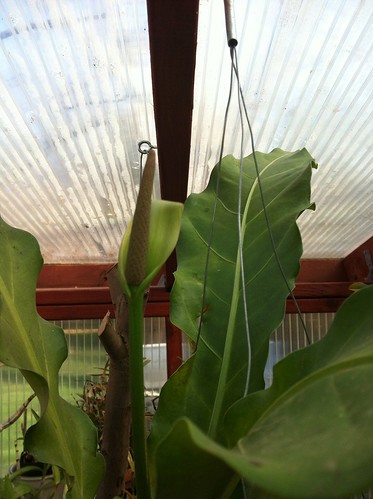
My hotel had some nice palm trees on the grounds.  When I think of India palm trees aren't the first plants that come to mind - especially far from the coast.  However, I know very little about Indian flora.

fishtail palm
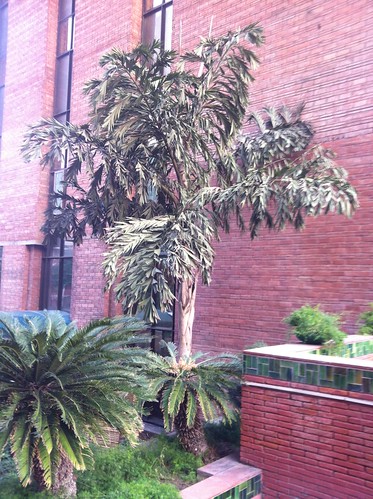
Caryota urens, Fishtail Palm

palm
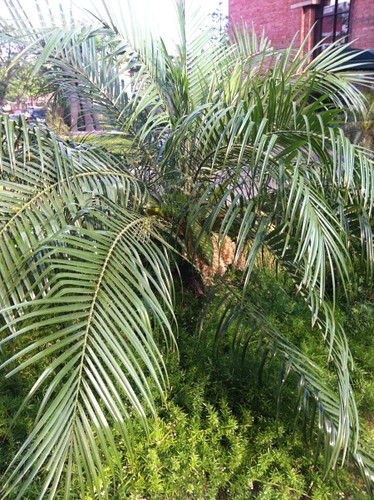
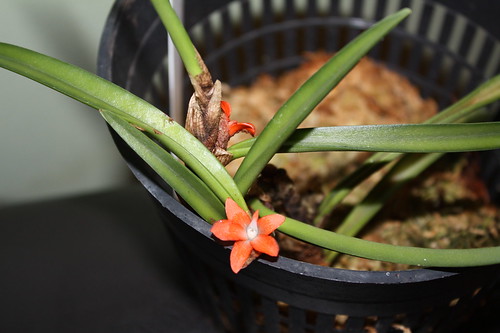
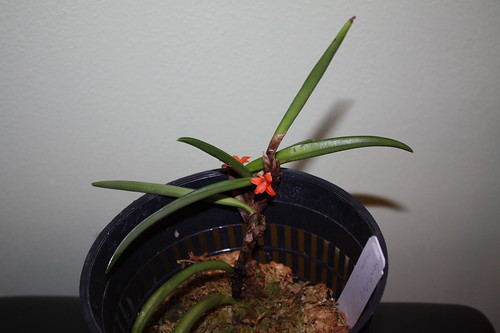
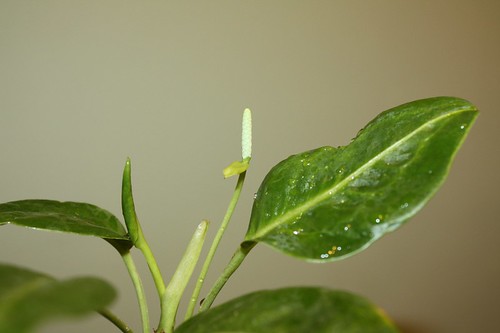
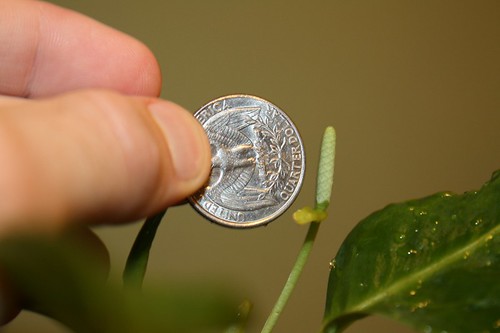
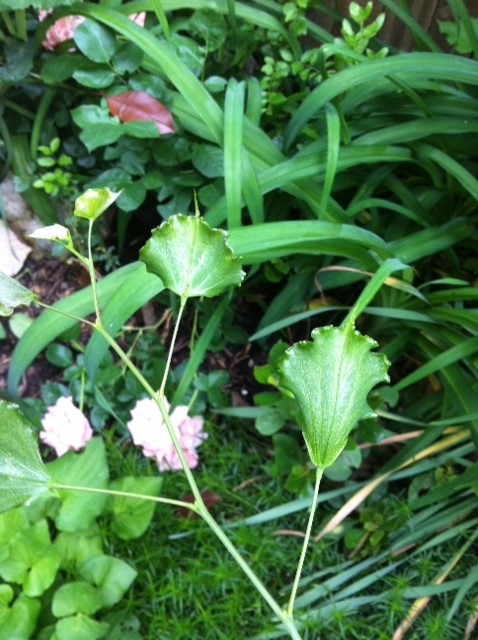
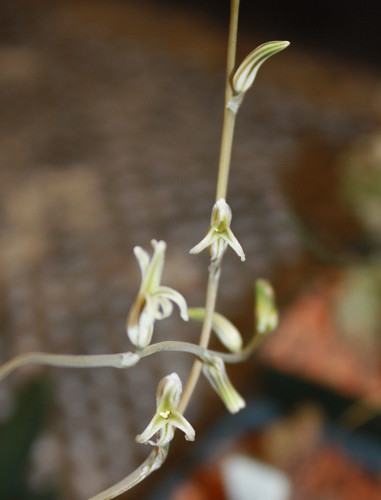
Phoenix roebellini growing in a container.  Notice the white flowers.

palm inflorescence
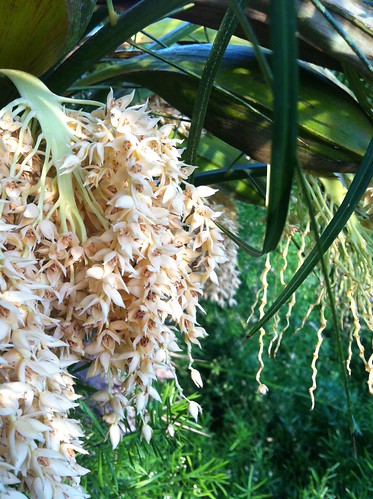
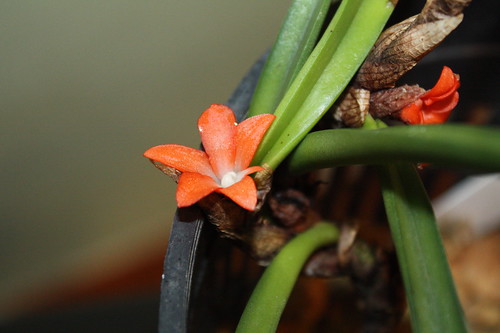
Close-up of Phoenix roebellini flowers.

There was a beautiful lotus pond at the hotel.  In the morning and early afternoon the flowers were open.  By the heat of the afternoon they would close.

Lotus pond
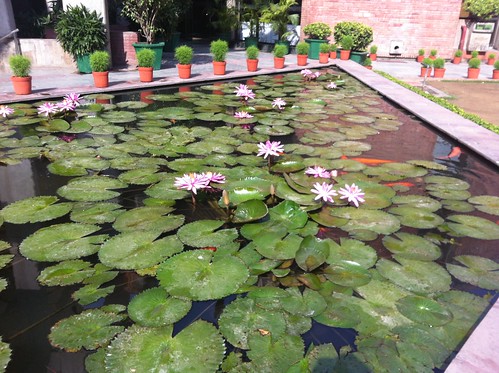
Lotus pond at the hotel

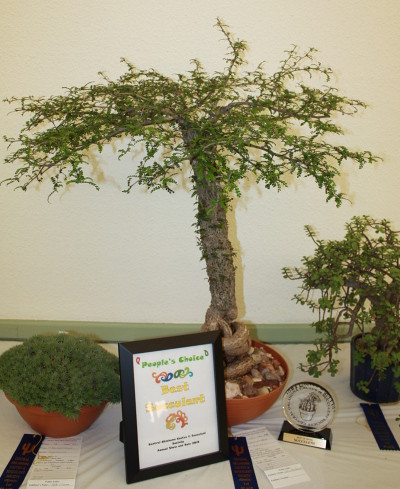
My hotel also had  a collection of bonsai trees.

bonsai Ficus
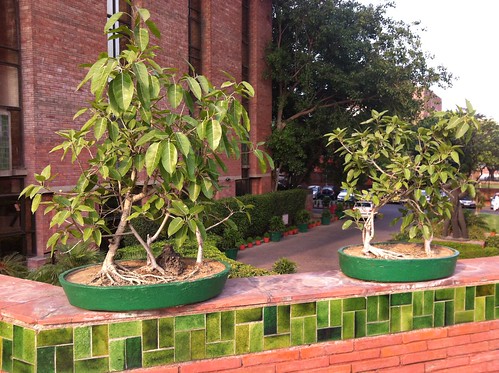
Ficus bonsai at my hotel

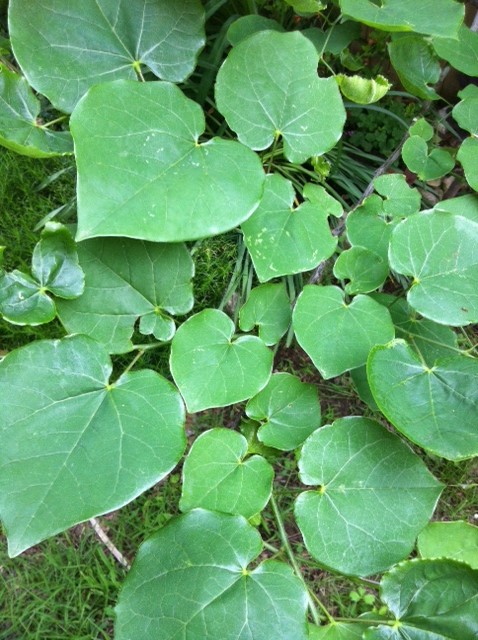
I walked about a mile from the hotel to the Lodhi Gardens.  Along the way I passed the India Islamic Cultural Centre, where there was a nice aroid (maybe Epipremnum) growing on the trunk of a deceased tree.

Epipremnum
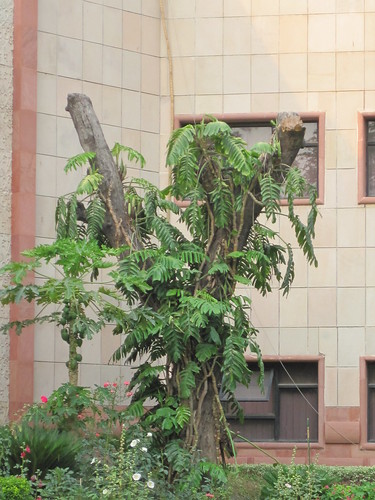
Probably an Epipremnum

The Lodhi Gardens is a public park where a lot of families and friends congregate to just enjoy the outdoors.  Inside the gardens are several tombs and a mosque, beautiful old buildings dating back to the 1400s.

Lodhi Gardens
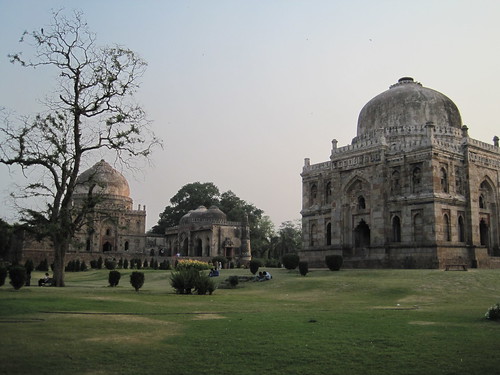
Tombs in the Lodhi Gardens

Ficus religiosa
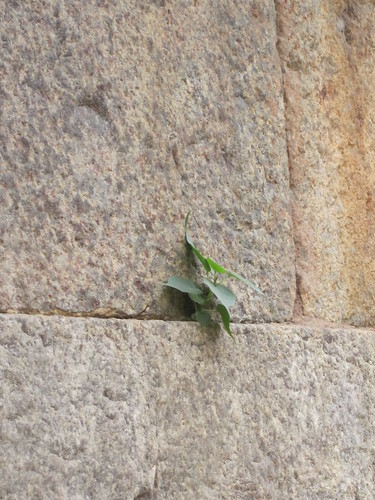
A tenacious Ficus religiosa taking root in the cracks of an old tomb. Hopefully someone will yank it out before it turns this tomb into a pile of rocks.

Lodhi Gardens
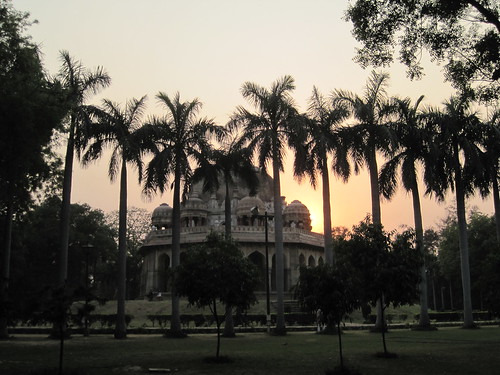
Sunset at the Lodhi Gardens

I wandered around the gardens until sunset, taking photos and enjoying the hot weather.

Lodhi Gardens
Beautiful Cannas in front of a beautiful tomb
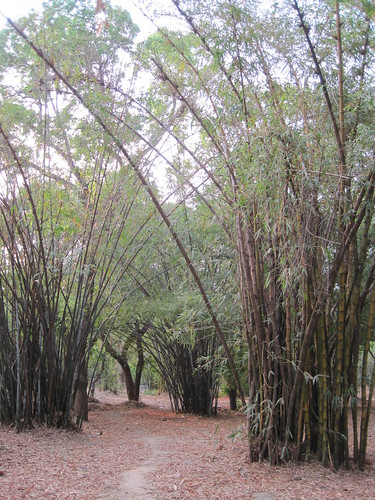
Bamboo stand
Stands of bamboo

Agave babies
Agave plants forming on the bloom stalk of a parent plant

Many of the trees in the park were tagged with their species names, including this Cinnamomum camphora.

Cinnamomum tree
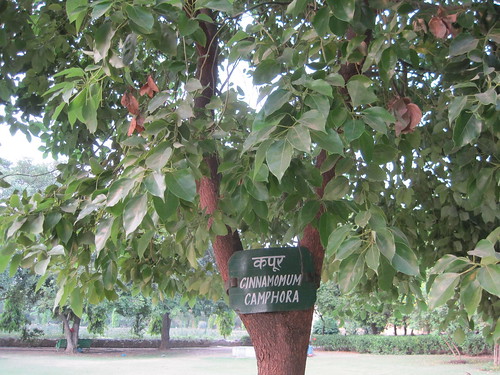
Cinnamomum camphora at Lodhi Gardens

There were many interesting birds in the park and a large placard that identified some of them.  I identified Parakeets, Common Mynah, and House Crow.

bird identification chart
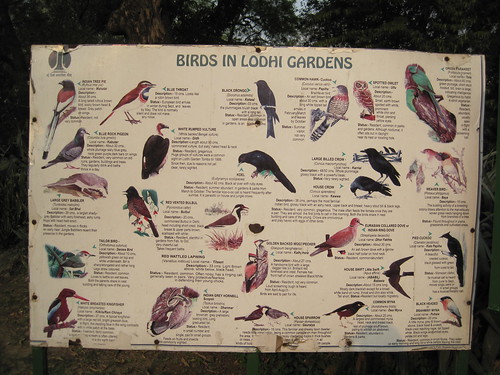
Placard of birds that can be found in the gardens

House Crow - Corvus splendens
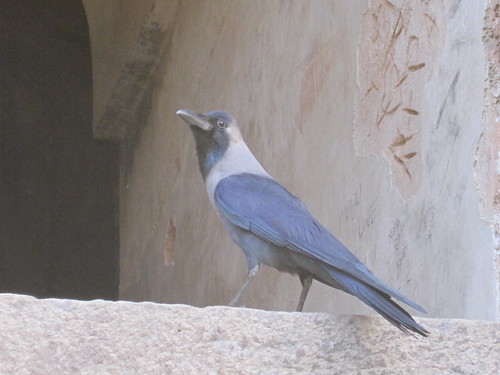
House crow (Corvus splendens)

Within the grounds of Lodhi Gardens is the "National Bonsai Park." Apparently it closes earlier in the day, so I wasn't able to go inside.
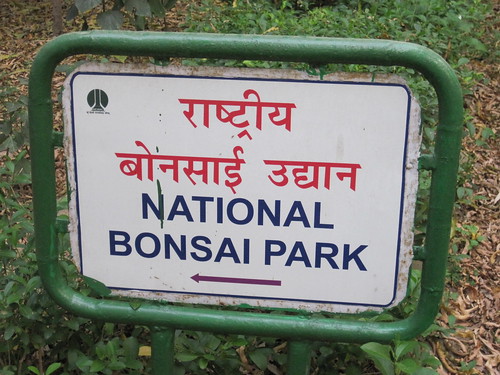
National Bonsai Park at Lodhi Gardens
Closed.

Down the street from Lodhi Gardens is the Safdarjung Tomb, which is a beautiful example of Mughal architecture.  It looks a bit like the Taj Mahal.  On the grounds was a beautiful fl0wering tree native to Madagascar.

Safdarjang tomb
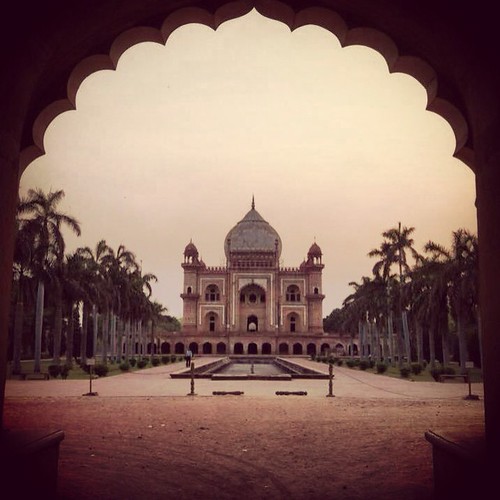
Safdarjung Tomb in Delhi

Delonix regia
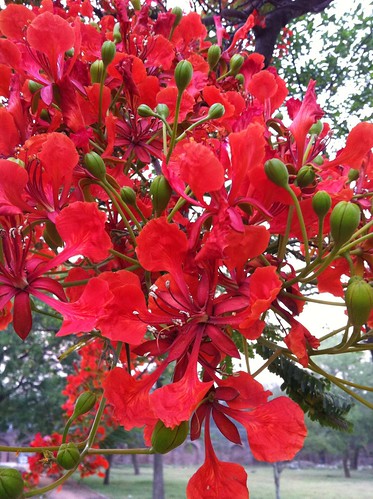
Beautiful flowers of Delonix regia, a Madagascan native.

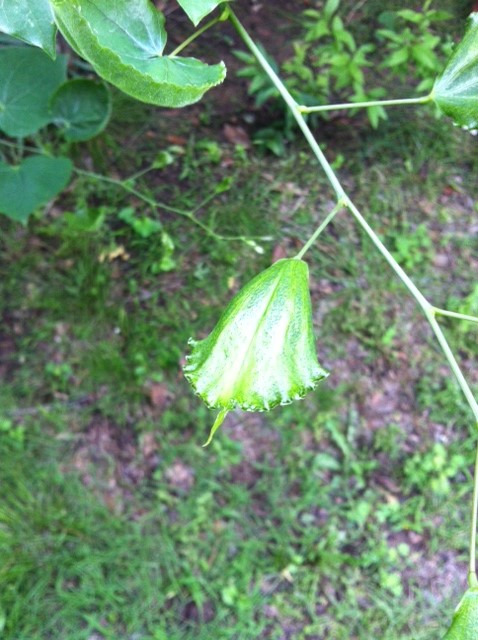
On the walk back to the hotel I passed a tree with interesting flowers hanging from inflorescences under the canopy at eye level.  It was dusk and my camera battery was dead, so I had to use my phone camera with flash, which resulted in a less than stellar picture.

Kigelia africana
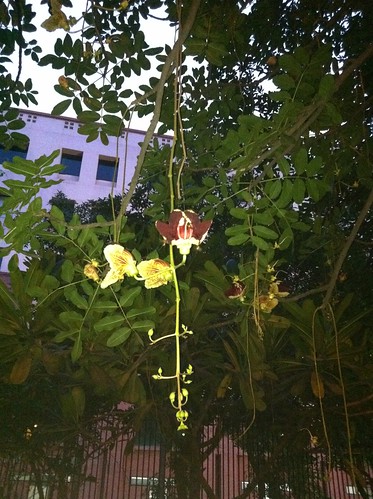
Flowers of Kigelia africana

Some friends helped me identify this tree as Kigelia africana, the Sausage Tree.  I have seen these trees at Fairchild Tropical Botanic Garden in Miami, with their large seed pods that look like sausages, but I had not seen them in bloom before.

I really enjoyed my limited leisure time in Delhi and I hope to get to visit India again some day.