Tuesday, September 29, 2009

Greenhouse update - Phase 4: Framing

After a couple of weeks of inactivity, we began framing on Sunday.  In fact, we did more than begin!  My father-in-law has framing experience from building several houses, 1 wedding chapel and a number of other projects.  He has been a huge help.  In fact, he's pretty much been doing the framing while I hand him the tools. :)  But I'm learning.

attaching_first_wall
Bolting down the first wall
Even with several snags along the way, all of the walls were erected in a mere 5 hours.  That included a couple of breaks to go and get supplies and to partake of refreshments and dinner.

rafters
End rafters added and long wall studs being placed.
The end rafters were also mounted.  At the end of the day, I couldn't help but bring out one of my new shelving units and sit a couple of plants on it in the greenhouse.  I just wanted to get a feel for how much space the shelves would take up in the greenhouse.  It's very exciting.

framed_day1
End of the first day, with all walls framed. Notice my nice shelf with a couple of future residents checking out their new home.
I'm sure that the finishing touches will take a while, but I am very encouraged to see how quickly it has gone up so far.  Soon we will be placing the door and adding the polycarbonate.  Stay tuned!

See other phases of the project here:

Monday, September 28, 2009

First Fall blooms

This year we decided to invest in year-round color in our corner garden.  For the most part, we really just had reliable color in the Spring, with our tulip, daffodil and crocus bulbs.  So we bought several Summer blooming perennials (Gaillardias) and also a couple of late-Summer/Fall blooming flowers (Asters).

first_asters
The first Aster blooms in our corner garden
We bought the Asters a couple of months ago and planted them at a time when it was rather hot and dry here in Oklahoma.  The result is that only about half the plants are still alive.  The good news is that some of them made it and are blooming now, providing some nice color to our garden.  With any luck, this should result in even more of these little guys coming up next year.

gaillardia_buds
New buds on my Prairie Gaillardias (Gaillardia aestivalis v. flavovirens)
Even with the first cold front coming through over the week, signaling the onset of Fall, the Gaillardias have continued to bloom.  There are lots of seed heads laying on their sides right now - potential for the coming year.

spent_gaillardia_tokajers
Spent blooms of a Gaillardia 'Tokajer' that has been setting seed in the garden.

Wednesday, September 23, 2009

The first real quince fruit

We have a large quince bush in our backyard that presents a beautiful display of color in the early Spring, late Winter.  A number of people have asked me if it produces fruit and I always reply that it is just a flowering quince.  My neighbor, who has a degree in landscaping, told me that it probably still produces fruit.  Until recently, the only thing I had seen that resembled fruit was a little hard, dried and shriveled brown thing that I wasn't really sure about.  I suspected it might be something that wasps make, called a gall, after reading about them in a plant book.

quince_gall
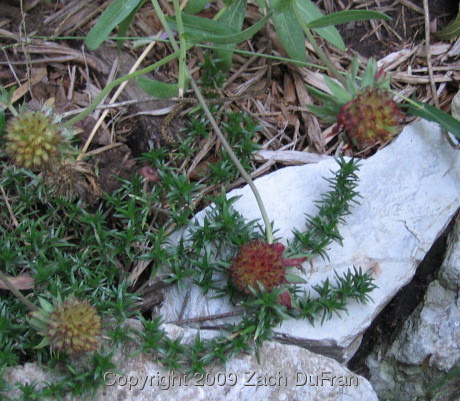
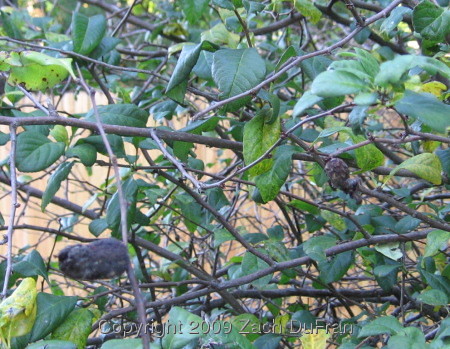
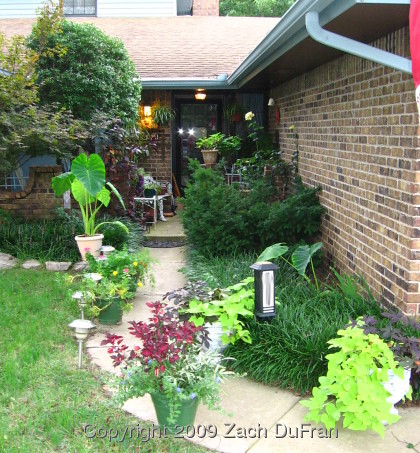
Unknown growths on my quince bush (foreground left and background right). Might be a gall produced by a wasp.
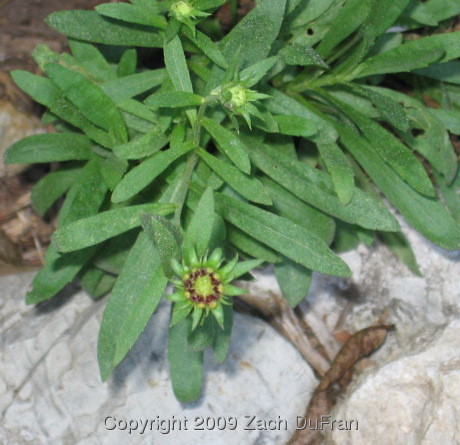
I've tried looking online for similar galls on quince bushes, but haven't found any.  I'm not really sure what those things are.  But sometime over the last week I spotted a definite fruit on my quince bush, for the first time.  This bush is just covered in blooms in the Spring, and yet, somehow, only one fruit formed on the whole bush.

quince_fruit
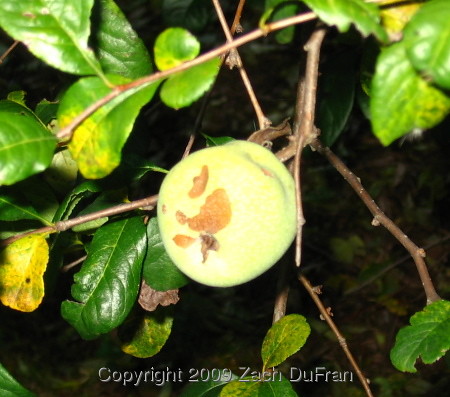
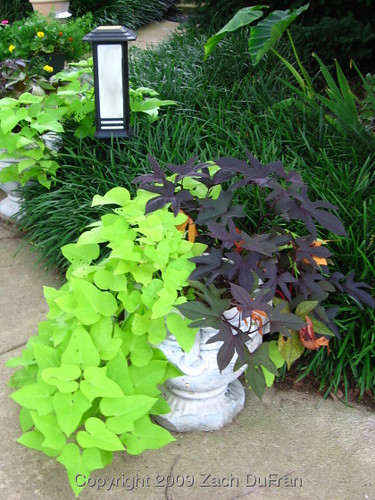
The first real fruit that I have found on my quince bush (Chaenomeles speciosa)
I scoured the bush, looking very closely at every branch, trying to find additional fruits, but the only thing I could find was what looks like 2 dead fruits that might be from last year.  I'll have to look more closely in the future.

quince_dead_fruit
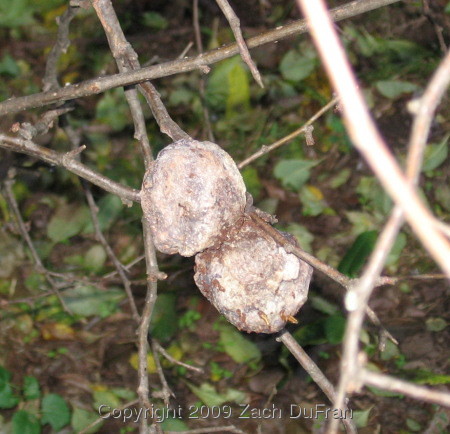
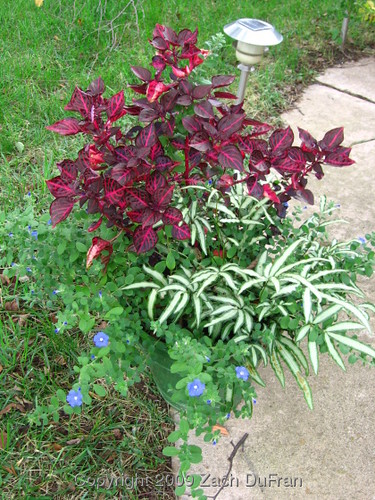
Dead fruits overlooked until recently and possibly produced last summer.
If anyone knows what the mystery growths from the first picture might be, please let me know!

Monday, September 21, 2009

Summer container arrangements

I attribute most of my plant interest to my Mom and my grandmother.  I spent time with both of them growing up, walking around the yard and watering plants while learning their names.  My mom has always had really nice pots of plants along the front walkway to the house and covering the front porch of the house where I grew up.

moms_walkway
The walkway to the front door of my parents' house is nicely shaded and always full of plant life.
This year is no exception.

moms_potato_vines
Sweet potato vines
The front yard is shaded pretty heavily by a large River Birch tree.  It makes for a great location to grow many different plants.  This year there are containers with sweet potato vines, asparagus ferns (my  mom's favorites), marigolds, elephant ears and other foliage plants.

moms_blue_and_red
My mom's colorful combination of summer annuals
I really like this combination for it's variety of textures and colors.  Job well done, Mom!

Friday, September 18, 2009

Greenhouse update - Phase 3: Anchoring

In order to tie the masonry base of the greenhouse to the framing above, I had to affix anchor bolts to the cinder block structure.  I used 10" Simpson L-bolts and set them in concrete about every 3 feet along the top of the wall.

anchor_bolts
Anchor bolts placed in concrete
At the same time, I stuck a 24" length of rebar in each of the concrete-filled holes, for better stability of the walls.  After drilling precisely-placed holes in the base boards of the framing, we can now attach the walls to the cinder block and everything will be very solid.

I am using 1x6 decking boards to cap off the holes of the cinder block wall.  These 1x6 boards will lay just beneath the regular 2x4 framing.  Drilling the holes in the correct location was not an easy task, but the first board is now attached and the others should be a little easier.

anchored_board
1x6 tied down with anchor bolts
As you can see, there is still plenty of room on the bolt to lay a single 2x4 lengthwise on top of the 1x6.  Assuming I measured correctly when I set the bolts in concrete, the nut should be just at the top of bolt when the 2x4 is attached.

Framing should start in about a week!

See other phases of the project here:

Thursday, September 10, 2009

Greenhouse update - Phase 2: Staining

One of the requirements for us building a greenhouse on our back porch is that is must look nice from the outside as well as the inside.  It can't be some unsightly building with a garden of Eden inside.  That's why we plan to eventually cover over the cinder block with brick that matches our house.  That's also why we decided to stain all of our lumber before doing the framing.

staining_station
The staining station where Christie tirelessly stained all 19 2x4s and 2 long 1x6 decking boards.
Christie spent several hours over the weekend, staining our standard 2x4s and base boards, while I was finishing with the block laying.  We chose a very red stain color, which matches the brick of our house very closely and contains all of the sealant stuff to help protect the wood for a long time.  Hopefully we won't have to re-stain the wood any more often than 8-10 years or so.

boards_and_brick
Stained boards laying up against the matching brick of our house
With the last block in place, we are ready to start the framing!

See other phases of the project here:

Wednesday, September 9, 2009

Liriope in bloom

I'm not sure what it is about this year, but I'm thinking it's the late summer rain.  Whatever it is, the Liriope (Monkey grass) is loving it.

liriope_blooming
Liriope muscari in my front flowerbed, next to the waterfall.
Liriope is all over town, gracing the shady spots under trees, flowerbed edges and garden problem spots.  And this year it is all covered in purple blooms.  I have never seen it bloom so profusely before.  Even the small starts that we recently planted at my parents-in-laws wedding chapel are blooming - and some of them are just inches tall!

Tuesday, September 1, 2009

Greenhouse update - Phase 1: Masonry

This weekend we got down to business on the greenhouse construction.  I spent a couple of hours on Saturday gathering supplies.  I made a trip to Lowe's to get two truck fulls worth of  lumber and cinder blocks.  I honestly won't need the lumber for a little while, but I wanted to make best use of the 10% coupon I had.  I also purchased the mortar mix, rebar pins and anchor bolts that will be used in the construction of the walls.

mortar_bolts
Mortar mix, anchor bolts and rebar pins
The 60 cinder blocks were loaded into the truck with a forklift, but since I don't have my own at home, they had to be unloaded by hand...  That's a lot of blocks.

On Sunday, we got to work.  (Although Saturday wasn't exactly sitting on our butts!)  Christie and I carefully chalked the perimeter of the greenhouse.  Then I laid the first bed of mortar and carefully placed the first block.

zach_mortar_bed
Laying the mortar bed for the first block
The first couple of blocks were frustrating and tedious.  But a couple of blocks later and we were cruising.  I had some help from Christie and her dad and we were able to complete much more than I had expected!

cp_ron_laying_block
Christie and her dad laying block
After we were finished laying block for the day, Christie meticulously cleaned the tools and the work area, making sure that all of the mortar lines looked clean and filled.

phase1_close
Finish of the first day
See other phases of the project here: