Showing posts with label Greenhouse. Show all posts

Wednesday, September 16, 2020

Greenhouse update

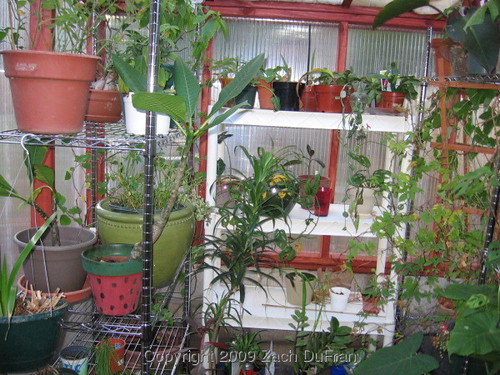
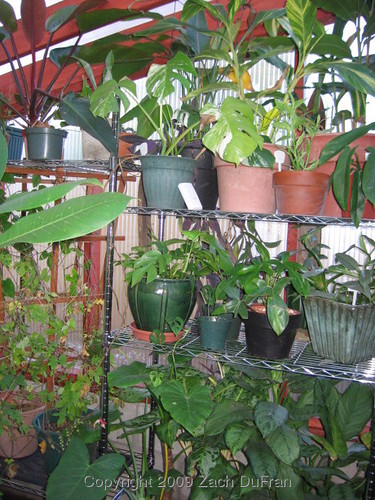
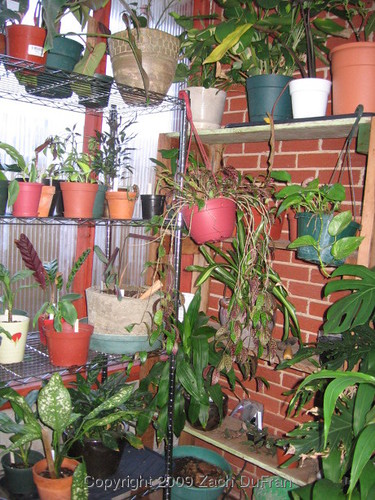
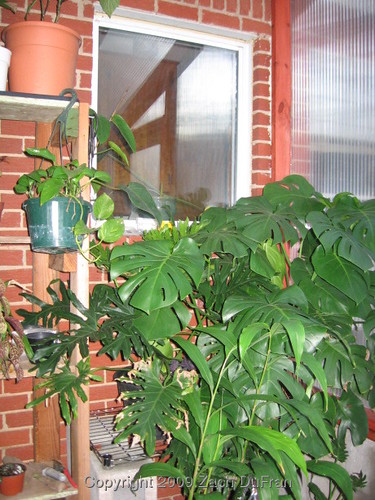
Since I haven't been keeping up with this blog for a while I figured I should provide a little update on my greenhouse. When you have limited growing space (don't we all?) and an ever-growing appetite for plants, it's hard to make space for everything.
Many of my Encyclia orchids are kept together on this top shelf for the brightest light.


Another top shelf is filled with cacti and succulents.

Over the years some plants have been neglected. Some plants get over-watered or under-watered, depending on where they are located and how they are potted. Over the last month I have done the most comprehensive greenhouse cleanup since I first built it. I didn't quite take everything out, but I did go through all 7 shelving units and remove empty pots, sweep out all the leaves from the floor, remove all the junk that was being stored under benches, and repotted plants that were in need of new soil or more space. 

Quite a few plants are hanging in the center of the greenhouse, taking advantage of every bit of available sunlight. It makes for less room to stand in the greenhouse, but that is a secondary consideration.

It was a big undertaking, but I'm really glad I took this on before moving all my plants back into the greenhouse for the winter. Probably a third to half of my plants come out of the greenhouse for the warm part of the year, but have to move back in during the winter to survive our cold weather. 

Wide-angle view to show most of the greenhouse at once.

It's this time of year when I start worrying that I won't be able to fit everything in. This year I think there might be enough room to get my plants in and still have a spot for me to stand to water things. That would be a big win!

This mid-level shelf is more shaded and has tender new seedlings and other plants I need to keep a close eye on over the winter.

During the winter the heater will really dry out the air in the greenhouse, so it's important that I keep a close eye on plants that are sensitive to dry conditions. For this reason I've tried to position some of these plants in positions where I they are front and center when I walk in the greenhouse.

Here's to hoping that the plants are happy over the winter and next spring I have lots of plants to share with friends!

Friday, October 19, 2018

That time of year...

It's once again that time of year when all of the plants have to be moved back into the greenhouse for a long winter slumber in semi-tropical conditions. Most of my plant collection consists of tropical and semi-tropical plants that can't take the cold Oklahoma winter weather. I keep my greenhouse thermostat at 60 Fahrenheit and it does a pretty good job of maintaining that temperature overnight during the winter, only falling lower when the outside temperature is down in the 20s for multiple hours. Prepping the greenhouse and then moving in all of the winter occupants is a pretty big chore which I knock out in two sessions of about two hours each.

BEFORE: Plumbago (Plumbago auriculata) in all it's glory
My greenhouse is pretty small - especially for the hundreds of potted plants I have. So I have to pack everything in tight, and in vertical layers. Some of the larger plants have to be trimmed back. This year our potted Plumbago really took off and was blooming something fierce last week, when I was moving all of the plants into the greenhouse. I saved it for last and finally took out the shears. After it's haircut it fit into the greenhouse pretty well, leaving just one tiny amount of floor space for me to stand in while I try to water all of the captive plants over the next 5 months.

AFTER: Plumbago (Plumbago auriculata) trimmed back and ready to pack into the greenhouse
Every year I make minor modifications to my greenhouse setup and where I place all of my plants. This year I decided to put my cacti and succulents (which can stay pretty dry over the winter) in the hardest to reach places. I think this will really help because it brings more plants which do need to be watered to more accessible locations and prevents me from accidentally watering something that would prefer to be dry. Also, some of those hard to reach places receive a little more light than other places and the cacti and succulents will like that. In previous years I had put my Plumeria plants on one of these high, sunny shelves. Since they drop their leaves over the dry winter, they really don't need to be in sunlight, so I have those scattered around in various places in the greenhouse this year.

Friday, October 11, 2013

Greenhouse repair, stage 2

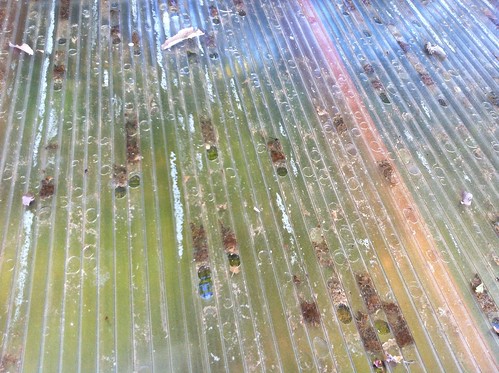
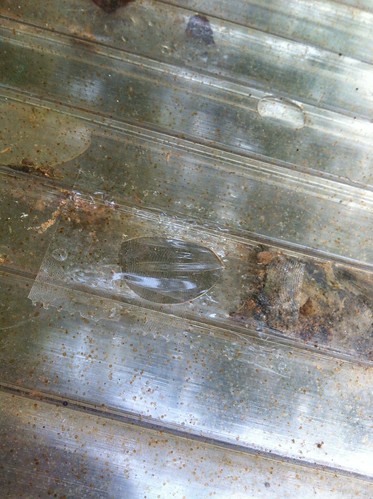
Before leaving for my annual trip to Florida, I was able to get the greenhouse put together again.  I spent about 10 hours (total) cleaning out the broken panel and patching it with clear tape.  If I told you there were 576 holes I would probably be lying.

Untitled
patched panel

Because there were actually more.

Untitled
patched panel
Once it was finally patched I sealed the ends with tape again and put the end caps on.  I put the panel back on top, flipping it over so the patched side is now down and the suspected stronger side is now facing up.  Some caulk and screws were all that was needed to make it official.

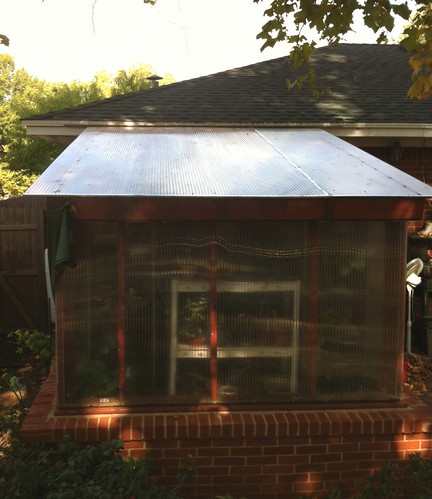
Greenhouse roof re-installed
It doesn't look great on the inside, but from the outside it looks okay and at least it is closed in once again.  I am hoping it will last a while before I have to actually replace any of the panels.

Friday, August 9, 2013

Greenhouse repair, stage 1

It has been four years since I built my greenhouse.  All in all, I am very happy with it.  This Spring we had some severe thunderstorms roll through (quite typical for central Oklahoma).  One of them dumped a lot of hail about the diameter of a quarter.  Many people in town got new roofs after the hail storm, but our new roof withstood the hail without any damage.  The greenhouse didn't fair so well.

Greenhouse hail damage and repair
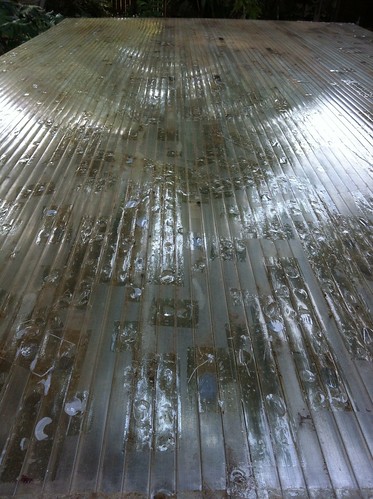
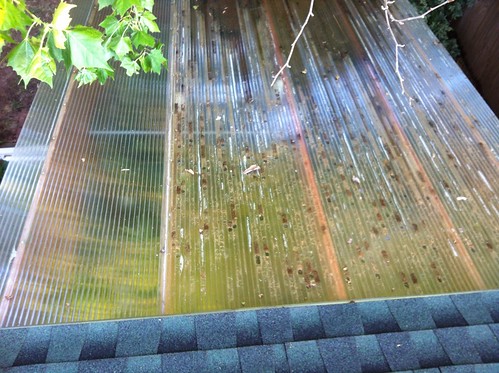
Roof of greenhouse riddled with holes from hail damage
The roof and walls of the greenhouse are made of triple wall polycarbonate.  There is one seam in the roof.  Based on my damage assessment I'm guessing that one of the sides of the polycarbonate must be tougher and more resistant to damage than the other side.  I had no idea when I installed the sheets.  Nor did I realize I was putting different sides up on the two pieces.  The repeated pounding of the hailstones punctured through the upper surface on one of the polycarbonate sheets and left the other sheet unharmed.  I wish I had known this when I was building the greenhouse.

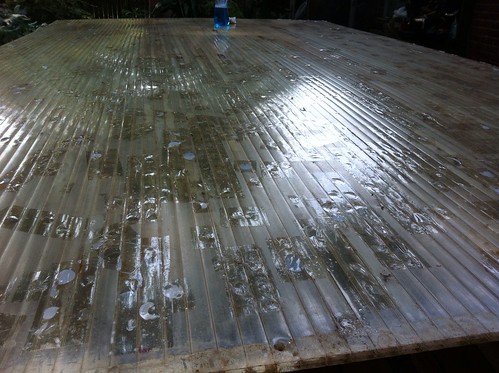
Greenhouse hail damage and repair
The panel on the left is completely without blemish while the panel on the right has hundreds of holes.
You can also see where the panel has filled with water (top of the image).

At the time of damage I couldn't just remove the sheet and replace it.  For one, replacement material is expensive and difficult to procure.  I had to buy a huge sheet (8' x 36') and cut it down to manageable sheets to get it home the first time around.  It was also still getting down near freezing some nights at the time, so I couldn't leave the greenhouse unprotected.  Because I used triple wall polycarbonate the holes weren't actually exposing the interior of the greenhouse to cold air from outside.  There was still a layer of protection.

Greenhouse hail damage and repair
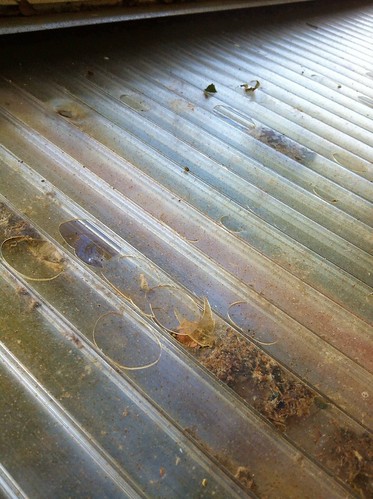
Seeds from our Sycamore tree and other junk has washed off the roof,
right into the channels of the polycarbonate panel.

I stalled and life was busy and in the meantime, the holes of the roof allowed all sorts of water and junk to get inside.  Because the ends of the panel were sealed shut, the roof actually filled up with water, to the level of the lowest hole in each channel.

Greenhouse hail damage and repair
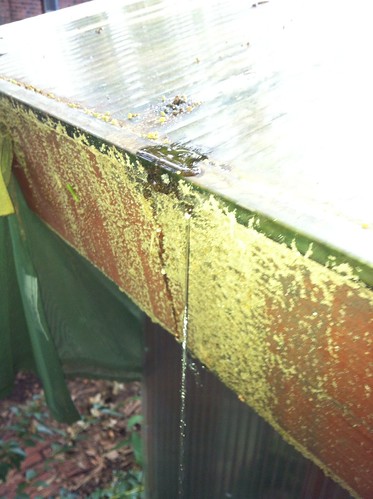
Water draining from one of the channels after I removed a screw attaching the panel to the frame.

What to do now?  Well, I have removed the damaged sheet, which was very heavy with the added weight of the water.  I drained the water and I am in the process of cleaning it out.  This is a time consuming process and I'm afraid the final outcome will not be a clear panel.  The walls and other roof panel of my greenhouse still look about as clear and clean as the day I installed them, but this roof panel will likely not be as pristine.

Greenhouse hail damage and repair
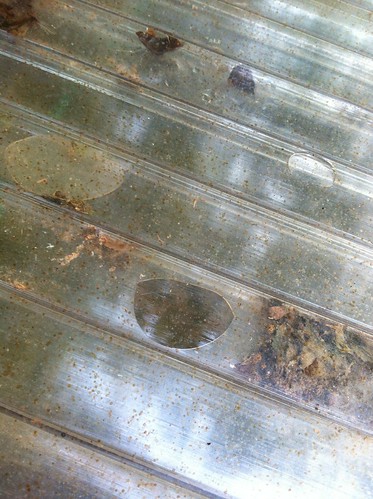
Typical hole punched by hail

Once the cleaning process is complete I will be patching the (hundreds of) holes with clear packing tape.  I have patched some areas and then tried to shoot water through those channels to flush out the junk.  That didn't work as well as I had hoped, so I am going to try to use the holes to wash out the junk, and maybe also use a shop vac.

Greenhouse hail damage and repair
My patch job.  Not the prettiest thing around, but hopefully it will do the job.

After the junk is out, I will do all of the patching, re-seal the ends of the panel, flip the panel so the repaired side is down, and then reattach it to the roof.  With the repaired side facing down any "leaks" would just be allowing the warm air from the greenhouse into the cell, rather than cold outside air into the cell.  Also, if it is true that the sides of the polycarbonate differ in strength then this puts the stronger side facing up to weather the next inevitable hail storm.

Stay tuned to see how the repair progresses.

Friday, January 13, 2012

Greenhouse facelift

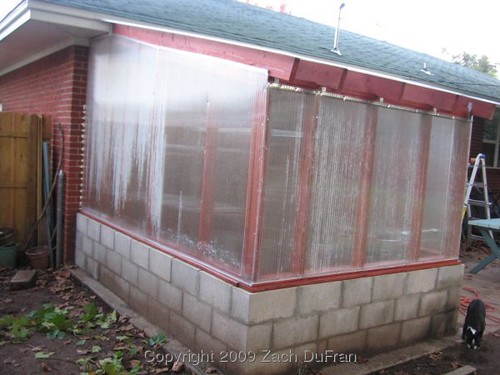
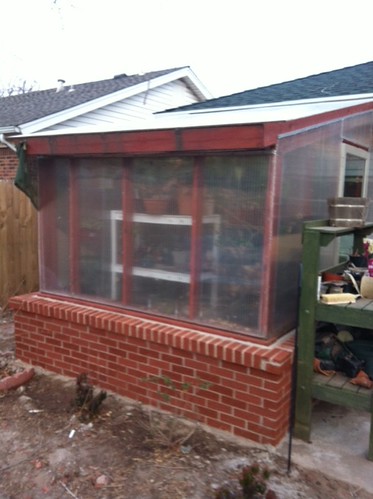
My blogging hiatus continues due to all of my free time going towards our house addition.  The addition was bricked a couple of weeks ago and it turns out that I ordered entirely too much brick.  Apparently that is difficult to do, so I have a hidden talent.  If you ever need someone to over estimate the number of bricks you need for a project, give me a call!  Anyway, I had our brick layer come back this week and use some of the extra bricks, to brick the greenhouse.  Check it out:

finished_poly
BEFORE (picture taken just after finishing the greenhouse, that brief moment before all the plants moved in)

The above picture was taken just after finishing the greenhouse, in that brief moment before all the plants went running inside.

bricked_end
AFTER


Pretty nice, huh?  It's just a little sad to see my nice cinder blocks covered up.  But now the greenhouse perfectly matches the house and looks a little more official.

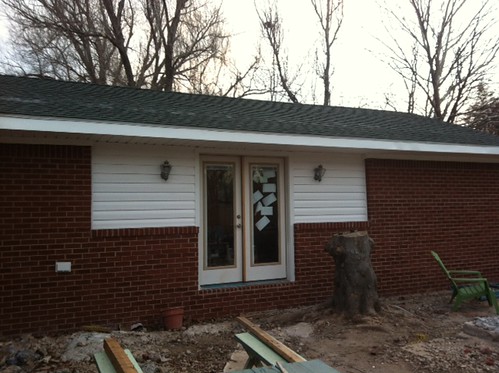
And here's a photo of our addition, all finished on the outside.  It's getting close to being finished on the inside, as well.

brick_and_siding
Finished exterior of our house addition

Tuesday, February 15, 2011

Close calls with brutal weather

It has been untypically cold in Oklahoma over the last couple of weeks.  Oklahomans are used to some severe weather in all seasons - hot summers (sometimes humid, sometimes dry) with temperatures above 100 F, and cold winters with temperatures in the teens and snow and ice on the ground.  But it is pretty rare for us to get into the single digits or near zero.  I live in USDA hardiness zone 7a, which is a winter minimum temperature between 0 and 5 Fahrenheit.  However, it has been a good 6-8 years since we have dipped near 10F.  This year we have been hit pretty hard.

We have actually reached 0 F on two different nights over the last 2 weeks.  And we have gotten some real snow on the ground, in three different events!  Last week the all-time low temperature record for the state was broken when a temperature of -31 Fahrenheit was recorded in Nowata, Oklahoma.  At the same time, it was +16 Fahrenheit at the North Pole.  That's just hard for me to believe.  The previous low was -27, set in Watts, Oklahoma in 1930.

My electric space heaters have done remarkably well keeping the temperature in the 60s in the greenhouse.  But the electric load has been trying for a single circuit.  Last week I woke up and checked the greenhouse temperature from the warm confines inside the house to find that it had dropped to 38 overnight in my greenhouse!  Prior to this my greenhouse had only gotten into the low 50s on one or two occasions.  I ran out to the greenhouse to find that the heaters were not on and would not respond to me hitting the power buttons.  The fuse had finally given out and the heaters had been off all night long, letting the temperature plummet (actually, it was more of a gradual decline) to a temperature that I can only imagine my plants didn't like.

I found that having two space heaters plugged into the same outlet was not wise and since I didn't have them plugged into a modern surge protector, they were drawing a higher load than the wiring could really  provide.  Thankfully our old screw-in fuse when out.  I replaced the fuse and plugged my main heater into a modern surge protected power strip, which will flip off when a large load is being drawn.  For the following nights, I ran an extension cord from another outlet out to the greenhouse to supply power to my extra heater.

It looks like I might have come through this debacle with only minor damage to some of my plants.  I don't think I lost any plants outright, but some have lost leaves and will have to slowly recoup.

Tuesday, September 21, 2010

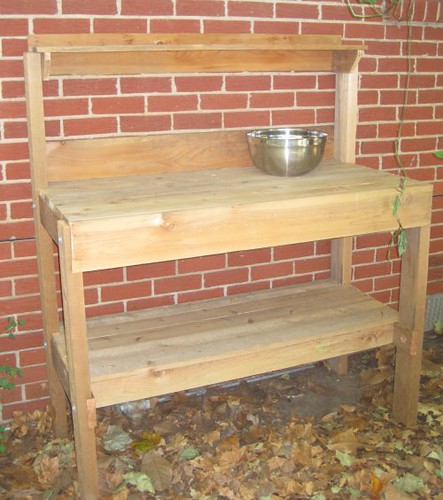
A place for potting

Last year for Christmas my parents-in-law gave me an unusual gift: a mixing bowl.  I feigned gratitude until I opened my next gift: a box of bolts.  My mother-in-law was snickering, telling me that they went together.  Okay...

Next gift? Directions for building a potting bench!  Ah, now it makes sense.  My father-in-law told me he had bought the lumber and would deliver it to my house shortly.  They explained that the mixing bowl was for mixing my various soil ingredients and that I could cut a hole in the table top (if I wished) to hold the bowl recessed from the surface.

potting_bench
Completed potting bench
So, for the last 6 months or so I've had some really nice lumber piled up on the side of the house, and our picnic table has been covered in my plants so Christie hasn't been able to enjoy her lunch breaks outside like she likes to do.  I had a free weekend a couple of weeks ago, so I pulled out the circular saw and went to work.  Just a couple of hours into it, I had something resembling the components of a bunk bed.  Another day of work and I had a very nice looking potting bench!

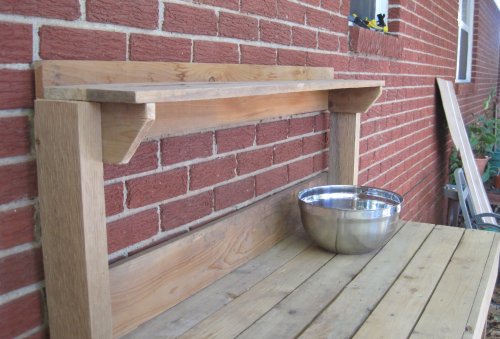
top_shelf
Top shelf of the potting bench
It fits very nicely along the wall of my greenhouse, right next to the door.  It also fits nicely under the eave of the house, where it gets a little more protection from the elements.

Now I have it loaded down with plants, leaving just enough room for repotting a plant or two on the work surface.  The lower shelf holds my bags of potting soil and extra pots.

I plan to stain it soon to protect the wood from long-term weathering.

What do you think!?!

Tuesday, December 29, 2009

Passionflower in bloom

After just a week in the greenhouse, I could already tell that the plants were happy.  Immediately my Aroids began to produce aerial roots where they hadn't before.  In fact, I have a variegated Monstera deliciosa that now has an aerial root about 5 feet long.  Pretty impressive for a plant that is only about 8 inches tall with 2 leaves!

Anyway, one of the best indicators of a plant's happiness is their bloomage.  Not that a non-blooming plant is unhappy, but it's a pretty sure bet that a blooming plant is happy.  In some rare cases, a very unhappy plant will produce blooms just before dying - a last ditch effort to spread seed and ensure its survival through its offspring.  But you can usually tell if your plant is blooming for this reason.

I don't have very many "blooming" plants.  Most of my plants do flower at some point in their life cycles, but their flowers are not particular showy, colorful or desirable to look at.  But those few that I have have been performing for me pretty well since being moved into the greenhouse.  The Datura (Angel Trumpet) has been producing yellow trumpet blooms constantly, followed by nice, full seed pods.  The lime tree put out a profusion of blooms once moved in and is now desperately trying to make fruit from those blooms, even though I can't seem to give it enough water.  Christie's Streptocarpus (False African Violet) has been covered in little blue-purple flowers since we got it several weeks ago.

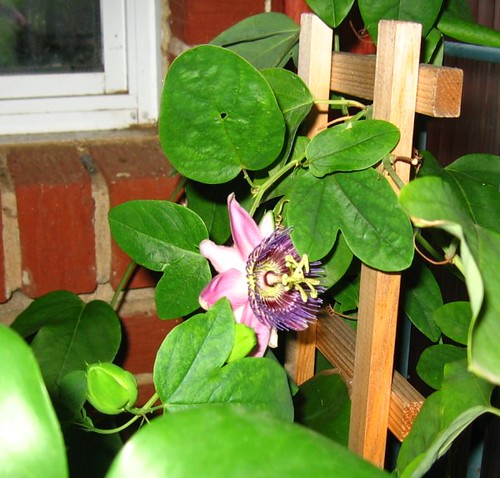
And my favorite blooming plant in my collection has even been performing.  I have two Passiflora x alatocaerulea (a hybrid Passionflower) in my greenhouse that have been producing a couple of blooms each week.  We purchased both of these plants last summer, keeping one and giving the other as a gift to Christie's grandmother for mother's day.  Since they are not hardy plants in our climate, I offered to overwinter her plant in the greenhouse with my own.  I was able to keep it attached to her grandmother's trellis and temporarily hang the trellis in the greenhouse.  Assuming I can keep it from getting too tangled with my other plants and greenhouse itself, it should be easy to transport back to her house in the Spring.

gh_passion_bloom
Passiflora x alatocaerulea blooming in the greenhouse
With Christmas day just a couple of days behind us, I figured now is a good time to share about the symbolism and name for the Passionflower.  If you have seen a Passionflower bloom before, you were probably amazed at the complicated sets of elements that are present.  There is just so much going on with each bloom.  It's not a simple set of petals with a colored center, like members of the Asteraceae family.  The Passionflower has many different parts and the numbers of those parts are significant in the Christian culture.  In addition, the Spanish saw a resemblance in this flower and a Saint's halo, commonly depicted in Roman Catholic art.

Back to the numerology of the bloom.  The bloom consists of five petals and five sepals, which represents the ten apostles - leaving out Judas the betrayer and Peter the denier.  The filaments can represent the thorns in Jesus's crown.  Apparently there are 72 of them and that is how many thorns were in Jesus's crown, though I'm not sure where that knowledge came from...  There are many myths and elements to teh Catholic faith that are not shared by the Protestant Christian denominations, of which I am a member.  There are five stamens, which is the number of wounds that inflicted Jesus.  In fact, the plant is referred to as "Flower of the Five Wounds" by South American Catholics.

Additional symbolism can be found in the shape of the leaves of some species of Passiflora, such that they look like spears, which pierced Jesus's side.  And some dots underneath the leaves are to represent the 33 pieces of silver which were paid to Judas for the betrayal.

Passionflower blooms are only open for one day, the same time that Jesus suffered on the cross.  After their show the bloom closes rather than falling from the vine, like many other flowers do.  This closing symbolizes hidden wisdom and Jesus being placed into the tomb.

I hope that you had a wonderful Christmas and I wish the best in the New Year.

Thursday, November 5, 2009

Ying-Yang Beans

My sister works for a non-profit outreach program here in town.  On Friday we went to a fund-raising dinner and trivia tournament for her group and my sister's boss (Lynn), who also has a greenhouse, brought me a gift.

ying_yang_beans
Ying Yang Beans from the Phaseolus vulgaris 'Calypso' plant
These are Ying-Yang beans (Phaseolus vulgaris 'Calypso').  Lynn was given some Ying-Yang beans when she got her greenhouse and she grew them into plants, which flowered and produced about 10 beans.  She is now passing three of them on to me for good luck.

They are really cool beans.  When she handed them to me I almost felt like I was being invited on a snipe hunt.  I thought, "Oh, this must be the mild hazing that all new greenhouse owners endure.  Surely these beans were painted by someone."  But they're not painted; they are authentically half white and black with little dots even.  And as far as I can tell, this is nothing like the fruitless snipe hunts.

These beans grow into small bushes that produce white flowers and eventually some little pods of similarly colored black and white beans that look like ying-yangs.  (see here) These beans have also been called "Anasazi beans" since they are believed to have been a crop of the Anasazi native Americans.  They can be cooked and eaten much like any other bean.  However, as far as I understand, the beans turn solid black when cooked.

I hope to be able to grow some beans of my own and maybe pass them onto to a fellow new greenhouse owner.

Friday, October 23, 2009

Greenhouse update - Phase 6: Move-in Day

I actually moved the plants into the greenhouse nearly a week ago, but I am just now getting to posting pictures of the interior with the plants moved in.

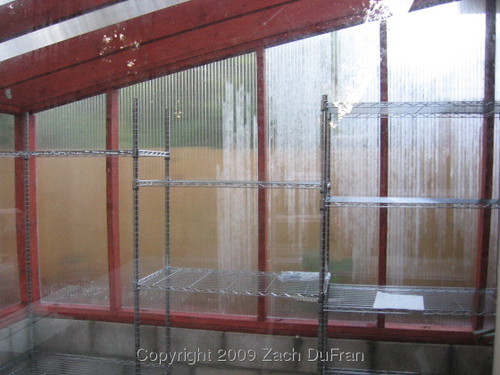
I bought three wonderful shelving units from Aldi (discount grocery store) for a sale price that is less than half their normal going price.  They come with 5 shelves each and I only need 3-4 shelves for each unit, since I have to allow room for the height of the plants.  That left me with extra shelves, which I used to combine two units out of three kits!  My remaining kit is on the opposite wall.

empty_shelves
Two units of kitchen shelves, combined to make 3.

I configured the heights of the shelves to allow for special plants that have trellises attached or are taller and need more head room.

gh_left
Looking left once you enter the door.
Then I spent a good deal of time on Friday and Saturday of last week, moving all my plants from the garage or inside the house into their new home in the greenhouse.

gh_center1
Looking ahead and to the left once you enter the door.

I still have quite a bit of rearranging to do and have not made the best use of my space.  There are still some shelves that are empty, while there are a couple of plants sitting on the floor.

gh_center2
Looking ahead and to the right once you enter the door.
I'm sure I will be moving plants around quite a bit until I feel that everything is settled in place.

gh_right
Looking to the right once you enter the door.
I also plan to hang a metal rod (which I have on hand) under the house eave, which will allow me to hang some hanging baskets in my greenhouse.  I might also put some hooks on some of the rafters, to allow me to hang more plants over time.  But we'll just see what types of plants I end up acquiring in the future!

gh_plants_inside
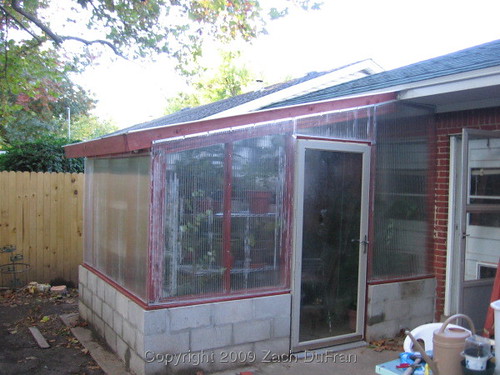
View of the exterior of the greenhouse this morning.
See other phases of the project here:

Wednesday, October 21, 2009

Greenhouse update - First heater night

We are certainly feeling Fall here in Oklahoma.  A couple of cool fronts have swept through over the last week, moving the overnight lows into the 40s.

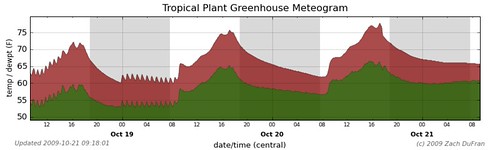
After getting the greenhouse roof in place and the door hung, I moved all of my plants into the greenhouse on Saturday and they spent their first night in their new home Saturday night, with an overnight low of 40 F.  My greenhouse stayed just below 60, with the heater kicking on and off during the night.  The next day I adjusted the thermostat to keep the greenhouse a little warmer, and the following night the temperature dropped to just about 53 and the heater kept the greenhouse between 61 and 62 all night.  Over the last two nights the heater has not had to come on and the greenhouse has stayed about 3 or 4 degrees warmer than the overnight low.


first_heater_night
Temperature over the last 72 hours in my greenhouse
The plot above shows a sawtooth pattern when the heater is kicking on and off.  You can see the night when my heater came on 12 different times over a 9 hour period.  The following two nights the temperature gradually decreased, but never low enough to trigger the heater.

I should mention that I am still not finished with the greenhouse.  The soffits are still open, so I have simply stuffed a couple towels in the gaping holes to keep air from leaking out of the eaves for the time being.  I should get the soffits attached later this week.

Also, I just finished the trim around the door and put weather stripping in place on Monday, which probably helped the greenhouse stay warmer over the last two nights.

I still haven't had a big test with a freeze outside, but I feel pretty confident now that with the soffits in place, my heater will keep the interior right around 60 degrees, which will make my plants very happy.

Stay tuned for pictures of my finishing touches and the plants in place!

See other phases of the project here:

Friday, October 16, 2009

Greenhouse update - Phase 5: Polycarbonate

The greenhouse is coming along.  Unfortunately the cold weather came before I finished, so Christie and I spent about an hour last Friday night, hauling all of my plants into the garage.

The final component (besides the details) to the greenhouse construction is the fastening of the walls and roof.  The material I have chosen to use is triple-wall polycarbonate panels.  These panels come in 6' by 24' sheets.  Yes, you read that right: twenty-four feet long.  The double-wall polycarbonate comes in much more manageable sizes because it is more commonly used.  The triple-wall is generally delivered in big trucks to the site of the greenhouse and assembled by a crew.  It's not commonly used for hobby greenhouses the size of mine.  When we picked up the panels at the greenhouse supply store in Oklahoma City, we had to take a circular saw with us and cut the polycarbonate on site so that it would fit in our trailer.

Then I made the mistake of unloading the polycarbonate in the backyard and letting it sit in the rain for a week.  The rain doesn't hurt the polycarbonate, but I had not capped off the ends and prepared them for hanging, so the walls filled with water.  The water is not easy to remove, let me add.

We had to use a combination of hair dryer, leaf blower, heater and dehumidifier to remove the moisture in the walls.

taped_poly
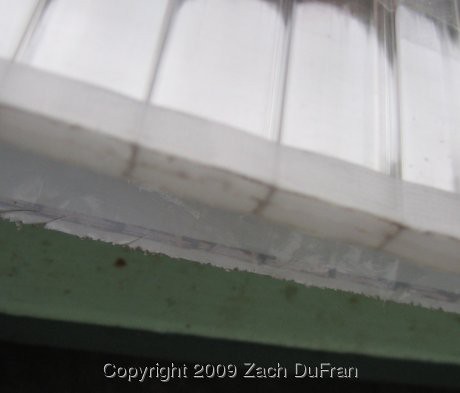
Open end of polycarbonate panel, taped with clear breathable medical tape to allow water to run out the bottom end.
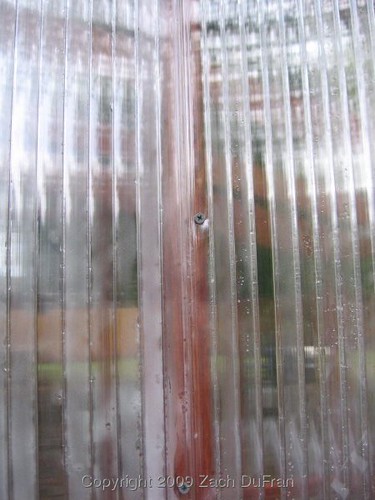
Next we had to do the normal preparation for hanging the panels.  Before a panel is hung, you must first cap off the top of the panel with aluminum tape and then a u-shaped bracket of polycarbonate.  The bottom of the panel is capped off with porous tape (to allow condensation draining) and then another u-shaped bracket.

first_poly
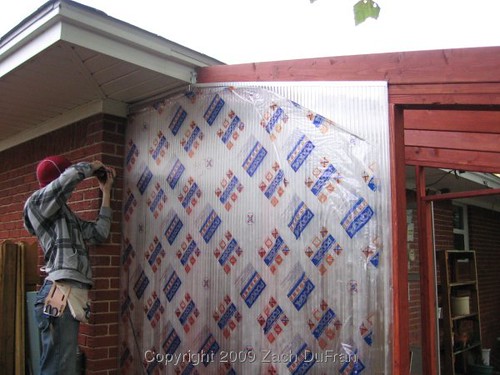
First panel being installed.  The film with labels was removed after the panel was attached.
poly_seam
Seam of two panels meeting at a stud. You can barely notice.
After a couple of hours of work on both Saturday and Sunday, we had hung all of the walls and only had the roof left.  By that time we were pretty proficient in terms of taping and capping the panels.  The only difficulty with the roof was being able to reach over to screw the panels into the rafters.

poly_over_door
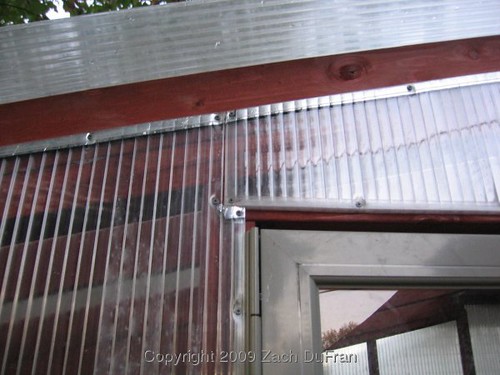
Multiple panels fitting together over the door. You can see the aluminum tape used to cap the top sides of the panels.
finished_poly
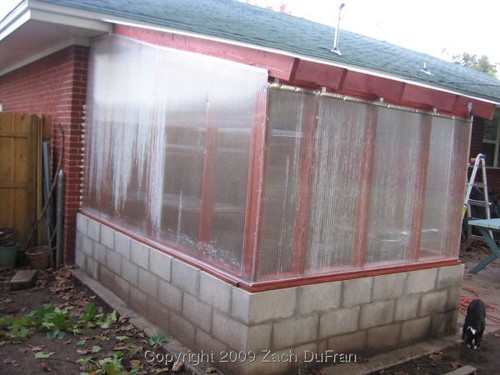
View of greenhouse with all polycarbonate panels installed.  You can't really see the greenhouse roof from this angle, but trust me - it looks just like the walls.
view_inside
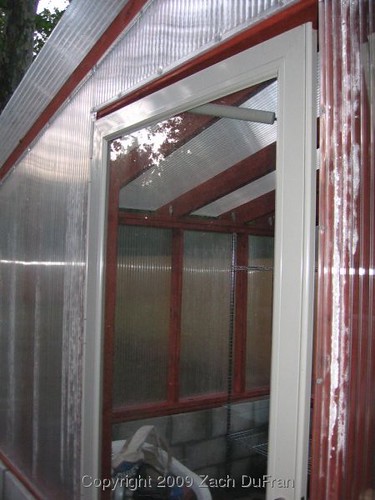
View inside of the greenhouse through the doorway.

There is still plenty of work to do in order for my greenhouse to be plant ready: caulking, finish the door installation, attach the soffits (which are currently open), stain any remaining unfinished wood.

In my next greenhouse update, I'll take you inside to see the shelves that I have purchased!

See other phases of the project here:

Tuesday, September 29, 2009

Greenhouse update - Phase 4: Framing

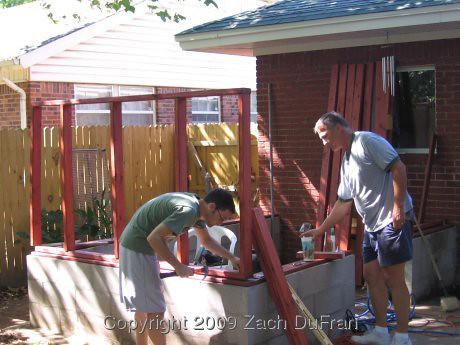
After a couple of weeks of inactivity, we began framing on Sunday.  In fact, we did more than begin!  My father-in-law has framing experience from building several houses, 1 wedding chapel and a number of other projects.  He has been a huge help.  In fact, he's pretty much been doing the framing while I hand him the tools. :)  But I'm learning.

attaching_first_wall
Bolting down the first wall
Even with several snags along the way, all of the walls were erected in a mere 5 hours.  That included a couple of breaks to go and get supplies and to partake of refreshments and dinner.

rafters
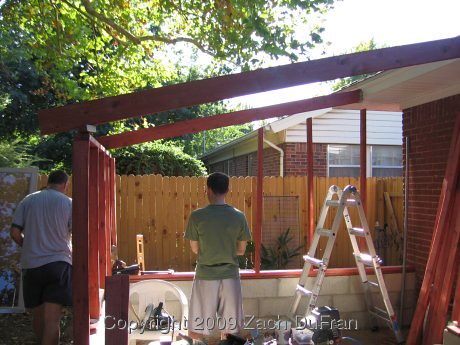
End rafters added and long wall studs being placed.
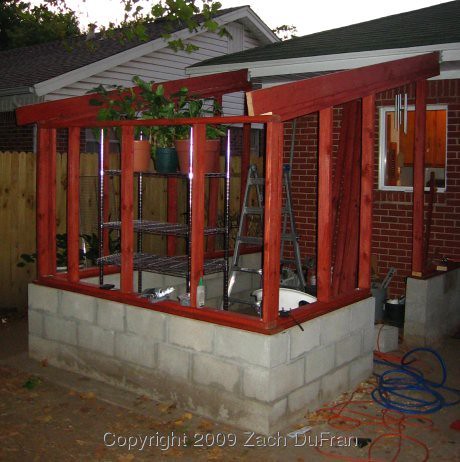
The end rafters were also mounted.  At the end of the day, I couldn't help but bring out one of my new shelving units and sit a couple of plants on it in the greenhouse.  I just wanted to get a feel for how much space the shelves would take up in the greenhouse.  It's very exciting.

framed_day1
End of the first day, with all walls framed. Notice my nice shelf with a couple of future residents checking out their new home.
I'm sure that the finishing touches will take a while, but I am very encouraged to see how quickly it has gone up so far.  Soon we will be placing the door and adding the polycarbonate.  Stay tuned!

See other phases of the project here:

Friday, September 18, 2009

Greenhouse update - Phase 3: Anchoring

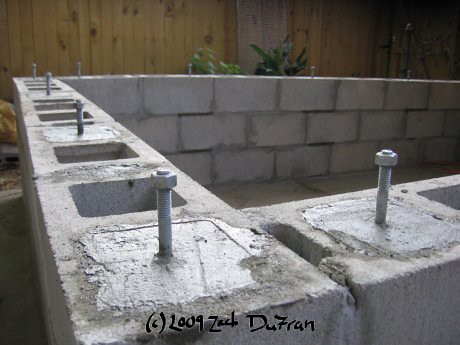
In order to tie the masonry base of the greenhouse to the framing above, I had to affix anchor bolts to the cinder block structure.  I used 10" Simpson L-bolts and set them in concrete about every 3 feet along the top of the wall.

anchor_bolts
Anchor bolts placed in concrete
At the same time, I stuck a 24" length of rebar in each of the concrete-filled holes, for better stability of the walls.  After drilling precisely-placed holes in the base boards of the framing, we can now attach the walls to the cinder block and everything will be very solid.

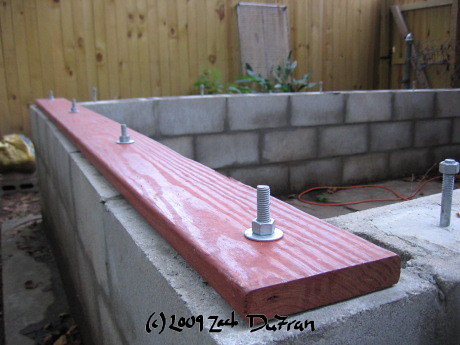
I am using 1x6 decking boards to cap off the holes of the cinder block wall.  These 1x6 boards will lay just beneath the regular 2x4 framing.  Drilling the holes in the correct location was not an easy task, but the first board is now attached and the others should be a little easier.

anchored_board
1x6 tied down with anchor bolts
As you can see, there is still plenty of room on the bolt to lay a single 2x4 lengthwise on top of the 1x6.  Assuming I measured correctly when I set the bolts in concrete, the nut should be just at the top of bolt when the 2x4 is attached.

Framing should start in about a week!

See other phases of the project here:

Thursday, September 10, 2009

Greenhouse update - Phase 2: Staining

One of the requirements for us building a greenhouse on our back porch is that is must look nice from the outside as well as the inside.  It can't be some unsightly building with a garden of Eden inside.  That's why we plan to eventually cover over the cinder block with brick that matches our house.  That's also why we decided to stain all of our lumber before doing the framing.

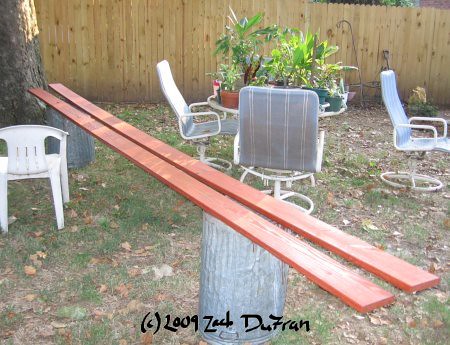
staining_station
The staining station where Christie tirelessly stained all 19 2x4s and 2 long 1x6 decking boards.
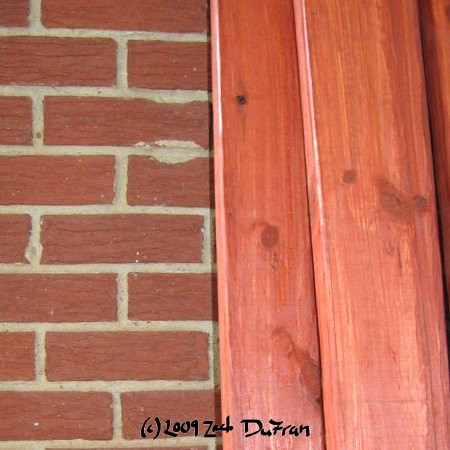
Christie spent several hours over the weekend, staining our standard 2x4s and base boards, while I was finishing with the block laying.  We chose a very red stain color, which matches the brick of our house very closely and contains all of the sealant stuff to help protect the wood for a long time.  Hopefully we won't have to re-stain the wood any more often than 8-10 years or so.

boards_and_brick
Stained boards laying up against the matching brick of our house
With the last block in place, we are ready to start the framing!

See other phases of the project here:

Tuesday, September 1, 2009

Greenhouse update - Phase 1: Masonry

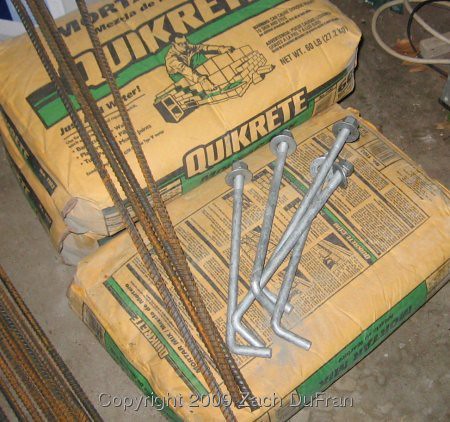
This weekend we got down to business on the greenhouse construction.  I spent a couple of hours on Saturday gathering supplies.  I made a trip to Lowe's to get two truck fulls worth of  lumber and cinder blocks.  I honestly won't need the lumber for a little while, but I wanted to make best use of the 10% coupon I had.  I also purchased the mortar mix, rebar pins and anchor bolts that will be used in the construction of the walls.

mortar_bolts
Mortar mix, anchor bolts and rebar pins
The 60 cinder blocks were loaded into the truck with a forklift, but since I don't have my own at home, they had to be unloaded by hand...  That's a lot of blocks.

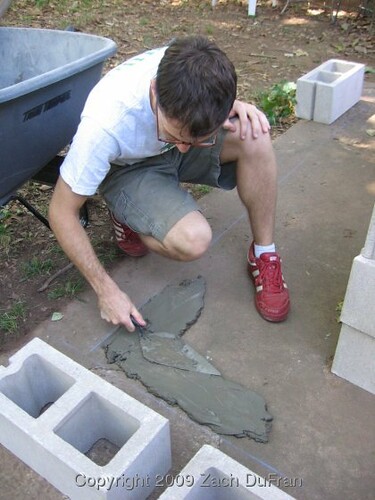
On Sunday, we got to work.  (Although Saturday wasn't exactly sitting on our butts!)  Christie and I carefully chalked the perimeter of the greenhouse.  Then I laid the first bed of mortar and carefully placed the first block.

zach_mortar_bed
Laying the mortar bed for the first block
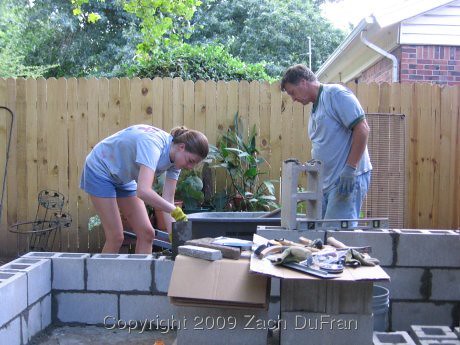
The first couple of blocks were frustrating and tedious.  But a couple of blocks later and we were cruising.  I had some help from Christie and her dad and we were able to complete much more than I had expected!

cp_ron_laying_block
Christie and her dad laying block
After we were finished laying block for the day, Christie meticulously cleaned the tools and the work area, making sure that all of the mortar lines looked clean and filled.

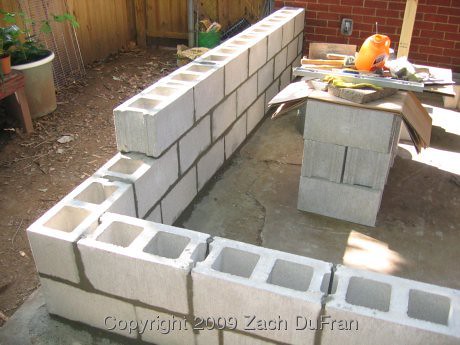
phase1_close
Finish of the first day
See other phases of the project here:

Monday, August 24, 2009

My greenhouse cometh

Recent growth in my plant collection has highlighted the inevitable - I'm going to need a greenhouse sometime in the future.  And that future seems to be quickly approaching.  For quite a while I have thought that a greenhouse might be possible sometime in the future, but we recently decided to go ahead and do it now.

Plants are almost literally growing out of our ears!  We need someplace to put them.  While my wife and I love our little house, it is lacking in the number of windows needed for happy houseplants.  During the winter months, our house stays at 60F most of the day and we only turn it up to 62-63F when we are going to be at home for a while and get cold.  The plants would prefer 80F and 80% humidity.

A greenhouse can provide that kind of growing environment on winter days, by simply taking advantage of the sun's awesome power.  I intend to take advantage.  On winter nights, a heater is required.

In the next month, we're going to build a small greenhouse on our back porch.  The area we have to work with is about 8'x12', so the inner dimensions will likely be about 7'x11'.  This area is pretty heavily shaded during the growing season by our huge Sycamore tree.  When Fall arrives and the temperatures drops, so do the leaves.  At this critical time of the year my greenhouse will receive the most light.

One wall of the greenhouse will be shared with the exterior of our house.  The roof of the greenhouse will adjoin our house roof.

patio_before
My back patio where the greenhouse is to be built
Construction

I plan to lay 2-3 layers of cinder blocks and then build a simple wooden frame out of 2"x4"s on top of that.  I have experience laying cinder block from house-building mission trips to Mexico.  My father-in-law has built several houses and will be helping with the framing.  The walls and ceiling will be covered with 8mm triple-wall polycarbonate sheets. Twin-walls are a little cheaper and more common, but the cost differential is quickly paid for with reduced heating costs and size of heater needed.
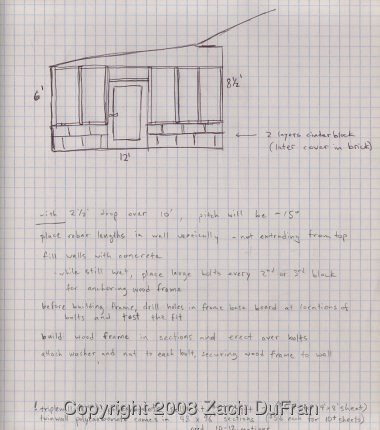
greenhouse_sketch
Initial sketch of my greenhouse plans
The polycarbonate sheets can be attached very easily by nailing/screwing them into the wood frame.  Additionally, you have to seal all joints to avoid leaking the warm, humid air of the greenhouse.

To cover the screws or nails, you cover the polycarbonate joints with trim wood.  I plan on cutting my trim pieces to fit and then staining and sealing my trim pieces before attaching them to the greenhouse.

Heating

I will buy a small space heater that will run in the greenhouse during the winter months over night.  During the day, it should stay pretty warm, even when the temperatures outside are cold.  I have used a calculator online to determine the BTU output my heater will need.  Assuming the temperature falls to about 20 F outside and I want my greenhouse to stay at or above 60 F, I will need about 500 BTUs to heat the greenhouse.

Cost

I ran some rough numbers and have an estimated cost of the main materials.  Those materials are the lumber, cinder blocks and polycarbonate sheets.  They are the most costly and also the easiest to figure.  For instance, I know almost exactly how many cinder blocks I'll need, but have no idea how many nails.

My initial estimate doesn't include all of the fasteners (nails, bolts, etc.), sealers, stain, or bags of mortar and cement.  Other considerations are any extra tools for building (beyond what I already own), the exhaust fan, and a simple fluorescent light fixture.  I plan to find some cheap shelves and build the remaining ones to fill the space inside.

All in all, I figure the total cost won't be much more than 50% greater than my initial estimate for the base materials.

Room for improvement

Over the years the greenhouse will probably undergo a number of changes.  I've already thought a couple of them through.  We would like to add a room onto our house one day.  At that time, we will be ordering bricks to match our house.  I would like to have a professional mason cover over the cinder blocks with the matching red brick, so I will be leaving room on the back porch pad when I lay the cinder blocks.

Another upgrade I foresee is incorporating irrigation in some way.  I'm not sure how I want to do this and I think I will probably have a better idea after the greenhouse is built.  For now I'm going to just drag the hose in through the door or use a watering can.  One potential watering system would simply be to collect rainwater runoff from the roof and route it into a container in the greenhouse.  There are a couple of areas around the house that would benefit from gutters diverting heavy rains to other locations.

Other potential upgrades include improved circulation, ventilation or heating.

There is a good discussion of hobby greenhouses at Thyme for Herbs.

Stay tuned for more posts soon with pictures of the greenhouse in progress and complete with occupants!

See other phases of the project here:

Tuesday, January 27, 2009

Keeping a plant journal

My Plant Journal

Since October 2008, I have been keeping a plant journal.  I have a thing for journals and little blank books, so I had a bookshelf full of them.  My intention was to fill them with my important thoughts over the years, be it a novel, lousy sketches or a journal.  I was thinking that I really needed to start keeping track of important events concerning my plants and decided that one of my little blank books was perfect for the job.

My current plant journal is a small earth-tones journal made by Paperblanks from their "embellished manuscript" collection.  I chose the Vincent van Gough journal because of the small garden scene drawn on the front.  They also make a couple of Mozart and Beethoven journals with music on the front, as well as Rembrandt sketches and even Shakespeare's writing.  On my journal, the wrap over piece magnetically attaches to the front.  The journal measures 7"x9" and has 144 lined pages.  The pages have just the right number of lines to be spaced correctly for my handwriting.  Paperblanks makes a bunch of really cool looking journals, including some with Asian art on the covers, while others are simple leather-bound books.  I purchased mine in the gift shop of Nathaniel Hawthorne's house in New England.  But I have also seen them sold at several local book stores. :)

I have been using my journal to keep track of when I purchase new plants, where I got them and how much they cost me.  Then I track when they bloom, when I notice anything weird about my plants, when I bring them in, put them out, prune them, etc.  It has been a fun experience and I think it will prove valuable as I continue forward and wonder when certain things happened.  It is also a nice compliment to my blog.  I will write in my journal as things occur and then blog about them on a more regular (twice a week) schedule.  So, even though I took a trip to a wonderful greenhouse a couple of weeks ago, it's not going to be on my blog for a couple more weeks.  In the meantime, my journal (and my camera) will hold all of the important information that I need to remember for my blog post.

My Gardening Sketchbook

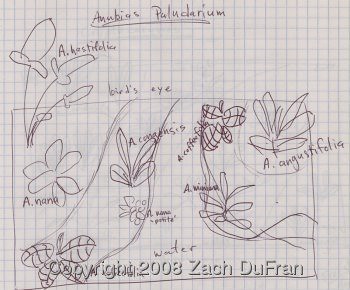
One day I wanted to sketch up a little idea for a terrarium that I wanted to plant.  But I wanted to be kind of messy and my plant journal was much too neat for this activity.  So I grabbed another journal - one of those lab books with the black and white marbled covers and gridded pages for drawing plots easily.  This journal has become my sketchbook for when I want to be messy and make plans.

anubias_sketch
Sketch of my plans for a 10 gallon Anubias paludarium
I have drawn up some plans for different terrarium and paludarium plantings, some sketches of my greenhouse plans and also made some lists of plants I would like to order.

greenhouse_sketch
Initial planning sketch for my greenhouse
These two journals are very separate things in my mind.  In my plant journal I use pencil and write pretty neatly.  In my sketchbook, I use a pen and scratch things out.  It's much more messy.  It's kind of like my two journals are for the two halves of my brain.

Do you keep a plant journal?