Wednesday, April 15, 2009

The Tulip Explosion

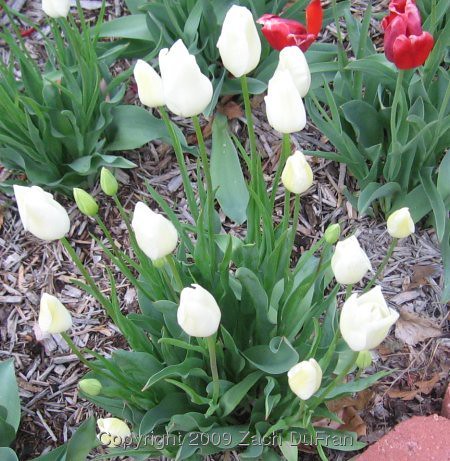
About 5 years ago I created a "figure 8" shaped garden in the front yard around a young maple tree that had just been planted.  Inside the flowerbed I planted 2 packages of tulips - 16 red and 16 white.  In April the tulips open, the red tulips first and the white ones about a week later.

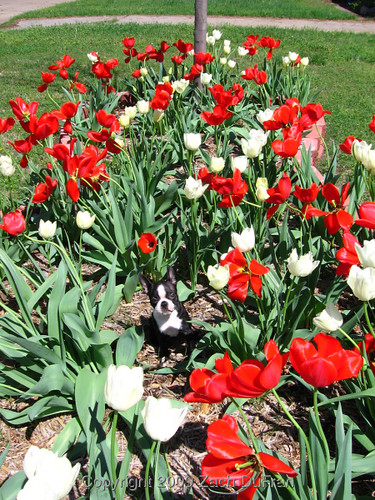
pw_tulip_bed
Pee-Wee in front of the tulip bed - Spring 2006
This is an event we look forward to each year.  It is probably the most anticipated moment in our garden.

peewee_tulip_above
Pee-Wee in the tulip bed - Spring 2006
When I first planted the tulips I set them out geometrically.  I alternated between red and white, making 2 concentric circles in each half of the corner garden.  The outer circle of the larger half of the "figure 8" was planted with 7 whites and 7 reds.  The inner circle was planted with 3 of each.  In the smaller half of the "figure 8" I planted 4 of each in the outer circle and 2 of each in the inner circle.  Is my math correct?  That should be 16 of each color for the first year.

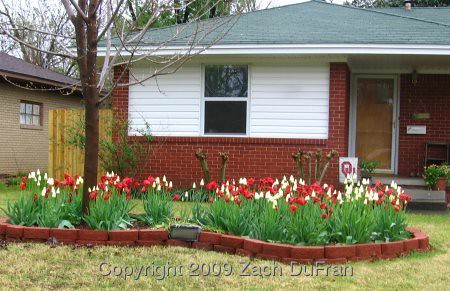
tulip_bed_house_2009
Our tulip bed in bloom - Spring 2009
We used red and white tulips because we live in Norman, Oklahoma, home of the the University of Oklahoma Sooners.  [See the OU flag in the picture above?]

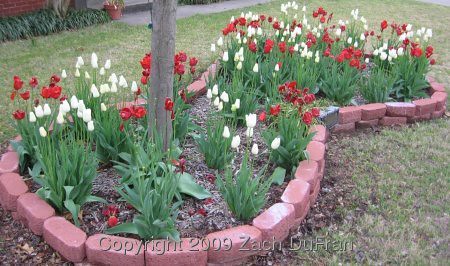
tulip_bed_slant_2009
Partial bird's eye view of the tulip bed - Spring 2009
From the street, you don't really see a geometrical design, you just see a sea of red and white tulips.   But from above, you can see the pattern pretty well.  Each year they multiply and multiply.

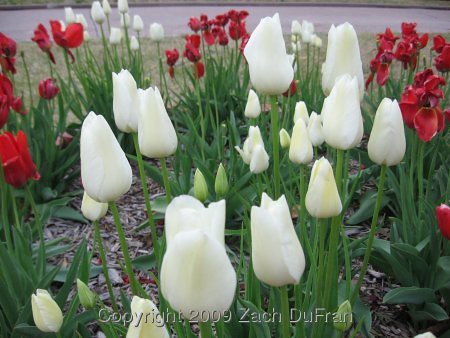
white_tulip_foreground
And yet more tulip pictures - Spring 2009
This year, I counted as many as 21 blooms in one location!  In a perfect world, each tulip bulb would double each year.  This would mean that in year two a single tulip bulb would have multiplied to 2, in year three to 4, in year four to 8, in year five to 16, and in year six to 32.  If I'm doing the math correctly, either my tulip bulbs have produced more than one offset each year (which is possible) or I planted them more than 5 years ago.  But I think my memory is correct on how long ago they were planted.

21_white_tulips
The prolific white tulip.  See if you can count all 21 buds. They're all there!
Of course, the 21 blooms was the most I counted at any one location.  Other locations had as few as 6 or 8.  Last year we dug up some of the offsets at locations where there were many more than other locations and relocated some of the bulbs to fill in the bed a little bit.  We will probably want to do the same thing again this year, once the plants have tied back to the ground surface.

red_tulip_snow_2009
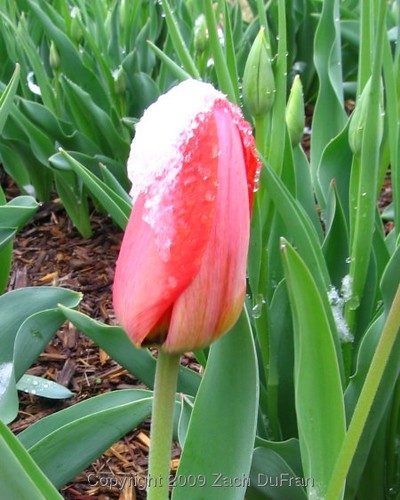
Light snow fell on the red tulip buds a couple of weeks ago, while the white tulip buds were still developing.

I was worried this year that the tulips would not all bloom because of the snow we got a couple of weeks ago after the buds were already exposed, but they weren't affected much by the quick cold snap.

open_red_tulip
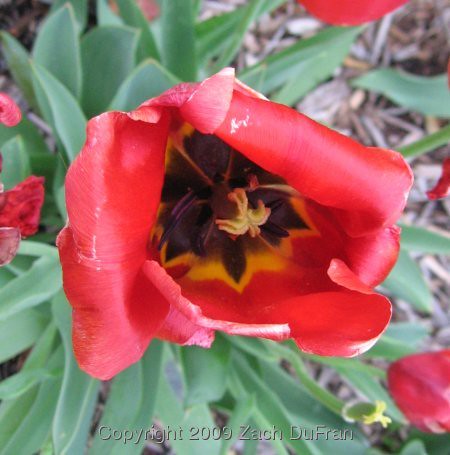
Open red tulip bud
But, as you can see, they turned out okay.  The first two pictures from this post are from 2 seasons ago simply because I didn't get a good picture of the tulip bed when both white and red tulips looked their best this year.

single_white_tulip
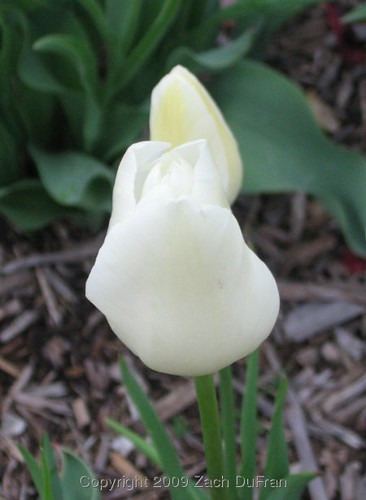
Single white tulip seeking long, cool blooming season (also, long walks on the beach, of course).

Friday, April 10, 2009

Long term planning for a "Paradise corner"

I started daydreaming a couple of weeks ago about some things we could do to further spruce up our backyard and make it more inviting.  As it is, my wife spends almost every lunch break lounging on our hammock in the backyard, enjoying the breeze, the sun, the birds, the squirrels and the plant life.

You can see pictures of our corner garden on this post.

I came up with some ambitious plans for the future of our backyard.  There are several improvements we are planning on making in the short term (over the next 5 years), but this vision for our backyard is more along the 10 year time frame.  It might happen sooner, but it will most likely be a slow progression.
paradise_corner
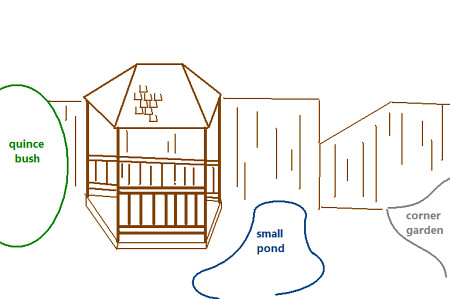
A sketch of my plans for a "paradise corner"
My sketch is a simplistic view of what I want the corner to look like.  The elements in the sketch would provide a nice place to sit and relax, but the elements that are missing from the sketch are those that will truly make it a paradise.  There will be lots of plant life surrounding all of these features.

To see what the corner garden looks like now, with the new fence erected, check out the fourth picture in this post.

The Pond

I have the sketch labeled "small pond," but that's not very descriptive.  I think it will be about 8-10 feet in length and about 4 feet in width at the narrowest and about 6 feet at the wider bulge.  I will probably create the usual shelf so that the center of the pond is about 2-3 feet deep, while the outer ring is only about 1-1.5 feet deep.  There will probably be some aquatic plants, including: Cannas, black-stemmed Alocasia, Lotus (water lilies) and grasses.  I'm not sure yet whether we will have any fish, but I imagine we probably will.

In the middle of the pond will be a small fountain to keep the water circulating (cutting down on mosquitos) and to generate some nice splashing water sounds.

After I told my wife about my plan, she had something to add to my vision.  She suggested that we have a small bridge that steps over the pond, linking the gazebo to the corner garden.  We'll have to keep our eyes peeled for a small, sloped bridge (without railings).  I think it would look a little silly with railings, due to the scale of the pond.

The Half-Gazebo

I don't think I have ever seen a half-gazebo before, so I'm not sure where I got the idea.  I was just thinking how neat it would be to have a small gazebo in that part of our yard with our hammock inside of it.  Since the gazebo will be against the fence, it makes sense for it to be cut in half.  Also, we won't want it to cut very far into the yard.

The gazebo will be a wonderful place for us to sit and relax, looking at the flowers in our corner garden, listening to the gurgling water of our pond fountain and watching the birds and squirrels.  We will probably want to run electricity to the gazebo and put in an outlet so that we can plug in radios, or other things like that.  Also, we will need electricity for the pond fountain.

I would like to plant around the gazebo so that the structure blends into the environment.  I plan on planting a Passion Flower along the front side that will climb up the railings and posts of the gazebo.

The Corner Garden

I wrote a post earlier this week about expanding our "corner garden" along the right side.  This will help our paradise corner from being too heavy along the left fence line.

paradise_corner_birds_eye
Bird's eye view of the planned "paradise corner"
Rock Walk

The ground area joining the corner garden to the pond to the gazebo will be covered in flat stones.  Since the area is narrow, well-shaded and will probably be perpetually moist, it will be easier to maintain and more ascetically pleasing if this area is rock, rather than grass.  I will try to get some moss growing between and on top of the stones.  Hopefully we can find some rock locally that matches the rock used in the pond.

The Flowering Fence Line

Currently there are small flowering bushes planted all along the fence line where I am planning to build the half-gazebo.  In the first sketch in this post, I condensed the width of fence line that lies between the corner garden and the large quince bush.  There are about 5 or 6 small quince bushes along this fence that are offsets from the large quince.  Also there is an almond bush and a spirea.  If we decide to build the gazebo flush with the fence, we will relocate the flowering bushes to wrap around the gazebo.  Otherwise, we can build the gazebo about 4 feet into our yard and leave the bushes in place.  It all depends on how much yard we are willing to sacrifice.

Tuesday, April 7, 2009

Short term planning for the "Corner Garden"

Beginning

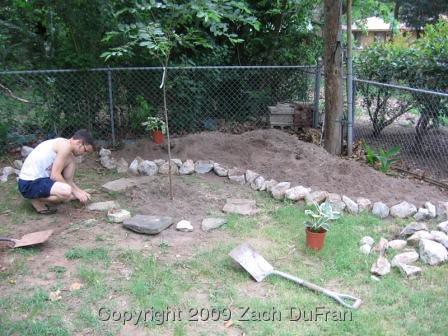
Our beloved "corner garden" was installed during the Summer of 2006.  One corner of our yard was particularly shady, so there wasn't any grass growing there.  Additionally, there is an unsightly utilities pole in that corner.  We decided to create a corner garden by erecting a wood fence inside of the corner of our yard and building a tiered garden in front of the fence.  We were lucky enough to have some neighbors doing some landscaping which left over a huge pile of dirt.  They were happy for us to haul it off and we were happy to have some free dirt.  We weren't as happy about the 50+ trips we made with the wheelbarrow to haul the dirt, though. :)  We also came across some free rocks from a relative who wanted them out of her garden.  Those we loaded in a truck.
before_corner_garden
Future site of the corner garden. Rocks were just being laid out to form the shape and dirt filled in.
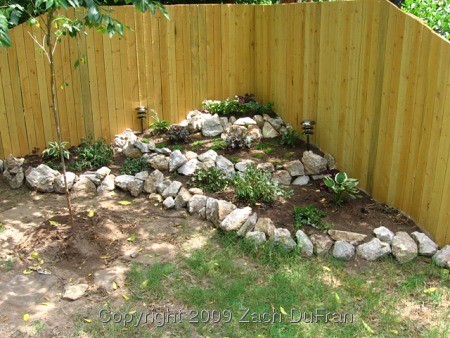
We used the rocks to create 3 tiers and hold the dirt in place.  We were very happy with the outcome of our garden.
corner_garden_v1
The corner garden once it was first complete (summer 2006).  None of the plants pictured are still in the corner garden.  If you look closely you will notice that the entire flowerbed is shaded.
We vigorously planted the corner garden the first year and it looked very nice for the first two years.  The Hostas got larger and several of the Heuchera (Coral Bells) came back.  The garden was starting to mature.

Change

However, during December of 2007 central Oklahoma had a really bad ice storm, resulting in the loss of a lot of beautiful trees.  Several of the scraggly trees from our neighbor's yard lost limbs that were responsible for shading the corner garden.  As a result, last summer most of the shade plants that we had established began to die under the intense full sun.  Several plants were removed and relocated before it was too late.  But the plants left a void.
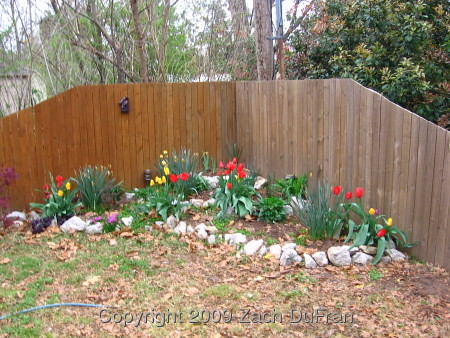
current_corner_garden
The current state of the corner garden.  It looks pretty good, but most everything green only lasts for a couple of months during the early Spring.  Soon it will all die back, leaving very little to look at during the Summer.
Right now the garden looks nice because it is filled with the colors of Spring bulbs.  But soon those will turn brown and die back until next Spring.  And there will be very little green left in our garden for the remainder of the Summer.

It's really sad, because the corner garden is a foundation of our backyard and one of our inspirations for continual improvement.  This year it needs some attention.

Revival

We are going to invest some of our gardening budget this year on reviving the corner garden with colorful perennials that are meant for a full-sun garden.  The goal is to have the corner garden looking great all year long.  At its current state, the corner garden only looks up to par during the Spring.

I have already ordered some Rudbeckias, which will provide color during the Summer.  We planted some creeping Phlox a couple of years ago, but it hasn't rebloomed until this year.  We're excited about that coming back.

I have also been thumbing through the plant catalogs and decided that the late Summer and Fall color will be attained by a collection of Asters.  Bluestone Perennials has an "Aster Collection," which includes 5 plants of different colors.  I can't remember the exact names of the plants, but there was a purple, a blue, a red and a white.  The value of the collection is that you get several different colors for a reduced price.  Lots of color and reduced cost sounds good to me!

Bluestone Perennials also has a bush to add vivid Fall color - Euonymus alatus compactus.  This shrub is commonly called "Burning Bush" because of it's bright red foliage in the Fall.  It also produces small red berries that remain after the leaves have fallen at the end of the Fall.

Euonymus alatus compactus - available from Bluestone Perennials
Dwarf Burning Bush (Euonymus alatus compactus), available from Bluestone Perennials.
And finally, we will need some evergreen plants mixed into our corner garden.  Sometimes I don't really consider green to be a color when it comes to plants, but compared to brown, dormant plants - green will do nicely.

I haven't figured out what type of evergreen plants to put in our garden.  I really like the junipers that we have planted around our garden waterfall.  Maybe I'll plant something like that, but I don't think the same type would fit with the feel of the corner garden.  I've got some time to think about that, though.

Expansion

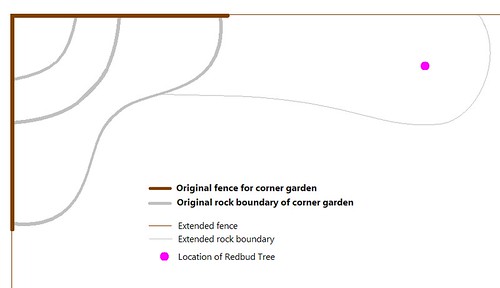
While the year-round color is a goal we expect to cover this year, we have another short-term goal that will probably be done in the next two years.  Last Spring we transplanted a Redbud tree along the fence line, about 10 feet away from our corner garden.  We have been talking about expanding the corner garden along the back fence line (to the right with respect to the corner) to enclose the Redbud tree.

Here's a little sketch of the existing corner garden and original fence backing (in bold) and the planned extension (fainter line).
corner_garden_expansion
Sketch of my plan for expanding the corner garden
The existing corner garden has 3 tiers, but the extension will only be for the lowest tier level.  It will allow us to plant some more things, including some larger items, like the small "Burning Bush" shrub shown above.

What do you think of our planned expansion?
Thursday, April 2, 2009

Backyard fencing project

Primarily, the content of the posts on The Variegated Thumb is centered on plants, or at least orbits around the topic of plants.  This post is in a more distant orbit than most of my others.

pup_portrait
Pippa (Boxer, left) and Pee-Wee (Boston Terrier, right) posing for the camera
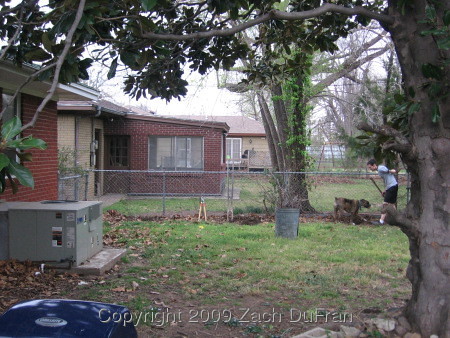
Our dog, Pippa, likes to jump our 4 foot chain link fence.  We have tried keeping surveillance on her while she is outside but she'll jump the fence so quickly we just can't keep up with her.  We tried putting her on a chain the backyard, but she just broke it in two.  When we go out of town, Pippa (and Pee-Wee) get to stay with their grandparents.  But sometimes it is inconvenient for the grandparents or they might even be out of town at the same time as we are.  So, it has come time for us to invest in a taller fence that will allow us to keep the dogs without monitoring.

before_poles
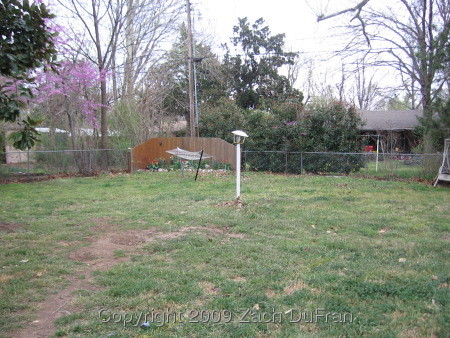
One corner of our yard before the wood fence was put in
The dogs are the impetus for erecting the fence now, but it is also a face-lift project for our backyard that we would have tackled eventually.  We have enjoyed having the open feel of the chain link fence.  We like being able to see beyond the fence and feel like we're out in the woods when we venture into our yard.  And we enjoy talking with our neighbors.  But the fence will help to make our backyard become more of the comfortable oasis we've been trying to create.

after_poles
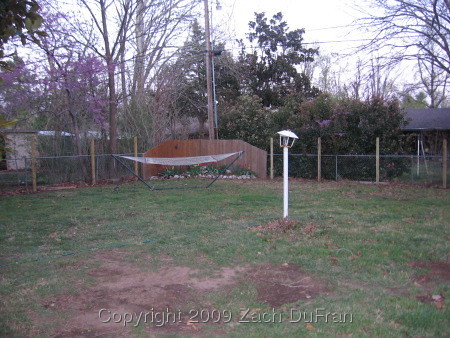
The same corner of our yard after the poles were erected
A couple of years ago we built an elevated, tiered corner garden with a fence backing.  Now the corner garden is not highlighted by the fence since we will have fence around the entire yard, but we have a long list of improvements that will help highlight the corner garden.  Actually we're planning on expanding the corner garden to run another 15 feet along the back fence (to the right) and meet the redbud tree that we planted last season.  As the overhanging trees fill out, some of our "corner" garden will be part-shade and some will be full-sun.

complete_fence
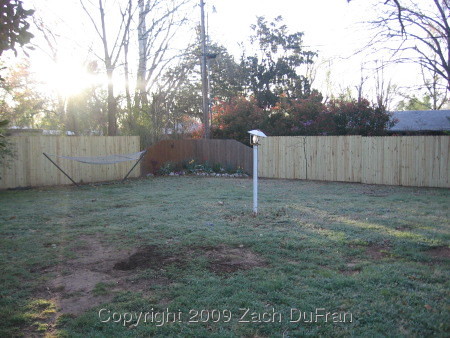
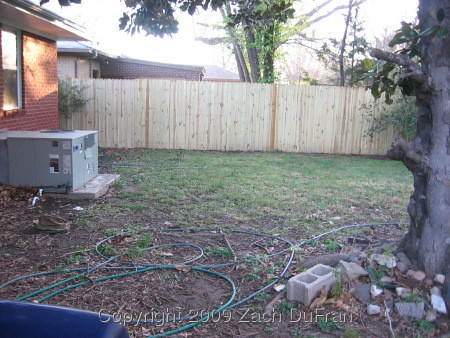
The same corner after fence has been completed
We have now completed 2/3 of our fence.  The side that remains to be built is at your back in pictures above.  We'll be tackling that portion this weekend.

For the most part, our yard is the same, we just installed the wood privacy fence inside of the chain link fence on the back of our yard and one of the sides.  We removed the chain link on the other side because our neighbor went in on the fence with us.

sideyard_before
Corner of our house prior to privacy fence.  Notice how the chain link fence was even with the back wall of our house (left side of the picture).
We also extended the fence along one side of our house, enclosing the side windows in our backyard for a little more privacy.  This has given the pups some more room to run and explore in the shade of our house.  The fence runs about 30' along the side of our house now, so that our side yard is now connected to the backyard instead of the front yard.

sideyard_after
Corner of our house with fence wrapping around side of house.  There is an extra 6' by 30' run enclosed by the wood fence that was previously part of our front yard.
We have been spending lots of time out in our yard already this summer - mainly working on the fence, but also discussing our future plans.  I will post some of my sketches and ideas a little later this month.

Plant Finds: Three new Calatheas

Last week I bid on some plants on eBay.  This was kind of a first for me and I am very satisfied with the quality of the plants and the speed in which I received them.  The auctions ended on Sunday and the plants arrived on my doorstep on Tuesday at lunchtime!

calathea_arrivals
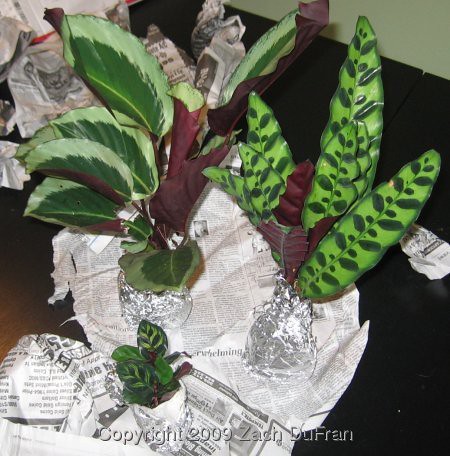
My three new Calatheas. Clockwise from top left: Calathea roseopicta 'Mia', Calathea lancifolia, Calathea makoyana.
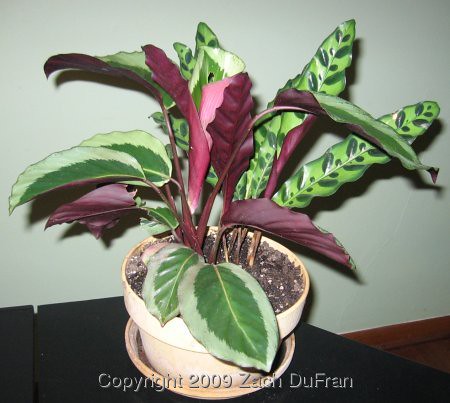
The three plants I bought are all from the Calathea genus (commonly called Peacock plants), from the Marantaceae family (commonly called the Prayer Plants).  Since I am running low on pots, I potted the largest two species together in one medium sized pot.  I think they look pretty neat together and will look even better as they each fill out.

calatheas_mia_lancifolia
Calathea roseopicta 'Mia' and Calathea lancifolia jointly potted
Calathea lancifolia had been on my "to acquire" list for quite a while and I am really glad that I bought such a nice looking specimen.  It seems very healthy and happy.  The plant which was sold as Calathea 'Mia' looks to me like a variation of the species C. roseopicta.  I have another color variation of roseopicta, which is called 'Saturn' and has the opposite coloring on top of the leaf.  Saturn has light green center and a dark green band around the edge.

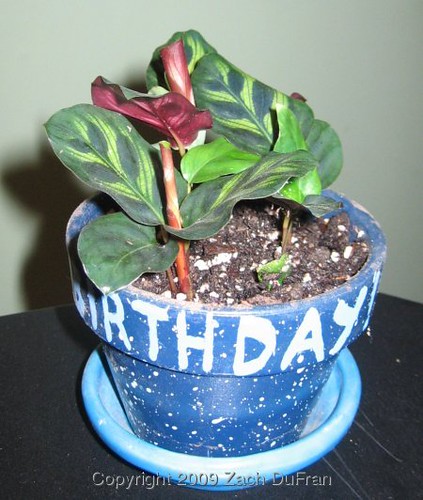
The smallest little critter I planted separately in this little pot I found in the garage.  Apparently I painted it for my wife a while back.  It says "Happy Birthday" and is a little bit too much color (in my opinion) for this plant.  I would prefer a simple pot, not to overshadow the colorful foliage of this little plant.  Anyway, that's where he will stay for now.  Maybe this summer I will move some things around and he will get a new pot.

makoyana_potted
Calathea makoyana potted
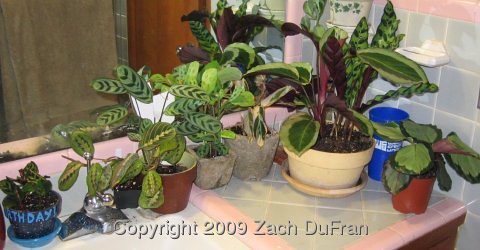
My collection of plants from the Marantaceae family is growing!  I now have plants from a total of 10 species - 4 Calathea, 3 Ctenanthe, 2 Maranta, and 1 Stromanthe species.  I moved pots around in the house this morning (it's still too cold to let them get some fresh air outdoors) and decided to move all of these plants to the bathroom counter, where most of them were already.  With the exception of my two large Ctenanthe species, all of Marantaceae plants are sitting together now.  I decided they should probably have a family portrait.

family_portrait
Marantaceae family portrait. Left to right: Calathea makoyana, Maranta leuconeura erythroneuro, Ctenenthe burle-marxii, Maranta leuconeura, Stromanthe sanguinea 'Triostar', Calathea roseopicta 'Mia', Calathea lancifolia, Calathea roseopicta 'Saturn'. [Not pictured: Ctenanthe lubbersiana 'Brazilian Snow' and Ctenanthe setosa 'Grey Star'
If you missed my other posts concerning Marantaceaes, you can see them here:

Monday, March 30, 2009

Holly bush in bloom

Last week took us by surprise.  We had been cruising along at Spring temperatures for a month or so, when a cold front moved through and dropped a bit of snow on us over the weekend.  We can have freezes up until mid-April in central Oklahoma, but the recent warm temperatures had tricked all sorts of plants into sprouting a little earlier than usual.  Saturday morning I took pictures of our tulips topped in snow.  That may happen elsewhere, but it hadn't happened here to my recollection.

Sunday morning was back to usual, with the sun shining and an afternoon high temperature of 65F.  Walking out to the car I noticed a wonderful fragrance of something blooming.  I looked around, trying to figure out what it could be.  The tulips are without scent and nothing else is really blooming right now.  The saucer magnolia was too far from where I was when I smelled the scent.  I mentioned it to my wife and she said she could faintly smell it.

holly_bush
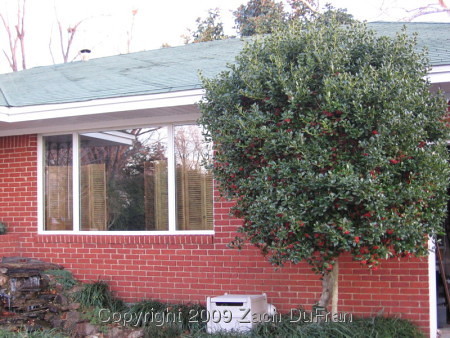
Our red berry holly bush (Ilex cornuta) in the front flowerbed
I walked in and out of the house several more times before I pinpointed the location.  There were bees swarming around me as I walked down the sidewalk by the holly bush.  I must confess that I wasn't a big fan of the holly bush in our front flower bed for quite a while.  I trimmed it up in to a nice shape a couple of years ago and now it is kind of nice, especially with its red berries that seem to be there year-round.  It is an evergreen-and-red bush.  The leaves on this bush are downright vicious, especially once they dry out and turn brown.  You want to wear thick gloves when picking those up.

holly_bee
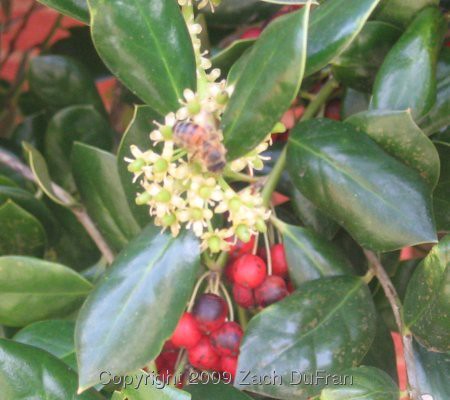
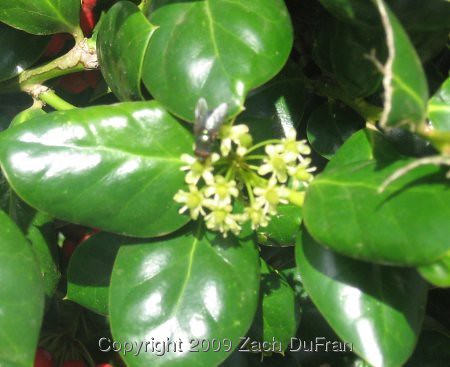
Bee at work on the holly bush blooms
I had never really paid much attention to the bush as it changes throughout the year.  I really had no idea that it blooms.  It's amazing how many things I miss and how the bees take notice to these same things.

holly_bush
A couple more bees at work
The blooms are not showy, nothing really to look at.  But, man, they really smell good!  I was surprised by this.  And the bush was just covered with bees.  I even saw a couple of flies on several of the clusters of blooms.

holly_fly
Fly at work on the holly blooms
Later in the day, my wife and I noticed that you could smell the bush from our front porch, about 15 feet away.  I'm not surprised that I missed this blooming event in past years, but I can't imagine how I missed the smell as I walked by.  This is definitely an event I will anticipate next year.

Thursday, March 26, 2009

Plant Find: Ctenanthe from Australia!

Earlier this week, I wrote about a plant I was expecting in the mail from Australia.  Well, it arrived yesterday!  Here's the story:

Back in December I bought a plant at TLC that appeared to be in the Marantaceae family, but I didn't know the genus.  After doing some research online, I found a match.  My plant was a Ctenanthe lubbersiana (Ctenanthe 'Brazilian Snow').  I really like the Maranta family, as I have mentioned recently in a couple of posts, so I did some image searching for other Ctenanthes.  I came across a couple of Ctenanthes with very light white or gray tone leaves with the usual streakings of green and solid red underneath the leaves.  One particular image caught my attention on Flickr.

Ctenanthe in Australia - photo courtesy of Flickr user imbala
Ctenanthe setosa 'Grey Star' in Australia - photo courtesy of Flickr user imbala

Going out on a limb, I sent a message to the image owner on Flickr and asked if they owned the plant and were willing to make a plant trade.  It turns out the owner lives in Australia and she was willing to trade with me.  Unfortunately, I didn't really have any plants that she was wanting, but I did have access to some plants that are a little harder to find in Australia, apparently.  I bought a package of 10 Caladium bulbs of varying colors and she dug up 5 of her Ctenanthe plants, trimmed away the leaves, wrapped the roots and stems in newspaper and boxed them up.  The trade was ready.

setosa_package
Package from Australia
We both carefully packaged our goods and sent them in the mail.  The Australian package arrived at my house yesterday!

The Ctenanthe plants were sent as roots only with a leaf and a bloom included so that I could see the plant in person before mine grows.

setosa_leaf
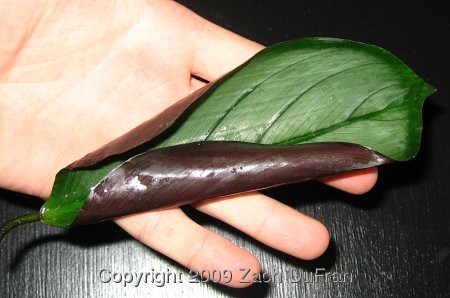
Ctenanthe setosa 'Grey Star' leaf.  The top of the leaf looks almost grey in person.
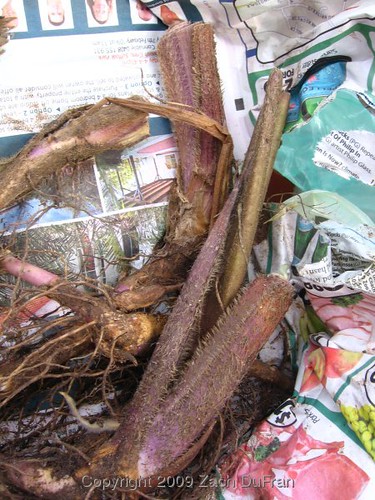
I looked up the species name "setosa" in my Gardener's Latin book and found that setosa means "bristly or hairy."  I first thought this must be a poor name choice for this plant.  Either that or the word "setosa" must have another meaning.  It turns out the stems of this plant are much furrier than they look in the Flickr picture I had seen.

setosa_roots
Ctenanthe setosa 'Grey Star' roots with furry stems
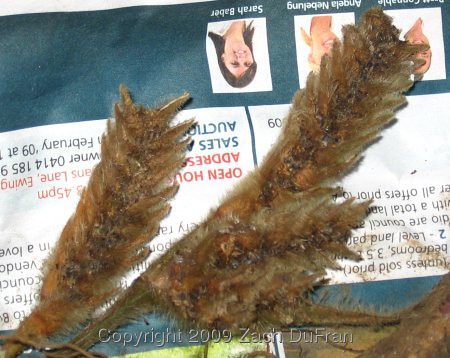
The form of the blooms looks similar to some bromeliad blooms I have seen.  I think other plants in the Marantaceae family have this type of bloom.

setosa_blooms
Ctenanthe setosa 'Grey Star' dried blooms
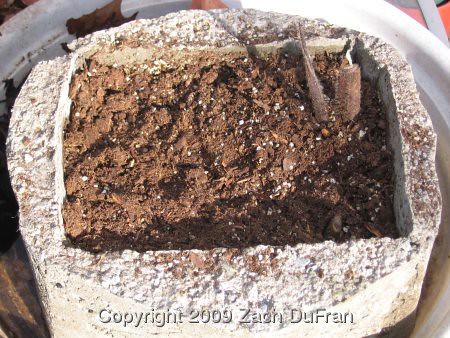
I potted three of the five rooted stems in a (unintentionally heavy) hypertufa pot that I made this winter in a mixture of peat moss, rich potting soil and vermiculite.

setosa_hypertufa
Three stems of Ctenanthe setosa 'Grey Star' potted in a hypertufa planter I made this winter
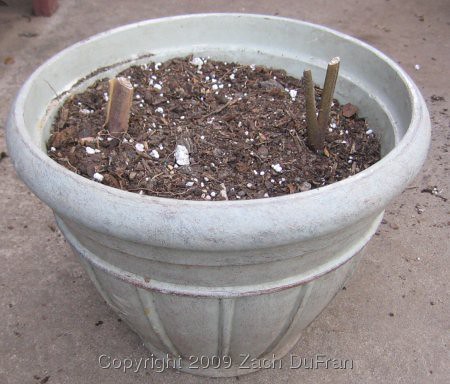
I potted the other two stems in a large round planter that was the former home of my Coconut palm tree.  I used a slightly sandier soil mixture in this pot with more potting soil than peat moss.

setosa_round
Two stems of Ctenenthe setosa 'Grey Star' potted separately
I can't wait to see my stems sprout and produce leaves like the ones in the Flickr picture.

Thanks a bunch Flickr friend! :)